

Does your clock tick away happily but still lose time, or has it fallen silent altogether? When a clock acts up, the trouble often hides inside the small box on the back, the part that drives every hand. The good news is that you can repair clock mechanism problems yourself, often in under an hour, without a workshop or special training.
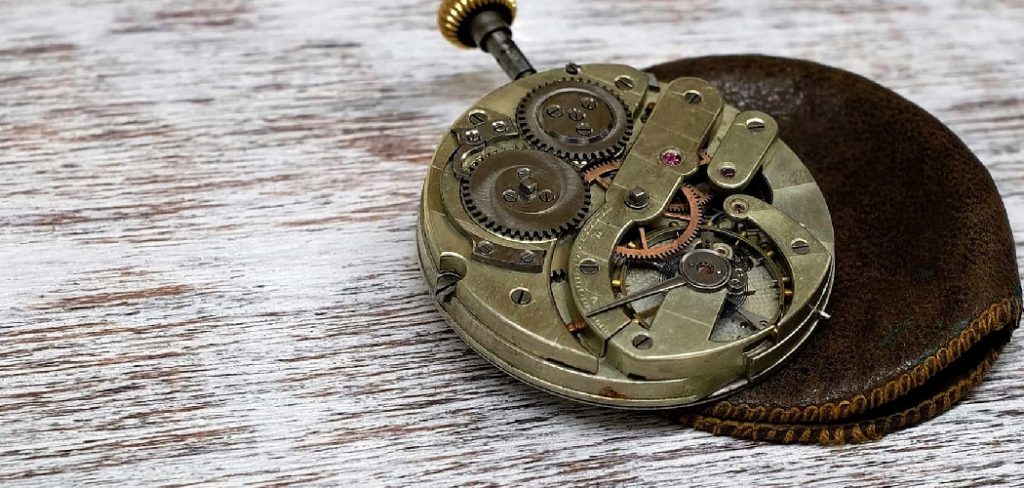
Maybe the gears are gummed up, the battery contacts are corroded, or the whole drive unit has simply worn out. Whatever the cause, you don’t need to toss the clock or pay a repair shop. With a few basic tools and a little patience, you can bring it back to life. This guide walks you through the entire process how to repair clock mechanism, step by step, so you can get your clock keeping accurate time again.
Why Learning Clock Mechanism Repair Matters
A clock that runs slow or stops cold is more than a small annoyance. It throws off your morning routine and makes a cared-for room feel a little neglected. Learning to fix the inner workings yourself saves real money, since repair shops often charge more than the clock cost in the first place.
For homeowners, it keeps treasured wall clocks and heirlooms ticking for decades. For renters, it’s a clean fix that needs no permanent changes. And for DIY beginners, it builds genuine confidence with small, fiddly parts.
Campers and outdoor lovers gain something too. The same patient skills, swapping batteries, cleaning contacts, and seating tiny components, carry straight over to fixing lanterns, weather stations, and battery-powered camp gear. Once you understand how a clock movement works, you’ll spot the same logic everywhere.
Tools and Materials You’ll Need
Gather everything before you start, because hunting for a tiny tool mid-repair is a fast way to lose a part. Here’s what to keep within reach:
- A small flathead and Phillips screwdriver – for opening the housing and loosening mounting hardware
- Tweezers – to handle small parts and seat the gear train without slipping
- Needle-nose pliers – for gripping tiny components and removing stubborn hands
- A fresh battery – for quartz movements, so you can test as you work
- Cotton swabs and isopropyl alcohol – to clean corroded contacts in the battery compartment
- A soft cloth – to protect the dial face while you work
- A replacement movement – matching shaft length and type, in case yours is beyond saving
- A small magnifying glass (optional) – handy for inspecting the gear train and reading tiny markings
Lay it all out on a clean, well-lit surface.
Step-by-Step Guide on How To Repair Clock Mechanism
Step 1 – Diagnose the problem first
Before you open anything, watch and listen closely for a minute. Does the clock tick steadily but lose time? Has the ticking sound stopped entirely? Each clue points somewhere different.
A clock that runs slow often has a weak battery or a sticky gear train. A clock that’s silent may have dead contacts or a worn drive unit. Tap the case gently and see if it stirs back to life, which hints at a loose connection.
Jot down what you notice. Knowing exactly how the clock fails tells you whether you’ll clean, adjust, or replace the inner workings. This quick diagnosis saves you from taking apart far more than you need to.

Step 2 – Remove the clock and open the housing
Lift the clock off the wall and set it face-down on your soft cloth. A flat, padded surface protects the dial face and keeps tiny parts from rolling away.
Find a calm, well-lit spot, like a kitchen table near a window. Good light makes a real difference when you’re squinting at small screws and the time-setting wheel.
Locate the plastic box on the back, then remove the hands and the small nut on the hand shaft from the front. Now unscrew the mounting hardware holding the movement in place. Lift the housing free and set every screw in a small dish. With the inner workings exposed, you’re ready to look closer.
Step 3 – Inspect the battery compartment and contacts
Start with the simplest culprit. Open the battery compartment and look closely at the metal contacts. A white or greenish crust means corrosion, and that thin layer alone can block enough power to stop the clock.
Dip a cotton swab in isopropyl alcohol and gently scrub each contact until the metal shines again. You’ll often see the grime lift away on the first pass. Let it dry fully before moving on.
Pop in a fresh battery and check the fit. The springs should press firmly, not loosely. Many “dead” clocks spring back to life right here, so don’t rush past this step. Clean contacts and solid pressure are half the battle won.
Step 4 – Open the movement and check the gear train
If a fresh battery didn’t help, open the movement itself. Most plastic housings snap apart along a seam or release with a few tiny screws. Work slowly so the gear train doesn’t spill out.
Inside, you’ll see a stack of small toothed wheels. Look for dust, hair, or a stray fiber wedged between teeth, which is a surprisingly common cause of a stalled clock. Even one strand can jam the whole works.
Use tweezers to lift out any debris. Spin the largest gear gently with a fingertip and feel for grit or resistance. A healthy gear train turns smoothly and quietly. Note anything that grinds or sticks, since that points to where the trouble lives.
Step 5 – Clean and lubricate the inner parts
With the gears exposed, give them a careful cleaning. Brush away loose dust with a dry cotton swab, then wipe the spindle and pivot points lightly with alcohol. Avoid soaking anything, since too much liquid seeps where it shouldn’t.
Let everything dry completely. Then add the tiniest drop of clock oil to each pivot point, never household oil, which thickens and gums up the works. A pinhead-sized amount is plenty.
Spin the gears again and feel the difference. They should glide with no scraping or hesitation. This careful cleaning is the heart of learning how to repair clock mechanism issues, because friction and grime cause most slow or stalled clocks. Clean, lightly oiled parts run smooth for years.
Step 6 – Reassemble the movement carefully
Now rebuild from the inside out. Set each gear back onto its post in the same order you removed it, matching the teeth so they mesh cleanly. Take your time, because one misaligned wheel keeps the whole train from turning.
Press the housing halves back together until they snap or screw firmly into place. Spin the hand shaft by hand and confirm the gears respond smoothly, with no catching.
Listen for a faint, even click as the parts settle. If anything feels stiff or jumps, open it back up and check the alignment before going further. A patient, methodical rebuild here saves you from frustrating do-overs later, and it sets you up for a clean, reliable test.
Step 7 – Reinstall and test the movement
Seat the movement back into the clock and tighten the mounting hardware just snug, never forced. Slide the hands onto the hand shaft and align them at twelve for a clean reference point.
Drop in a fresh battery and watch closely. The second hand should begin a smooth, steady sweep, and you’ll hear that satisfying ticking sound return. Let it run several minutes to be sure the quartz movement holds a steady pace.
Use the time-setting wheel on the back to set the correct time. Then hang the clock and check it again in an hour. When it keeps accurate time without slipping, you’ve successfully completed your repair. Enjoy the quiet pride of fixing it yourself.
Step 8 – Decide when to replace instead
Sometimes the kindest fix is a swap. If the gears are cracked, the coil is dead, or the clock still stalls after a thorough cleaning, a replacement movement costs only a few dollars and installs in minutes.
Measure the hand shaft length before buying, since shafts vary and a mismatch leaves the hands floating too far from the dial face. Match the type too, whether standard, high-torque, or pendulum.
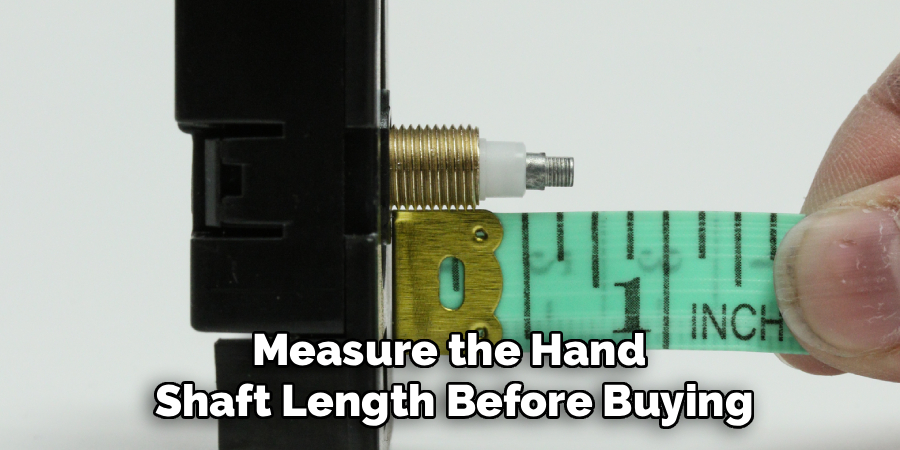
Remove the old drive unit, slide the new one into place, and reattach the hands and mounting hardware. You’ll feel relieved skipping hours of fiddly repair on a worn-out part. Knowing when to repair and when to replace is a skill all its own, and it saves both time and headaches.
Critical Mistakes When Repairing a Clock Mechanism
The most common mistake is using the wrong oil. Beginners reach for household lubricant or cooking spray, thinking any oil helps. In truth, thick oils gum up the delicate gear train within weeks and leave you worse off than before. Use proper clock oil, and only a pinhead-sized drop per pivot.
Another frequent error is forcing parts together during reassembly. The gears mesh by precise alignment, so pressing hard when something resists usually bends a tooth or cracks a post. If it won’t seat smoothly, stop and check the alignment instead of muscling it.
Many people also overlook the battery contacts entirely. They assume the whole movement is dead and order a replacement, when a sixty-second cleaning with alcohol would have fixed it. Always rule out corrosion and a weak battery first.
Skipping the debris check is another slip. A single hair or fiber trapped between gears can stall a perfectly healthy clock, and tearing into a full rebuild misses that simple cause. Inspect the gear train carefully before deeper work.
Finally, folks often buy the wrong replacement movement. Guessing the shaft length leaves hands that won’t reach the dial. Measure before you order every time.
Expert Tips
Always start with the cheapest, simplest fix first. Clean the battery contacts and try a fresh battery before you ever open the movement. You’ll solve a surprising number of problems in two minutes flat.
Keep a small dish nearby for screws and tiny parts. These pieces love to roll off the table and vanish into carpet, and they’re maddening to replace.
Snap a clear photo before you disassemble the gear train. If you lose track of the order, that picture becomes your perfect cheat sheet for rebuilding.
When in doubt about a worn movement, weigh repair time against a cheap replacement. A new drive unit often costs less than your afternoon.
Finally, work in bright, natural light. Tiny gears and faint corrosion hide easily under dim bulbs, and good lighting reveals problems you’d otherwise miss.
Frequently Asked Questions
Why does my clock tick but lose time?
A clock that ticks yet runs slow usually has one of a few simple causes:
- A weak or fading battery that can’t drive the gears fully
- A sticky gear train slowed by dust or dried oil
- A worn coil inside the movement
Start by swapping in a fresh battery. If it still lags, clean and lightly lubricate the gears. If the problem returns, the movement is likely worn and worth replacing.
Can I fix a clock mechanism without replacing it?
Often, yes. Many clocks stop because of corroded contacts, a dead battery, or a fiber jammed in the gears, all easy fixes. Clean the contacts with alcohol, clear any debris with tweezers, and add a tiny drop of clock oil to the pivots. If the gears are cracked or the coil is dead, though, a replacement movement is the smarter, cheaper choice.
How do I know if the problem is the movement or the hands?
Listen and watch closely. If the clock ticks steadily but the hands don’t move, the hands may be stuck or rubbing. If the ticking stops entirely or sounds irregular, the movement itself is likely at fault. Try removing the hands and spinning the bare hand shaft. If it turns freely on its own, focus on the hands rather than the inner workings.
What kind of oil should I use on clock gears?
Use only proper clock oil, sold cheaply at hobby and repair shops. It’s thin enough to flow into tiny pivots without gumming up. Never use cooking oil, household lubricant, or penetrating spray, since these thicken over time and clog the gear train. Apply just a pinhead-sized drop to each pivot point. Too much oil attracts dust and causes more problems than it solves.
How long should a clock movement last?
A quality quartz movement typically lasts ten to fifteen years with regular battery changes. Cheaper units may wear out sooner, especially in humid rooms where corrosion creeps in faster. You can stretch its life by cleaning the contacts yearly and using fresh batteries promptly. When the gears finally wear or the coil fails, a replacement movement costs only a few dollars and installs in minutes.
Conclusion
Bringing a tired clock back to life is more about patience than skill. Start by diagnosing how it fails, then open the housing, check the battery contacts, and inspect the gear train for debris. Clean the parts gently, add the tiniest drop of clock oil, and rebuild carefully so every gear meshes cleanly. Test with a fresh battery before you set the time, and don’t hesitate to swap in a cheap replacement movement when the old one is truly worn.
The real secret to a lasting fix is starting simple and handling each part with care. Clean contacts, the right oil, and proper alignment keep your clock running smoothly for years.
You don’t need a repair shop or fancy gear to repair clock mechanism troubles and get accurate time back on your wall. With a steady hand and an hour to spare, you can do it yourself and feel genuinely proud. Next time a clock slows or falls silent, grab your tools, find good light, and fix it with confidence.