

You walk downstairs and notice a damp patch near the floor, a faint musty odor, or a small puddle that wasn’t there yesterday. A leaky basement feels alarming, but plenty of minor leaks come from simple causes you can fix yourself.
Most water seepage starts with a hairline crack in the foundation wall, a clogged gutter, or a downspout dumping rain right against your house. The good news? These problems often respond well to a careful DIY approach.
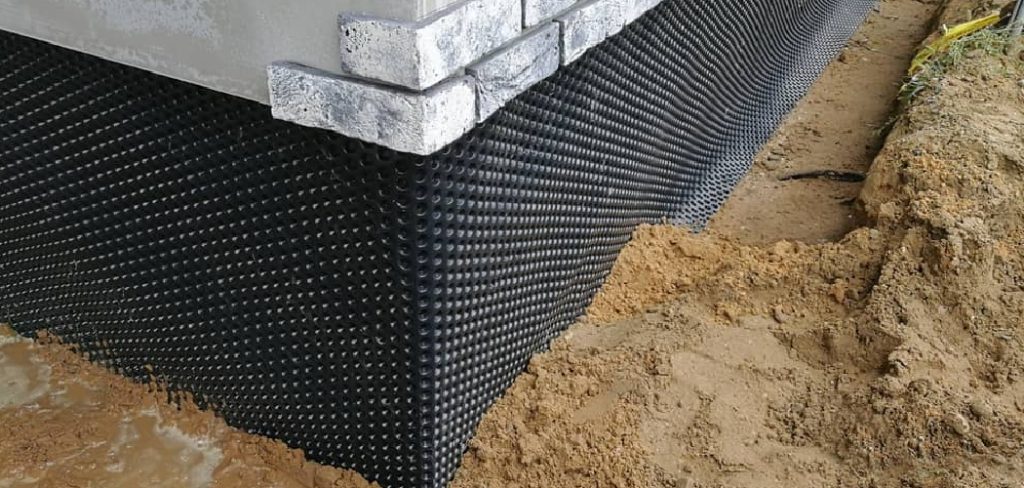
Learning how to repair basement leak issues early gives you a real, money-saving skill—as long as you know which jobs are safe to tackle and which ones need a pro.
This guide walks you through tracing the water source, sealing minor cracks, and keeping your basement dry without hiring a contractor.
Why Fixing a Basement Leak Matters
A small trickle of water rarely stays small. Left alone, moisture invites mold, ruins stored belongings, and slowly damages your foundation—repairs that climb into the thousands fast.
Catching a leak early protects your home and your wallet. You’ll also learn to read warning signs like efflorescence, a damp smell, or puddling before they turn into a flooded basement.
These skills carry over for campers and outdoor beginners too. If you store tents, sleeping bags, coolers, and gear in your basement, keeping that space dry protects your equipment from mildew and rot.
More than that, understanding how water moves and where it sneaks in builds real confidence. When you can spot a drainage issue and handle water intrusion calmly, you’ll feel more capable everywhere—from your basement to a soggy campsite far from home.
Tools and Materials You’ll Need
Gather everything before you start so you’re not running to the store mid-job with water seeping in.
- Hydraulic cement for sealing active cracks and the wall-floor joint
- Masonry sealant or waterproofing paint rated for below-grade walls
- A wire brush and putty knife to clean and pack cracks
- A cold chisel and hammer to widen cracks for better adhesion
- A bucket and stiff scrub brush for cleaning the surface
- A shop vacuum to remove standing water
- A dehumidifier or fan to dry the area thoroughly
- Safety goggles, a dust mask, and work gloves for protection
- A flashlight to inspect dark corners and trace the leak
- A downspout extension to redirect exterior runoff
Optional but handy: a moisture meter. It helps you confirm whether a wall is truly drying out or still holding hidden water behind the surface.
Step-by-Step Guide on How to Repair Basement Leak
Work through these steps in order, and take your time. Knowing how to repair basement leak problems safely starts with finding where the water actually comes from.
Step 1 – Trace the Water Source
Before you seal anything, you need to know where the water enters. Patching the wrong spot wastes time and lets the real leak keep flowing.
Grab your flashlight and inspect the walls and floor closely, especially after a rainstorm. Look for damp streaks, water stains, or a chalky white residue called efflorescence that marks where moisture pushes through.
Run your hand along the foundation wall and feel for cool, damp patches. Check the wall-floor joint, around windows, and near pipe entries.
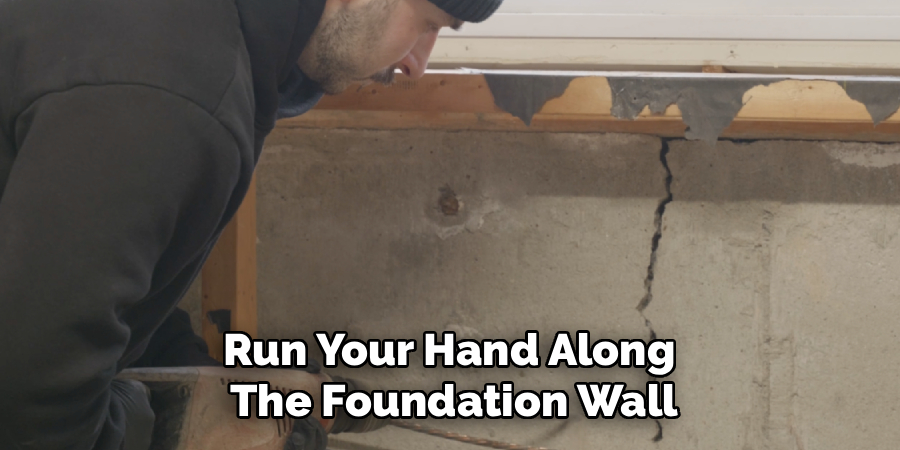
Notice whether the water appears only when it rains or stays constant. Rain-driven leaks usually point to a drainage issue outside, while steady seepage may signal groundwater pressure. Mark each leak point with chalk.
Step 2 – Clear Gutters and Downspouts
Most basement leaks start outside, not in. Overflowing gutters dump water straight against your foundation, and that water has to go somewhere.
Climb up safely and scoop out leaves, twigs, and gunk from the gutters. You’ll likely smell wet, rotting debris—that’s the clog that’s been redirecting rain toward your walls.
Flush the gutters with a hose and watch the water flow. It should run freely toward the downspouts without spilling over the edges.
Then check where each downspout ends. If it dumps rain right beside the house, add a downspout extension to carry runoff at least four to six feet away. This one fix solves a surprising number of leaks before you ever touch the inside.
Step 3 – Check Grading and Exterior Runoff
Now look at the ground around your home. The soil should slope away from the foundation, not toward it.
Walk the perimeter and study how the land sits. If you spot low spots where puddling collects against the wall, water is pooling exactly where you don’t want it.
Add soil to build up these dips, sloping the grade gently downhill for the first several feet. Tamp it firm as you go. You’ll feel the ground settle under your boots into a steadier surface.
Clear away any mulch or planting beds that trap moisture against the wall. Redirecting exterior runoff before it reaches the foundation eases pressure on your basement and makes every interior repair last far longer.
Step 4 – Dry and Clean the Area
A sealant only sticks to a clean, dry surface. Skipping this step is the top reason DIY patches peel away within weeks.
Use your shop vacuum to suck up any standing water first. Then scrub the cracked area with a wire brush to strip away loose debris, flaking paint, and that powdery efflorescence.
Wipe the surface down and let it air out. Set up a fan or dehumidifier and give it time—damp masonry can take a day or two to dry fully.
You’ll know it’s ready when the wall feels dry to the touch and the damp smell fades. Run your hand over it one last time to confirm a clean, grit-free surface for the patch ahead.
Step 5 – Widen and Prep the Crack
This step feels backward, but it works. To seal a hairline crack properly, you actually need to open it up a little.
Use your cold chisel and hammer to cut along the crack, creating a small inverted V-groove that’s wider underneath than at the surface. This shape locks the cement in place so it can’t push back out.
Brush out all the loose chips and dust as you go. You’ll hear the chisel bite into the masonry with a sharp tap-tap rhythm.
Wipe the groove clean and dampen it lightly with water—hydraulic cement bonds best to a slightly moist surface. A well-prepped crack makes the difference between a seal that holds and one that fails.
Step 6 – Apply Hydraulic Cement
Here’s where the actual fix happens. Hydraulic cement expands as it cures, making it perfect for sealing active leaks and the wall-floor joint.
Mix only a small batch in your bucket, following the package directions. It sets fast—usually within minutes—so work quickly. You’ll feel it grow slightly warm as it activates.
Press the cement firmly into the groove with your putty knife, packing it deep so no air gaps remain. Hold pressure for a moment if water is actively seeping; the cement will grab and stop the flow.
Smooth the surface flush with the wall. Work in sections if you have several cracks, mixing fresh batches as you go so nothing hardens in the bucket.
Step 7 – Seal the Wall with Masonry Waterproofing
Once your cracks are patched and cured, add a protective coat across the whole wall. This builds a moisture barrier against future seepage.
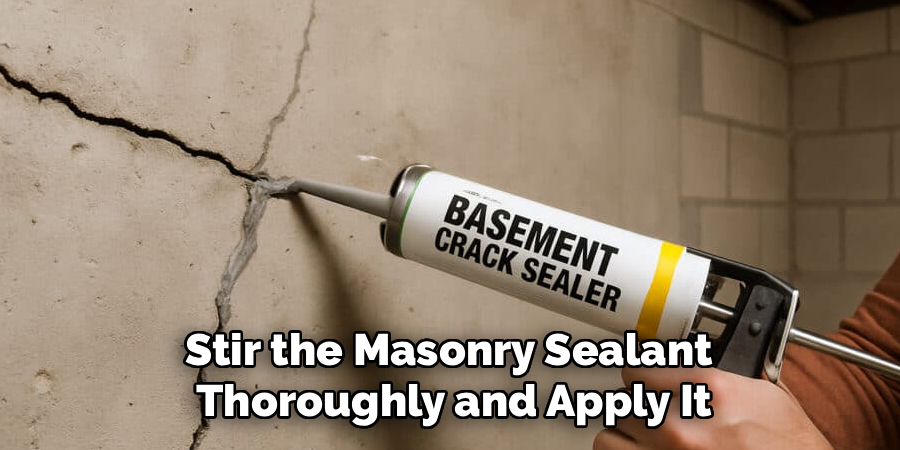
Stir the masonry sealant thoroughly and apply it with a stiff brush, working it into the pores of the foundation wall rather than just gliding over the surface. You’ll see the masonry darken as it soaks in.
Cover the area evenly and reach into corners and along the wall-floor joint. Most products need two coats, so let the first dry fully before adding the second.
Remember that sealant alone won’t stop active intrusion from a drainage issue or structural crack—it works as a finishing layer after you’ve handled the real source of water.
Step 8 – Dry, Monitor, and Test
The final step takes patience, but it confirms your work held. Let everything cure completely per the product instructions before testing.
Keep your fan or dehumidifier running to pull lingering moisture from the air. The room should start to smell fresh instead of musty.
After the next good rainstorm, head down with your flashlight and inspect every spot you sealed. Press your hand against the patches and feel for any returning dampness.
Check back over the following week, since some leaks reappear slowly. If the walls stay dry and the air feels comfortable, your repair worked.
If water returns despite your efforts, the problem likely runs deeper and calls for a professional waterproofing contractor to evaluate it.
Critical Mistakes When Repairing a Basement Leak
The biggest mistake is treating the symptom instead of the source. Slapping sealant over a wet wall while a clogged gutter keeps dumping rain against the foundation guarantees the leak comes right back. Always trace the water and fix exterior drainage first.
Another common error is relying on waterproofing paint alone to stop active intrusion. Paint can dress up a dry wall, but it won’t hold back water pushing through under pressure. You need hydraulic cement in the cracks and proper drainage outside before any coating goes on.
Many beginners also rush the drying step. They patch over damp masonry, and the cement never bonds, so the seal fails within days. Give the area real time to dry, and use a fan or dehumidifier to help.
People often ignore grading too. If soil slopes toward the house, every storm sends water straight at your walls no matter how well you seal inside.
Finally, know your limits. Bowing walls, repeated flooding, major structural cracks, or spreading mold are not DIY jobs. These signal serious problems that demand a foundation specialist or waterproofing contractor right away.
Expert Tips
Always tackle outside water before inside repairs. Clean gutters, longer downspout extensions, and better grading solve more leaks than any sealant ever will.
Keep a simple log of when and where water shows up. Noting whether leaks follow heavy rain or appear steadily helps you pinpoint whether you’re dealing with surface runoff or deeper groundwater pressure.
Mix hydraulic cement in small batches only. It sets in minutes, so a big bucket just hardens into waste before you can use it.
Run a dehumidifier in damp seasons to keep humidity down and discourage mold from taking hold in corners and on stored gear.
And trust your gut about scale. If you see a crack wider than a quarter inch, a wall that bulges inward, or mold creeping across surfaces, stop and call a professional. Some problems are simply bigger than a weekend fix.
Frequently Asked Questions
Can I fix a basement leak myself?
Yes, for small to moderate leaks. Minor hairline cracks, clogged gutters, and poor grading are all within reach for a careful DIYer. Success comes down to fixing the water source first, then sealing properly. Trace the leak, improve outside drainage, and patch cracks with hydraulic cement. For bowing walls, repeated flooding, or structural cracks, though, call a professional waterproofing contractor.
What’s the best product to seal a basement crack?
Hydraulic cement is the go-to for active leaks because it expands as it cures and bonds to damp masonry. For broader protection, a masonry waterproofing sealant adds a moisture barrier across the wall. Use them together for best results:
- Hydraulic cement to fill and seal cracks
- Masonry sealant as a finishing coat afterward
Just remember neither replaces fixing the drainage source outside.
Why does my basement leak only when it rains?
Rain-driven leaks almost always point to an exterior drainage issue. Overflowing gutters, short downspouts, or soil that slopes toward the house send water straight at your foundation. As pressure builds, water finds its way through cracks and the wall-floor joint. Start by clearing gutters, adding a downspout extension, and improving the grade. These outside fixes often stop the leak before any interior repair.
How do I know if my basement leak is serious?
Watch for warning signs that go beyond a simple crack. Bowing or bulging walls, cracks wider than a quarter inch, repeated flooding, or spreading mold all signal trouble that DIY methods can’t safely handle. A musty smell that never fades despite drying also hints at hidden moisture. If you notice any of these, stop and bring in a foundation specialist for a proper inspection.
Will waterproofing paint stop my leak?
Not on its own. Waterproofing paint works as a finishing layer on a dry, already-sealed wall, but it can’t hold back water pushing through under pressure. If you paint over an active leak, the coating bubbles and peels within weeks. First fix the drainage outside, seal cracks with hydraulic cement, and dry the area fully. Only then does a waterproofing coat add real value.
Conclusion
A leaky basement doesn’t have to mean panic or a giant repair bill. Once you understand how to repair basement leak problems step by step, you can handle the small stuff with confidence and keep your space dry and usable.
The routine is simple: trace the water source, clear your gutters, fix the grading outside, dry the area completely, seal cracks with hydraulic cement, and add a masonry waterproofing coat. Then watch it through the next few rainstorms to make sure the fix holds. Patience during the drying and curing stages makes all the difference between a repair that lasts and one that fails.
Just as important, you’ve learned where to stop. Bowing walls, repeated flooding, major structural cracks, and spreading mold all call for a professional waterproofing contractor—no shame in that.
So grab your gloves, lay out your tools, and take it one careful step at a time. When the rain falls and your basement stays bone dry, you’ll feel the real satisfaction of fixing it yourself and knowing exactly when to call for backup.