

Few things deflate a summer faster than spotting your pool’s water level creeping down day after day. You top it off, only to watch it drop again, and that sinking feeling sets in. A torn or punctured liner is the usual suspect, and the slow leak quietly drives up your water bill while shrinking your swim season.
Here’s the good news: you don’t need to call a pro or drain the whole pool. Learning how to repair a pool liner is a beginner-friendly project you can knock out in an afternoon with a few inexpensive supplies.
Whether you own an above-ground pool or an inground setup, small tears and punctures are completely fixable at home. This guide walks you through every step, from finding the leak to sealing it for good.
Why Repairing a Pool Liner Matters
If you love the outdoors, your backyard pool is the heart of summer. But a leaking liner can cut your fun short fast, and ignoring it only makes things worse. A tiny puncture today can stretch into a gaping tear tomorrow.
Catching and fixing leaks early protects more than your swim season. Water loss saturates the ground beneath your pool, which can shift the base, erode footing, and lead to costly structural damage over time.
Learning this skill keeps you self-reliant. Instead of waiting days for a technician or shelling out for a pricey service call, you handle it yourself for a few dollars. That confidence carries over to other outdoor projects too, helping new homeowners and weekend DIYers tackle repairs without stress. It’s a small fix with a big payoff for your wallet and your summer.
Tools and Materials You’ll Need
Before you dive in, round up your supplies so you’re not scrambling mid-repair with wet hands. Most of these items cost very little and store easily for next time.
- A vinyl patch kit matched to your liner color
- Underwater adhesive or wet-patch glue rated for pool use
- Leak detection dye or a bottle of food coloring
- Sharp scissors to trim patches to size
- Rubbing alcohol and a clean cloth for prepping the surface
- A soft brush or sponge to scrub away algae and grime
- A measuring tape to size your patch properly
- A rolling pin or smooth object to press out air bubbles
- Goggles if you’re patching underwater
Optional but handy: a pair of waterproof gloves keeps your hands dry and gives you a steadier grip while you work the adhesive.
Step-by-Step Guide on How to Repair a Pool Liner
Follow these steps in order, and resist the urge to rush the leak-finding stage. Pinpointing the exact damage first saves you from patching the wrong spot.
Step 1 – Find the Leak
Start by watching your water level over 24 hours. Mark the waterline with tape, then check the next day to confirm you’re actually losing water rather than dealing with normal evaporation.
Once you know there’s a leak, grab your leak detection dye or food coloring. Turn off the pump so the water sits still, then slowly squeeze a few drops near suspicious spots like seams, wrinkles, or worn areas.
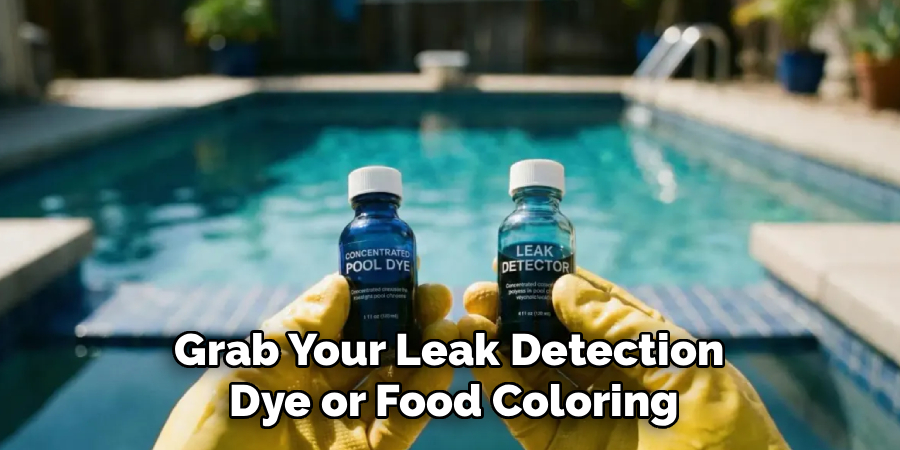
Watch closely. The colored stream will drift and get sucked toward the tear or puncture, pointing you straight to the problem. It’s oddly satisfying to see that little ribbon of dye reveal the culprit. Mark the spot with a piece of waterproof tape so you don’t lose it.
Step 2 – Inspect the Damage
Now get a close look at what you’re dealing with. Run your fingertips gently over the marked area underwater and feel for the edges of the tear. Is it a clean pinhole puncture, a jagged rip, or a separating seam?
Size matters here. Small punctures under an inch are quick fixes, while longer tears need a bigger patch with rounded corners to hold. Check the surrounding vinyl too—if it feels brittle or thin, your patch will need extra overlap to grip healthy material.
Take a quick photo with your phone for reference. Knowing the exact shape and size helps you cut a patch that covers the damage with at least two inches of margin all the way around.
Step 3 – Clean the Surface
A patch only sticks to a clean surface, so don’t skip this. Algae, oils, and grime act like a barrier that keeps adhesive from bonding properly.
If the damage sits above the waterline, drain or lower the water just past the spot and let it air-dry. Then wipe the area with rubbing alcohol on a clean cloth until it squeaks.
For underwater repairs, use a soft brush or sponge to scrub away any slimy buildup around the tear. You’ll feel the vinyl turn smooth and grippy once it’s clean. Brush in gentle circles and rinse the debris away. A spotless surface is the single biggest factor in making your repair last for seasons instead of days.
Step 4 – Cut Your Patch
Time to size your patch. Knowing how to repair a pool liner the right way means cutting a patch larger than the damage, never just to its edges.
Lay your vinyl patch flat and measure the tear, then add two inches on every side. Trace a rounded shape with a marker—circles and ovals work best because sharp corners peel up over time.
Cut slowly with sharp scissors for clean edges. Ragged cuts catch on water flow and lift away. Hold the finished patch over the damage to double-check the coverage before you commit. It should blanket the puncture or tear completely with healthy vinyl to grab onto all around. A well-cut patch is half the battle won.
Step 5 – Apply the Adhesive
Here’s where your fix takes shape. Squeeze a generous, even layer of underwater adhesive across the back of your patch, working it right to the edges so nothing lifts later.
Move quickly but carefully. Wet-patch glue starts curing fast, especially underwater, so have your patch ready before you open the tube. The adhesive feels tacky and thick, almost like rubber cement.
Spread it with the applicator or a gloved fingertip until the whole back is coated. Avoid clumps in the center that could trap air later. If you’re patching a dry area above the waterline, a thin coat on both the patch and the liner gives an even stronger bond. Don’t let the glue skin over before you press it down.
Step 6 – Press and Seal the Patch
Now place the patch directly over the marked tear, centering it so you’ve got even coverage on all sides. Press firmly from the middle outward.
This outward motion is key—it pushes trapped air and water toward the edges instead of locking air bubbles underneath. Use a rolling pin or any smooth, flat object to work the surface in steady strokes. You’ll feel the patch flatten and grip as the adhesive grabs hold.
Run your thumb along every edge and press hard to seal the border completely. Lifted edges are where leaks sneak back in. Hold steady pressure for a full minute. The patch should lie flat and smooth, with no ripples, bumps, or pockets bulging up anywhere along its surface.
Step 7 – Let It Cure
Patience pays off here. Walk away and resist the urge to poke or test the patch too soon. Most underwater adhesives need at least 24 to 48 hours to fully cure and reach maximum strength.
Check the product label, since cure times vary by brand. If you patched a dry section, keep the water level below it for the recommended time so the bond sets undisturbed.
During this window, avoid heavy splashing or running the pump on high near the repair. The adhesive is still hardening beneath the surface, even if the patch looks set. Treat it gently, give it the full window, and you’ll reward yourself with a seal that holds firm for the rest of the season.
Step 8 – Test the Repair
Once the patch has cured, it’s time for the moment of truth. Refill the pool to its normal level if you lowered it, then mark the waterline with a fresh strip of tape.
Wait another 24 hours and check the mark. A solid repair holds steady with no measurable water loss beyond normal evaporation.
For extra peace of mind, squeeze a little leak detection dye near the patch again. If the colored stream drifts away without getting pulled toward the liner, your seal is watertight. Run your fingers over the edges one last time to confirm everything lies flat. If it all checks out, congratulations—you’ve sealed the leak and saved yourself a service call.
Critical Mistakes When Repairing a Pool Liner
Even an easy repair can flop if you cut corners. The most common mistake is patching a dirty or slimy surface. Algae and oils block the adhesive from bonding, so the patch peels within days. Always scrub and wipe the area until the vinyl feels squeaky clean before you apply anything.
Another frequent error is cutting the patch too small or with sharp corners. A patch that barely covers the tear has nothing to grip, and square edges lift over time as water flows past. Round your corners and add at least two inches of margin on every side.
Many beginners also rush the cure time. The patch looks set after an hour, so they crank the pump and start swimming, breaking the bond before it hardens. Give it the full 24 to 48 hours.
Trapping air bubbles under the patch is another trap. Pressing from the edges inward seals air inside, creating weak spots. Always press from the center outward. Finally, don’t ignore brittle, aging vinyl around the tear—if the whole liner is failing, a single patch won’t save it.
Expert Tips
Want your fix to last for years instead of weeks? Keep a vinyl patch kit and a tube of underwater adhesive stashed in your pool shed. When a puncture pops up, you patch it the same day before it grows into a real tear.
Match your patch material to your liner type. Above-ground and inground pools sometimes use different vinyl weights, so check before you buy. A mismatched patch can look obvious and bond poorly.
Skim and clean your pool regularly. Sharp debris, toys, and even pet claws cause most punctures, and a clean pool means fewer surprises. Round patches always outlast square ones, so cut curves whenever you can. And if you spot several leaks at once, it’s a sign your liner is near the end—plan ahead for a full replacement rather than chasing endless patches.
Frequently Asked Questions
Can I repair a pool liner without draining the pool?
Yes, in most cases you can. Underwater adhesive and wet-patch vinyl kits are designed to bond beneath the water, so small tears and punctures don’t require draining. Just turn off the pump, clean the spot, and apply your patch carefully. Draining is only necessary for very large tears, damage near the floor, or repairs that need a completely dry surface.
How long will an underwater patch actually last?
A properly applied patch can last several years, often the full remaining life of the liner. Longevity depends on a few things:
- Surface prep: a clean, oil-free area bonds best
- Patch size: larger patches with rounded corners hold longer
- Cure time: allowing the full 24 to 48 hours is critical
Skip any of these, and the patch may peel within weeks instead.
What’s the difference between fixing an above-ground and inground pool liner?
The repair process is nearly identical—find the leak, clean, patch, and cure. The main differences are access and water pressure. Inground liners face more water weight pushing on the patch, so edge sealing matters even more. Above-ground pools are often easier to lower partially for dry repairs. Either way, the same vinyl patch kit and adhesive work for both.
How do I find a leak I can’t see?
Start by ruling out evaporation with the bucket or tape test over 24 hours. Once you confirm real water loss, turn off the pump and use leak detection dye or food coloring. Squeeze drops slowly near seams, wrinkles, and worn spots. The colored stream gets pulled toward the tear, revealing hidden punctures you’d never spot by eye alone.
When should I replace the liner instead of patching it?
Patching works great for isolated tears and punctures. But if you’re finding multiple leaks, the vinyl feels brittle or faded, or seams are separating in several places, it’s time to replace. A liner near the end of its life will keep failing no matter how many patches you apply. Most liners last 7 to 12 years before replacement.
Conclusion
A leaking pool doesn’t have to wreck your summer or your budget. Now you know how to repair a pool liner from start to finish—find the leak with dye, inspect the damage, clean the surface, cut a generous rounded patch, apply your adhesive, press out the air bubbles, and let it cure before testing. None of it takes special skills, just a little patience and the right supplies.
The payoff is real. You stop the water loss, protect the ground around your pool, and skip the cost of a service call or a full replacement. That means more swim days and fewer headaches all season long.
So grab your patch kit and tackle that leak with confidence. Once you’ve sealed your first puncture, you’ll see just how simple these repairs really are. Keep a few supplies on hand, clean your pool regularly, and stay ahead of small tears before they spread. Which spot will you patch first?