

A gutter that drips, sags, or overflows can quickly turn a rainy afternoon into a headache. The good news? You don’t need to call a pro for most fixes. Learning how to repair rain gutter problems yourself saves money, protects your home, and gives you a real sense of accomplishment. Whether you spotted a small leak, a loose section, or water spilling over the edge, most issues come down to a few common causes you can handle with basic tools.
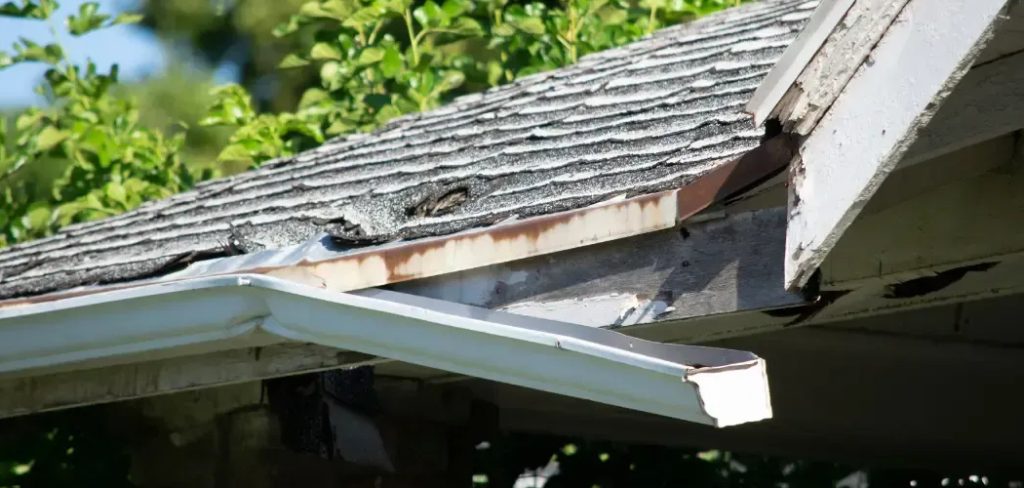
This guide walks you through everything step by step, from spotting the problem to sealing it up tight. By the end, you’ll feel confident tackling your gutters with simple methods that actually last.
Why Repairing a Rain Gutter Matters
Your gutters do more than catch rain. They guide water away from your roof, walls, and foundation, keeping your home dry and stable. When a gutter fails, water pools in the wrong places and slowly causes real harm.
Ignored leaks lead to rotted fascia boards, stained siding, and even cracked foundations. Those repairs cost far more than a tube of sealant ever will. For homeowners and renters alike, catching these problems early keeps small annoyances from becoming expensive disasters.
Learning this skill also builds your confidence around the house. Once you understand how gutters work, you’ll spot trouble faster and fix it before the next big storm. A little maintenance now means fewer surprises and better drainage for years to come.
Tools and Materials You’ll Need
Before you climb the ladder, gather your supplies so you’re not running back and forth. Most of these items are inexpensive and available at any hardware store. Having everything ready makes the whole job smoother and safer.
- Sturdy extension ladder
- Work gloves and safety glasses
- Gutter sealant or silicone caulk
- Putty knife or scraper
- Stiff brush and bucket
- Garden hose with spray nozzle
- Replacement gutter hangers or screws
- Drill with appropriate bits
- Sheet metal patch (for larger holes)
- Tin snips
- Rags and a cleaning solvent
- A gutter scoop or trowel (optional, but it makes cleanout much faster)
Step-by-Step Guide on How to Repair Rain Gutter
Step 1 – Inspect the Gutters Thoroughly
Start by walking the length of your gutters on a dry day. Set up your ladder on firm, level ground and climb up slowly. Look for obvious signs of trouble: rust spots, peeling paint, gaps at the joint seam, and any sagging gutter sections pulling away from the roof edge.
Run your fingers along the inside and feel for soft, corroded metal. Notice where water stains streak down the fascia, since those marks point straight to a leak. Check the downspout connections too, where many problems hide.
Take a notebook or your phone and jot down each issue. A clear map of the damage helps you work efficiently instead of guessing once you’re back on the ladder.

Step 2 – Clean Out Debris and Clogs
A clean gutter is the foundation of every good repair. Scoop out leaves, twigs, and that gritty black sludge that builds up over time. The smell can be earthy and damp, so wear gloves and keep a bucket handy.
Work from the downspout outward, loosening packed clogs with your trowel or scoop. Once the bulk is gone, grab the stiff brush and sweep the channel clean.
Then flush the whole run with your garden hose. Watch how the water flows. If it backs up or trickles slowly, you’ve found a blockage in the downspout that needs clearing. Proper drainage starts here, so don’t rush this part.
Step 3 – Locate and Mark Every Leak
With the gutters clean, run water through them again and watch closely. Drips will reveal themselves at seams, corners, and small holes. Mark each spot with a grease pencil or piece of tape so you can find it once everything dries.
A gutter leak often hides at the joint seam where two sections meet. Look there first. Pinholes from rust may be tiny but still let water escape during heavy rain.
Pay attention to the sound, too. A steady drip you can hear usually means a gap large enough to feel. Dry the marked areas completely with a rag, because sealant won’t bond to wet or dirty metal.
Step 4 – Seal Small Holes and Joint Gaps
Now comes the satisfying part. Scrape away any old, cracked sealant with your putty knife until you reach clean metal. Wipe the area with solvent so the surface is grease-free and ready.
Apply a generous bead of gutter sealant along the joint seam or over the pinhole. Smooth it with your finger or the putty knife, pressing firmly so it fills every gap. The sealant should feel tacky and spread evenly without thin spots.
For best results, apply it on the inside of the gutter where water sits. This is the heart of how to repair rain gutter leaks that nag you every storm. Let it cure fully before testing.
Step 5 – Patch Larger Holes
Some holes are too big for sealant alone. For these, cut a sheet metal patch with your tin snips, making it about an inch larger than the hole on all sides. Round the corners so they won’t snag.
Spread a layer of sealant around the damaged area, then press the patch firmly into place. Add another bead of sealant around the edges to lock out water completely.
The metal should sit flush and smooth, with no raised lips to catch debris later. Run your hand over it to check. A solid patch like this can outlast the rest of the gutter, so take your time and seal the seams generously.
Step 6 – Fix Sagging Sections and Loose Hangers
A sagging gutter usually means a failed gutter hanger or a screw that worked loose over time. Push the section gently back to its proper slope, aiming for a slight tilt toward the downspout for good drainage.
Replace any broken hangers with new ones spaced about every two feet. Drive fresh screws into solid wood behind the fascia, not into rotted spots that won’t hold.
As you tighten everything, the gutter should feel firm and stop bouncing when you press it. Step back and eye the line from below. A straight, properly pitched gutter sheds water fast and keeps standing puddles from forming inside.
Step 7 – Reattach or Repair the Downspout
The downspout carries water safely to the ground, so it deserves attention too. Check that each section connects tightly and that brackets hold it snug against the wall.
If a joint has come apart, slide the pieces back together and secure them with sheet metal screws. Seal any leaking connections with caulk, smoothing the bead for a clean finish.
Make sure the bottom extension points water at least a few feet away from your foundation. This simple step prevents water damage where it matters most. Give the downspout a firm shake; it should stay put without rattling or shifting.
Step 8 – Test Your Repairs
Once everything has cured, it’s time for the final check. Grab your hose and send water through the entire system at full flow. Watch every spot you fixed.
Look for fresh drips at the seams, holes, and downspout connections. Listen for trickling where it shouldn’t be. The water should rush smoothly toward the downspout and exit far from your home.
If you spot a stubborn leak, dry the area and add another thin layer of sealant. Knowing how to repair rain gutter issues means testing your work instead of hoping for the best. A clean, leak-free run gives you that quiet confidence the next time clouds roll in.

Critical Mistakes When Repairing a Rain Gutter
Even handy folks slip up on gutter repairs, so learn from these common errors before you start.
The biggest mistake is applying sealant to a wet or dirty surface. Sealant simply won’t bond to grime or moisture, and your fix will peel away within weeks. Always clean and dry the metal first, no matter how eager you are to finish.
Another frequent error is ignoring the gutter’s slope. People reattach a sagging gutter dead level, which lets water pool and breeds rust. Your gutter needs a gentle tilt toward the downspout so everything drains properly.
Many beginners also patch the visible damage but skip the downspout and fascia behind it. A leak that soaks into the wood causes rot and water damage long after you’ve sealed the metal. Check the structure, not just the channel.
Rushing the cure time ruins good work, too. Sealant needs hours to set, and testing too soon disturbs the bond. Finally, skimping on hangers leaves the whole run weak. Space them properly and anchor into solid wood so your repair holds through every storm.
Expert Tips
Want your repairs to last even longer? A few small habits make a big difference.
Always work on a dry, mild day. Sealant cures best in moderate temperatures, and a slippery ladder in the rain is dangerous. Keep your footing solid and never overreach; move the ladder instead.
Clean your gutters at least twice a year, in spring and fall. Removing clogs early prevents the heavy buildup that strains hangers and creates new leaks. Consider adding mesh guards to cut down on debris.
When buying sealant, choose a product rated for outdoor metal and wide temperature swings. The cheaper stuff cracks fast. Finally, keep an eye on the fascia and roof edge during inspections, since catching wood rot early saves you from a much bigger project down the road.
Frequently Asked Questions
How often should I inspect my gutters?
Check your gutters at least twice a year, ideally in spring and fall. Inspect them more often if you have many trees nearby that drop leaves and seeds. After major storms, take a quick look too, since heavy wind and rain can loosen hangers or create new clogs. Regular checks help you catch small problems before they grow into costly repairs.
What’s the best sealant for gutter leaks?
Look for a sealant specifically designed for gutters or outdoor metal. Good options include:
- Silicone-based caulk rated for exterior use
- Tripolymer gutter sealant for flexible, long-lasting bonds
- Butyl rubber sealant for joints and seams
Avoid standard indoor caulk, which cracks under temperature swings. Always apply to clean, dry metal and let it cure fully for the strongest, longest-lasting seal against water.
Can I repair a gutter myself, or should I hire a pro?
Most common gutter problems are well within reach for a confident DIYer. Cleaning, sealing small leaks, patching holes, and tightening hangers all use basic tools and simple steps. Call a professional only when you face extensive rot, multiple sagging sections, or work on a tall, steep roof where safety becomes a serious concern. For routine fixes, handling it yourself saves real money.
Why does my gutter overflow even when it’s clean?
Overflowing usually points to one of a few causes. The gutter may be pitched incorrectly, so water pools instead of flowing to the downspout. The downspout itself might be clogged lower down, or the gutter could simply be too small for heavy rainfall. Check the slope first, then clear the downspout fully before assuming you need a larger system.
How do I stop my gutters from clogging so fast?
Install mesh or screen guards over the channel to block leaves and debris while letting water through. Trim back tree branches that hang over your roof to reduce falling matter. Regular cleaning still matters, but guards greatly stretch the time between cleanouts. Keeping debris out also protects your hangers and reduces the chance of new leaks forming at the seams.
Conclusion
Fixing your gutters doesn’t require special training or an expensive service call. With a sturdy ladder, a few basic tools, and a careful eye, you can handle nearly every common problem yourself. You’ve learned how to inspect for trouble, clear out clogs, seal leaks at the joint seam, patch larger holes, fix a sagging gutter, and keep your downspout flowing freely.
The key takeaways are simple: clean before you seal, respect the slope for proper drainage, and always test your work before calling it done. These habits keep your repairs strong through every season and protect your home from costly water damage.
Knowing how to repair rain gutter problems puts you in control of your home’s health. The next time you hear that telltale drip, you’ll grab your tools instead of your phone. Take it one step at a time, work safely, and enjoy the quiet pride that comes from a job done well. Your gutters, and your foundation, will thank you for years.