

You glance up one morning and spot it—a yellowish ring spreading across your ceiling, the paint bubbling, maybe a soft sag forming in the drywall. Your stomach drops. Is the whole ceiling about to cave in?
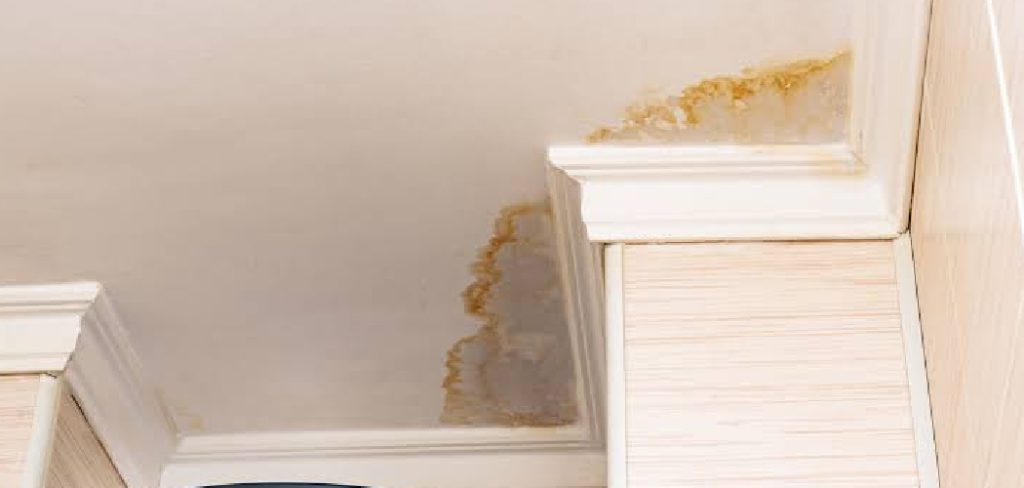
Take a breath. Most ceiling damage from a small leak looks far scarier than it actually is. With a little patience and the right approach, you can fix it yourself over a weekend—no expensive contractor required.
Learning how to repair a water damaged ceiling saves you money, builds real confidence, and stops a small problem from turning into a big, moldy mess. Whether you’re dealing with a faint water stain or a section of crumbling drywall, the basic steps stay the same.
This guide walks you through every step, from finding the leak source to patching, priming, and painting your ceiling like new.
Why Repairing a Water Damaged Ceiling Matters
A stained, sagging ceiling isn’t just ugly—it’s a warning sign that moisture has settled where it shouldn’t.
Learning to fix it builds practical patching and sealing skills that carry over to all kinds of repairs. Once you can patch drywall and seal out moisture, you’re ready to tackle other surfaces too. That same know-how helps campers and outdoor beginners patch tent floors, seal leaky gear, and waterproof a cabin roof when professional help is miles away.
There’s a financial payoff as well. Contractors charge a premium for ceiling work, and a simple stain rarely justifies that bill.
Most importantly, fixing water damage fast stops mold before it spreads. Lingering moisture rots wood, ruins insulation, and creates health risks for everyone under that roof. Acting early protects both your home and your wallet.
Tools and Materials You’ll Need
Round up your supplies before you climb the ladder. Nothing’s worse than stopping mid-repair to run to the hardware store.
- A sturdy step ladder to reach the ceiling safely
- A utility knife for cutting away damaged drywall
- A putty knife for applying joint compound
- Joint compound to fill holes and seams
- A drywall ceiling patch for larger holes
- Stain-blocking sealer to lock out old water stains
- Primer to prep the surface for paint
- A sanding sponge for smoothing patched areas
- Drop cloths to protect your floor and furniture
- Safety goggles and a dust mask for protection
- Paint that you can color-match to your ceiling
Optional but handy: a moisture meter takes the guesswork out of checking whether the drywall has fully dried. It saves you from sealing in dampness and starting the whole job over.
Step-by-Step Guide on How to Repair a Water Damaged Ceiling
Work through these steps in order. Knowing how to repair a water damaged ceiling starts with stopping the water before you touch a single tool.
Step 1 – Find and Fix the Leak Source
Before you patch anything, hunt down where the water came from. Skip this, and your fresh repair will stain again within weeks.
Head into the attic or the room above and look for damp spots, drips, or trails of moisture. Run your hand along pipes, around the base of vents, and under the roofline. You’ll often feel cool, clammy dampness where the leak hides.
Common culprits include a cracked pipe, a worn roof shingle, or an overflowing tub upstairs. Follow the trail patiently, since water travels sideways before it drips.
Once you spot the leak source, fix it completely. Tighten the fitting, replace the shingle, or call out the real problem. Only then should you move on.
Step 2 – Let the Ceiling Dry Completely
Patience pays off here. Sealing wet drywall traps moisture inside, which leads to mold and a repeat repair down the road.
Set up fans pointing at the damaged area and crack a window for airflow. A dehumidifier speeds things along nicely, pulling that heavy, damp feeling out of the room.
Give the ceiling at least a few days to dry, longer if the damage was severe. Touch the area gently—it should feel firm and bone-dry, not soft or cool.
If you have a moisture meter, use it to confirm the drywall has fully dried. Rushing this step is the most common reason repairs fail, so resist the urge to push ahead too soon.
Step 3 – Remove the Damaged Drywall
Once everything’s dry, it’s time to cut away the ruined material. Lay your drop cloths first, because this part gets messy.
Press gently on the stained area with your fingers. Soft, crumbly, or sagging drywall has to go. Firm spots can usually stay.
Using your utility knife, score a clean square or rectangle around the damaged section. Cut slowly and steadily—you’ll hear the blade slice through the chalky gypsum core.
Pull the loose piece free and clear away any soggy insulation behind it. You’ll likely smell that musty, damp odor as it comes out. Scrape back the edges so they’re clean and solid, giving your new patch a firm border to grip.
Step 4 – Cut and Fit the Patch
Now you’ll prepare a fresh piece of drywall to fill the gap you just made.
Measure the hole and cut a ceiling patch slightly smaller, so it slips in without forcing. Test the fit by holding it up to the opening. It should sit flush, not bulge or sink.
For small holes, a self-adhesive mesh patch works beautifully and saves time. For bigger gaps, cut a new drywall square and secure it with backing strips and screws.
Run your fingers along the edges to check for snug contact all the way around. A well-fitted patch means less filling later and a smoother final result. Take your time here—a tight fit now makes the next steps far easier.
Step 5 – Apply Joint Compound
This is where the patch starts to disappear into the ceiling. Grab your putty knife and joint compound.
Scoop a small amount onto the knife and spread a thin, even layer over the patch and its seams. Feather the edges outward so the compound blends gradually into the surrounding ceiling.
You’ll feel the smooth, creamy compound glide on like frosting a cake. Don’t glob it on thick—several thin coats always beat one heavy layer.
Let the first coat dry fully, then add a second and even a third, widening each pass slightly. Between coats, the surface should look chalky and matte when dry. Patience builds that flawless, invisible finish you’re after.
Step 6 – Sand the Surface Smooth
Once your final coat of compound dries hard, it’s time to smooth everything out. Pop on your goggles and dust mask first.
Glide your sanding sponge over the patched area in gentle, circular motions. You’re aiming for a surface so smooth you can’t feel the seam when you close your eyes and run your fingers across it.
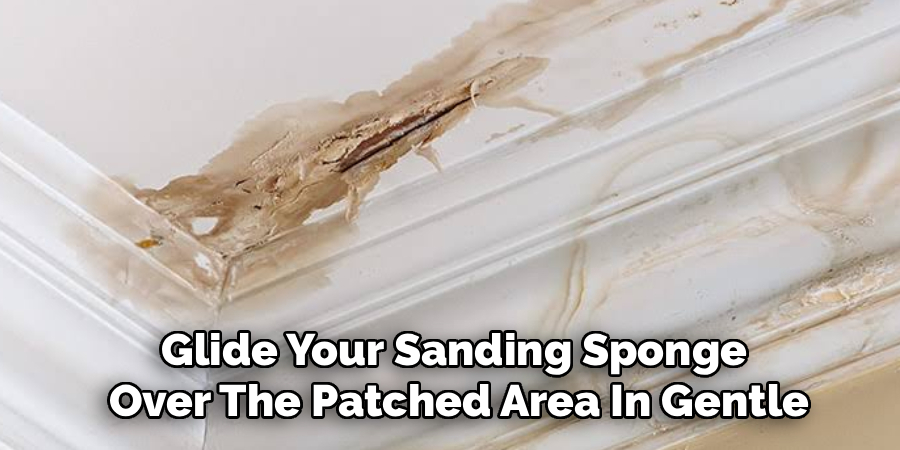
Fine white dust will drift down, so keep that drop cloth in place. Work the edges especially well, blending the compound into the original ceiling until no ridge remains.
Stop and check with your hand often. Over-sanding can dig into the compound and create new dips. When the patch feels seamless and looks flat under good light, you’re ready to move on.
Step 7 – Seal the Stain and Prime
Even after patching, old water stains love to bleed through fresh paint. A stain-blocking sealer stops that ghostly ring from coming back.
Brush or roll a coat of stain-blocking sealer over the entire repaired area, including any lingering water stain marks on the surrounding ceiling. You’ll notice the discoloration vanish under the opaque coating.
Let the sealer dry according to the label, then apply a coat of primer over the patch. Primer gives your paint something to grip and helps the new and old surfaces match in texture.
This double layer is the secret to a repair that stays invisible. Skip it, and that stubborn brown ring may haunt your ceiling for months to come.
Step 8 – Paint and Blend
The final step brings it all together. Now you’ll make that patch vanish completely.
Stir your paint well and test the paint match against a hidden corner of the ceiling first. Ceiling white fades over time, so an exact match might need a fresh coat across the whole surface for a uniform look.
Roll the paint on in thin, even layers, feathering past the repaired zone to blend it. You’ll watch the patch melt into the rest of the ceiling as the color evens out.
Apply a second coat once the first dries. Step back, look up, and admire your work—a smooth, clean ceiling with no trace of the damage that started it all.
Critical Mistakes When Repairing a Water Damaged Ceiling
The biggest mistake people make is patching before they fix the leak. A beautiful repair means nothing if water keeps dripping behind it. Always track down and stop the leak source first, or you’ll be redoing this whole job in a month.
Another common slip is rushing the drying stage. Sealing damp drywall traps moisture inside, which breeds mold and weakens the patch. Give the area plenty of time to dry, and confirm it’s truly dry before you continue.
Skipping the stain-blocking sealer is a costly shortcut too. Water stains are sneaky—they bleed right through ordinary paint and primer, leaving that ugly ring back within weeks. One sealer coat prevents the headache entirely.
Many beginners also pile on joint compound too thick. Heavy layers crack, sag, and take forever to dry. Thin coats, built up gradually, give a smoother, stronger finish.
Finally, don’t forget your safety gear. Drywall dust irritates your lungs and eyes, so goggles and a mask aren’t optional. Protect yourself, and the cleanup gets easier too.
Expert Tips
Want professional-looking results? Always feather your joint compound wider than you think you need to. The bigger the blend zone, the more invisible your patch becomes.
Keep a wet rag nearby while you work. Wiping your putty knife clean between passes prevents dried clumps from dragging streaks across your smooth surface.
When matching paint, take a small chip of the old ceiling to the hardware store for a precise paint match. Even “plain white” comes in dozens of shades that won’t quite line up.
Work in good, raking light by setting up a lamp at a low angle. Shadows reveal every bump and dip, helping you catch imperfections before the paint goes on.
Finally, address moisture problems at the root. A bathroom fan, better attic ventilation, or a roof inspection can stop ceiling damage from ever returning.
Frequently Asked Questions
How do I know if my ceiling damage is serious?
Press gently on the stained area. If the drywall feels soft, spongy, or sagging, the damage runs deep and needs cutting out. A flat, firm ceiling with just a surface stain is usually minor. Watch for these warning signs:
- Sagging or bulging sections
- Crumbling, soft drywall
- Active dripping or spreading stains
- A musty, damp smell
Any of these means you should act quickly.
Can I just paint over a water stain?
Painting straight over a water stain rarely works. The discoloration bleeds right through ordinary paint, and the brown ring reappears within weeks. Instead, fix the leak, let the area dry, then apply a stain-blocking sealer over the mark. Once that dries, prime and paint as normal. The sealer is the key step—it locks the stain in place so your fresh paint stays clean and bright.

How long should I let the ceiling dry before repairing?
Give the ceiling at least three to five days to dry fully, and longer if the damage was heavy. Set up fans and a dehumidifier to speed the process. The drywall should feel firm and bone-dry, never cool or soft to the touch. If you own a moisture meter, use it to confirm the reading is low before patching. Rushing this step almost always leads to mold and a failed repair.
Do I need to replace the whole ceiling?
Rarely. Most water damage affects just a small section, which you can cut out and patch without touching the rest of the ceiling. Full replacement only makes sense when large areas sag, the structure is compromised, or mold has spread widely. For a typical stain or a soft spot from a minor leak, a simple patch-and-paint job restores the ceiling perfectly.
What’s the best way to prevent water damage from returning?
Stop the moisture at its source. Fix leaky pipes promptly, replace worn roof shingles, and check around tubs and showers for hidden drips. Improving ventilation helps too—run bathroom fans, add attic vents, and keep humidity low. Inspect your roof and plumbing once a year. Catching small problems early keeps water out of your ceiling and saves you from repeating this repair down the road.
Conclusion
A stained, sagging ceiling looks alarming, but you’ve now got everything you need to fix it with confidence. Knowing how to repair a water damaged ceiling comes down to a clear set of steps: find and stop the leak, let the area dry completely, cut out the damage, patch and fill, then seal, prime, and paint.
None of this requires special talent or expensive tools. With a putty knife, some joint compound, and a little patience, you can erase that water stain over a single weekend.
The payoff is real. You’ll save the cost of a contractor, stop mold before it spreads, and protect your home from deeper damage. Best of all, you’ll gain skills that come in handy for repairs all over the house.
So grab your drop cloth, set up your ladder, and tackle that ceiling head-on. Once you look up at a smooth, clean surface with no trace of the damage, you’ll be glad you trusted yourself and picked up the putty knife.