

Do you have a beautiful piece of wooden furniture that is starting to peel, bubble, or chip? You are not alone. Many homeowners and renters face this exact issue with their favorite tables and dressers.
Learning how to repair wood veneer yourself is an incredibly smart move. You can save hundreds of dollars by fixing it at home. Hiring a professional restoration expert is expensive. Throwing the furniture away is wasteful.
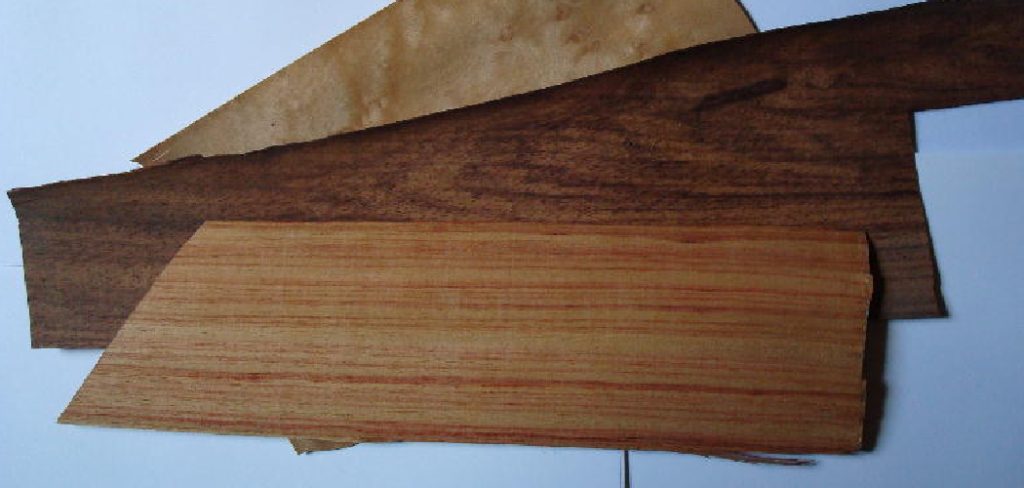
With a few basic tools and a free afternoon, you can restore your piece to its former glory. You do not need a carpentry degree to get great results.
In this guide, we will walk you through the entire process. We will cover everything from simple blisters to replacing chipped edges. Grab your tools, and let us get that furniture looking brand new again!
What Causes Wood Veneer to Peel and Bubble?
Before we start fixing things, it helps to understand why this happens. Veneer is simply a thin slice of real wood glued over a solid core. When that glue fails, problems start.
Here are the most common causes of veneer damage:
- Excessive Moisture: Spilled drinks or high humidity can seep under the wood. This weakens the adhesive over time.
- Heat Damage: Placing hot pans or electronics on the surface can melt or dry out the old glue.
- Direct Sunlight: Prolonged exposure to UV rays dries out the wood. This causes it to shrink, crack, and pull away from the base.
- Natural Aging: Antique furniture uses hide glue. This natural glue breaks down and becomes brittle after decades of use.
- Physical Impact: Bumping a vacuum cleaner against a dresser edge can easily chip off thin layers of wood.
- Poor Manufacturing: Sometimes, modern mass-produced furniture just does not use enough adhesive during the factory process.
Essential Tools & Materials Needed
Preparation is the secret to any successful DIY repair. You want to gather everything before you start applying glue.
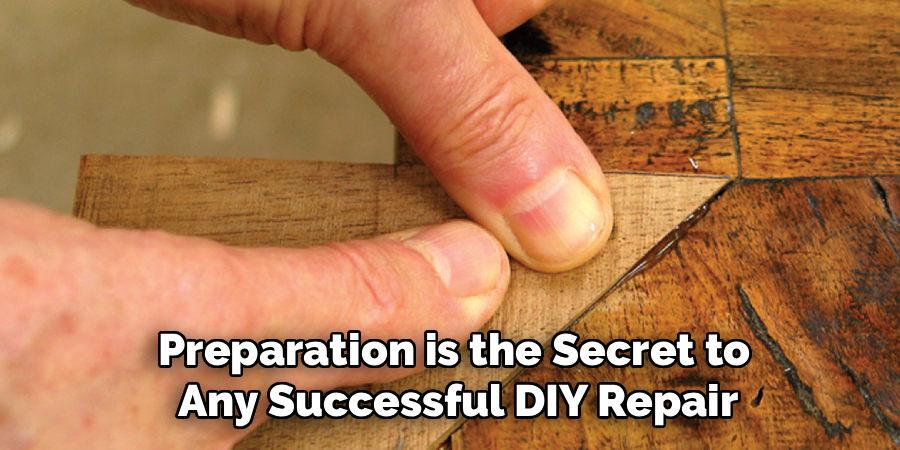
Here is a clear list of what you will need for these repairs:
- Good Quality Wood Glue: Standard yellow carpenter’s glue works best for most edge repairs.
- Veneer Pins or a Glue Syringe: These help you inject glue under tight bubbles without cracking the wood.
- A Standard Clothing Iron: You will use this to reactivate old glue.
- A Damp Cotton Cloth: This protects the wood surface from the hot iron.
- Sharp Craft Knife (X-Acto knife): Essential for cutting clean lines and slicing open blisters.
- Wax Paper: Prevents your clamps and blocks from sticking to the fresh glue.
- Small Wood Blocks: Used to distribute clamping pressure evenly.
- C-Clamps or Bar Clamps: You need these to hold the glued wood down tightly while it dries.
- Fine-Grit Sandpaper (220 grit): For smoothing out the edges after the repair dries.
- Wood Filler (matching your stain): Needed for filling small missing chips.
Understanding How to Repair Wood Veneer: Bubbles and Blisters
Bubbles appear when the glue releases in the middle of a panel. The wood raises up, creating an ugly blister.
This is actually the easiest problem to fix. Often, the original glue is still under there. You just need to reactivate it. Let us look at the best approach.
Step 1: Clean the Surface Completely
First, wipe the furniture down. Use a gentle wood cleaner to remove dust, oils, or furniture polish.
You need a clean surface so the iron can work properly. Dirt and grime can get pressed into the wood finish.
Step 2: Test the Iron Method
Turn your clothing iron to a medium heat setting. Do not use the steam function.
Place a damp cotton cloth directly over the blister. This cloth protects your finish from burning.
Step 3: Press and Heat
Press the hot iron firmly onto the damp cloth directly over the bubble. Hold it there for a few seconds.
Move the iron around slightly to prevent scorching. Check under the cloth after 10 seconds. The heat often melts the old hide glue, causing it to stick again.
Step 4: Weigh It Down
If the bubble flattens out, you are in luck! Immediately remove the iron and cloth.
Place a heavy object, like a stack of books, on top of the warm spot. Leave it there for 24 hours while the old glue cools and hardens.
Step 5: The Syringe Method (If Heat Fails)
Sometimes, the old glue is completely gone. If the iron trick fails, grab your craft knife.
Carefully slice a tiny slit in the blister, going along the wood grain. This hides the cut.
Step 6: Inject the Glue
Fill your glue syringe with standard yellow wood glue. Slide the needle into the small slit you just made.
Inject a small amount of glue under the blister. Press down on the bubble with your finger to spread the glue around underneath.
Step 7: Clamp and Dry
Wipe away any glue that squeezes out with a damp rag. Place a piece of wax paper over the slit.
Put a flat wood block on top of the wax paper. Clamp the block down tightly and let it sit overnight.
The Best Way on How to Repair Wood Veneer Edges
Peeling edges are incredibly common on tables and dressers. Clothes catch on them, pulling the wood back further.
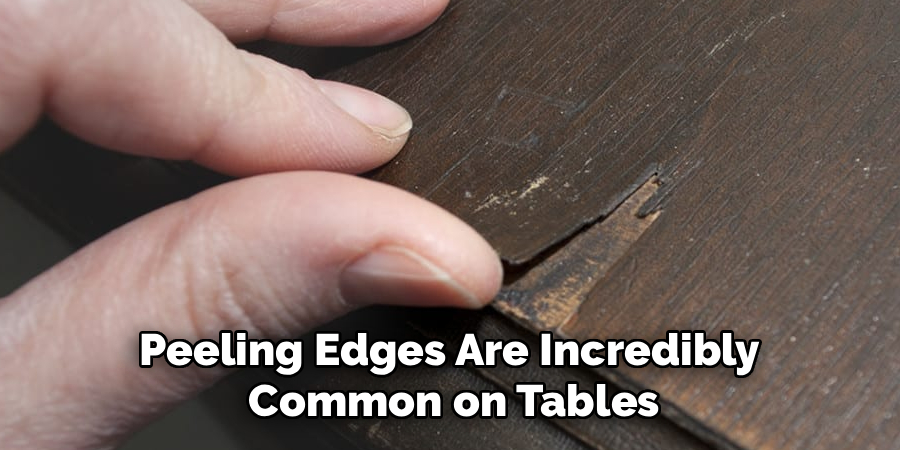
You must fix peeling edges quickly. If you wait, the wood can snap off entirely.
Step 1: Clean Under the Flap
Lift the peeling edge very gently. Do not pull it back too far, or it will snap.
Use a toothpick or a folded piece of sandpaper to scrape out the old, dried glue. You need bare wood for the new glue to stick properly.
Step 2: Apply the Wood Glue
Squeeze a thin layer of wood glue under the flap. You can use a toothpick to spread it deep into the crevice.
Make sure you cover the core wood and the underside of the peeling flap evenly.
Step 3: Press and Wipe
Press the veneer down firmly with your thumb. A lot of excess glue will squeeze out the sides.
Wipe this wet glue away immediately with a damp rag. If you let it dry, it will ruin your finish and repel wood stain.
Step 4: Setup the Clamping Block
Place a strip of wax paper over the repaired edge. The glue will not stick to the wax paper.
Place a flat piece of scrap wood over the wax paper. This block ensures the pressure is even across the whole repair.
Step 5: Apply Clamps
Secure your C-clamps over the wood block and tighten them down. You want firm pressure, but do not crush the furniture.
Leave the clamps in place for at least 12 hours. Wood glue needs time to cure deeply.
Step 6: Final Sanding
Remove the clamps and the wax paper. You might feel a slight raised edge where the glue dried.
Take your 220-grit sandpaper and lightly sand the edge. Move smoothly in the direction of the wood grain until it feels flush.
Patching Missing Chunks and Chipped Areas
Sometimes, the veneer snaps completely off and goes missing. This leaves an ugly bald spot on your furniture.
You have two choices here. You can fill small chips with wood filler, or you can patch larger holes with new wood.
Step 1: Assess the Damage
Look closely at the missing chunk. If it is smaller than a dime, colored wood filler is your best bet.
If it is larger than a coin, you need to cut a patch from a matching piece of donor wood.
Step 2: Using Wood Filler (For Small Chips)
Buy a wood filler that matches your current stain color. Scoop a small amount onto a putty knife.
Press the filler firmly into the chipped area. Overfill the hole slightly, as the putty shrinks when it dries.
Step 3: Sand and Shape
Wait for the wood filler to dry completely. This usually takes a few hours.
Sand the dried filler down until it is perfectly level with the surrounding wood. You can use a stain pen to draw fake wood grain lines if needed!
Step 4: Prepping a Wood Patch (For Large Holes)
For large missing pieces, buy a small sheet of matching veneer from a hardware store.
Place the new sheet over the damaged area. Tape it down so it does not move.
Step 5: Cut the Diamond Shape
Take your sharp craft knife. Cut a diamond shape through both the new sheet and the damaged layer below it.
A diamond shape makes it much easier to hide the seam lines in the natural wood grain.
Step 6: Remove the Old Material
Remove the tape and the new patch. Now, carefully chisel out the old wood inside the diamond shape you just scored.
Clean the core wood below to ensure it is perfectly flat and free of old glue.
Step 7: Glue the New Patch
Your new diamond patch will fit perfectly into the hole you just created.
Apply wood glue to the bare core. Press your new patch into place, cover it with wax paper, and clamp it down tightly.
Safety Warnings for DIY Wood Repair
Fixing furniture is generally safe, but you should still protect yourself. Always work in a well-lit area.
Keep your fingers clear when using sharp craft knives. The blades can easily slip when cutting tough wood grain.
Ventilate your workspace well. While standard wood glue is non-toxic, chemical cleaners and contact cements have strong fumes.
Be very careful with the hot iron. Never leave it unattended on the damp cloth, and keep the cord away from the edge of your table.
Wear safety glasses when chiseling out old glue. Small, brittle shards of dry adhesive can easily fly into your eyes.
When to Call a Professional
DIY is fantastic, but it does have its limits. Knowing when to stop can save your furniture from permanent damage.
If you are dealing with a highly valuable family heirloom or a rare antique, call a pro. Mistakes on these pieces reduce their value significantly.
Call an expert if the underlying solid wood core is rotting or warped. Gluing a thin top layer over rotten wood will not solve the structural problem.
If the damage covers more than 30% of the furniture’s surface, consider hiring out. Refitting an entire table requires specialized presses and vacuum bags.
Professionals also have access to chemical strippers and industrial contact cements that are dangerous to use at home.
Cost Estimate: DIY vs. Professional Repair
Money is a huge factor when deciding how to handle damaged furniture. Doing it yourself is almost always the cheapest route.
If you already own an iron and clamps, a bottle of wood glue and a syringe will cost you less than $15.
Even if you have to buy clamps, sandpaper, and replacement wood sheets, a DIY repair usually totals between $30 and $50.
Hiring a professional furniture restorer tells a different story. They charge for their specialized labor and overhead.
A professional repair for a peeling table edge usually starts around $150. If they have to cut and match patches, the bill can easily exceed $300 to $500.
By taking an afternoon to learn these skills, you keep that money right in your pocket.
Frequently Asked Questions
Can I use super glue instead of wood glue?
No, avoid super glue. It dries too fast, is brittle, and does not allow the wood to flex naturally with temperature changes.
What if the bubble comes back after ironing?
If the bubble returns, the old hide glue is completely dead. You must slice the bubble open and inject fresh wood glue to secure it.
How do I match the color of a new patch?
Take a drawer or a piece of the broken wood to the hardware store. Test various stain colors on scrap wood before applying it to your final patch.
Do I have to strip the whole piece of furniture?
Not always. If you are just injecting glue or gluing down an edge, you can usually leave the original finish completely intact.
How long should I leave the clamps on?
Always leave clamps on for a minimum of 12 hours. Rushing the drying process will cause the wood to pop right back up.
Conclusion
Seeing your beautiful furniture peel or crack can be frustrating. However, learning how to repair wood veneer is a highly rewarding skill.
You do not need an expensive workshop or years of training. With a hot iron, some good glue, and a little patience, you can flatten those bubbles and seal those edges.
Remember to take your time, prep your surfaces well, and use clamps to ensure a tight bond. Your furniture will look fantastic, and you will save a lot of money in the process.
Have you tried fixing a blistered table or peeling dresser recently? Leave a comment below and share your success stories, or let us know what piece you plan to tackle next!