

Finding a puddle of water seeping through your living room floor is a stressful moment. You might feel a sudden wave of panic about the potential damage. But take a deep breath. Figuring out how to repair slab leak issues doesn’t always require draining your savings account. Many handy homeowners can tackle this job with the right preparation.
A slab leak happens when the plumbing pipes beneath your home’s concrete foundation start leaking. It is a common issue for homeowners with concrete slab foundations. It affects older homes with aging copper pipes most frequently.
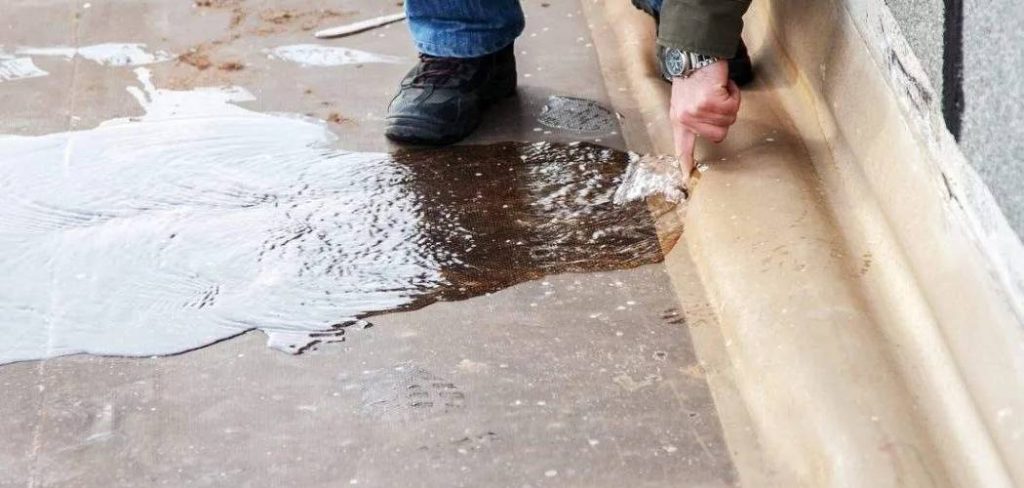
Plumbers often charge thousands of dollars just to locate and access these underground pipes. Fixing it yourself saves a massive amount of money on labor. You only pay for tool rentals and basic plumbing materials.
If you are comfortable with heavy tools and basic plumbing, you can handle this. Let us walk through the entire process together.
What Causes This Problem?
Before we start digging, it helps to understand why this happened. Pipes under concrete are well-protected, but they are not invincible.
Several hidden factors cause these underground plumbing failures. Here are the most common culprits:
- Shifting Soil: The ground beneath your house naturally expands and contracts. This movement puts immense pressure on rigid water lines, eventually causing them to crack.
- Poor Installation: Sometimes pipes are kinked or dented during the original home construction. These weak spots eventually give out under continuous water pressure.
- Chemical Corrosion: Hot water pipes made of copper are highly vulnerable. The minerals in your water can slowly eat away at the metal from the inside out.
- Pipe Abrasion: Pipes naturally expand when hot water runs through them. If they rub against gravel, concrete, or other pipes, the constant friction wears them thin.
- High Water Pressure: If your home’s water pressure is too high, it strains the plumbing system. Over time, this blows out joints and creates pinhole leaks.
Tools & Materials Needed
You cannot fix a foundation leak barehanded. This job requires serious hardware and basic plumbing supplies.
Gather everything on this list before you turn off your water. You do not want to run to the hardware store halfway through the job.
Heavy Equipment
- Electric jackhammer or heavy-duty hammer drill (can be rented)
- Sledgehammer
- Wet/dry shop vacuum
- Pry bar and shovel
Plumbing Supplies
- Replacement pipe (matching your current material, usually copper or PEX)
- Pipe cutter or hacksaw
- Push-to-connect fittings (like SharkBite) or a copper soldering kit
- Emery cloth or sandpaper
- Wire brush
Patching Materials
- Fast-setting concrete mix
- Concrete trowel
- Plastic sheeting
- Heavy-duty trash bags for debris
Safety Gear
- Thick work gloves
- Safety goggles
- Dust mask or respirator
- Hearing protection
- Knee pads
Step-by-Step Fix Guide: How to Repair Slab Leak
Now that you have your tools, it is time to get to work. Take your time with each phase of the project. Rushing through concrete removal can cause further damage to your home. Follow these actionable steps to fix the broken line.
Step 1: Pinpoint the Exact Leak Location
You must know exactly where the leak is before you break any concrete. Guessing will leave your floor looking like Swiss cheese.
Look for warm spots on the floor, especially if it is a hot water line leak. You might also hear a faint hissing or running water sound.
If you cannot find the exact spot, hire a leak detection specialist. Paying them a small fee to mark the spot is much cheaper than destroying your entire floor.
Step 2: Shut Off the Main Water Supply
Never break into a floor with active water pressure. You will flood your house in minutes.
Locate your home’s main water shut-off valve. This is usually near the street, in the garage, or near the water heater.
Turn the valve completely off. Open a few faucets inside the house to drain the remaining water and relieve pressure.
Step 3: Prepare the Work Area
Breaking concrete is an incredibly messy job. Fine dust will travel everywhere if you are not careful.
Remove all furniture, rugs, and valuables from the room. Tape plastic sheeting over doorways and air vents to contain the concrete dust.
Put on your safety goggles, heavy gloves, hearing protection, and dust mask. The noise and dust are going to be intense.
Step 4: Break Through the Concrete Slab
This is the most physically demanding part of the repair. Use your electric jackhammer to break the concrete over the marked leak spot.
Start with a small square, about two feet by two feet. Work slowly and let the weight of the tool do the heavy lifting.
Do not drive the chisel too deep into the floor. You want to break the concrete without striking the pipe beneath it.
Step 5: Excavate the Dirt and Expose the Pipe
Once the concrete chunks are loose, pull them out. Place them in heavy-duty buckets or bags for disposal.
Underneath the slab, you will find dirt, sand, or gravel. Use a small shovel or your hands to dig around the plumbing line.
Clear away enough dirt so you can see the pipe clearly. You need a few inches of clearance entirely around the pipe to work on it.
Step 6: Identify and Clean the Damaged Section
Inspect the exposed pipe with a flashlight. Look for the crack, pinhole, or broken joint that caused the leak.
Use your wet/dry vacuum to suck up any standing water in the hole. A dry workspace makes the plumbing repair much easier.
Use an emery cloth or wire brush to clean the pipe around the damaged area. The pipe must be smooth and free of dirt before you cut it.
Step 7: Cut Out the Broken Pipe
Measure the damaged section of the pipe. You need to remove the bad piece and leave clean, round edges on both sides.
Use your pipe cutter to slice through the line. Tighten the cutter around the pipe, rotate it, and tighten it again until it snaps through.
Remove the broken section and discard it. Use a deburring tool or sandpaper to smooth the sharp inner and outer edges of the remaining pipe ends.
Step 8: Install the New Pipe Segment
Now it is time to bridge the gap. Measure and cut a new piece of pipe to fit the space you just created.
For beginners, push-to-connect fittings (like SharkBite) are a lifesaver. You simply push the fitting onto the old pipe, insert the new pipe, and push it all together.
If you are experienced, you can solder new copper slip couplings into place. Make sure the connections are completely secure and straight.
Step 9: Turn the Water On and Test
Do not fill the hole with concrete yet. You must verify that your repair actually holds water.
Go back to your main water valve and slowly turn it back on. Watch the repaired section closely as the system pressurizes.
Leave the hole open for a few hours. Check back frequently with a dry paper towel to ensure absolutely no moisture is escaping.
Step 10: Backfill the Hole and Patch the Concrete
Once you are fully confident the leak is fixed, it is time to close up. Wrap the new pipe in foam pipe insulation so the concrete won’t touch the metal.
Fill the hole with the dirt or sand you removed earlier. Pack it down tightly until it is level with the bottom of the concrete slab.
Mix your fast-setting concrete according to the package directions. Pour it into the hole, smooth it out with a trowel, and let it cure completely.
Important Safety Warnings
Safety must always come first when tackling heavy-duty home improvements. This project involves electricity, water, and heavy machinery.
Always plug your jackhammer into a GFCI-protected outlet. You are working around standing water, which creates a massive electrocution risk.
Be highly aware of post-tension cables in your concrete slab. If your home has these, cutting one can cause explosive structural damage and severe injury.
Protect your lungs and eyes at all costs. Concrete dust contains silica, which is highly dangerous to breathe in. Always wear a quality respirator mask.
When to Call a Professional for a Slab Leak
DIY repairs are incredibly rewarding, but you must know your limits. Some plumbing emergencies require a licensed expert.
If you cannot find the exact location of the leak, stop immediately. Do not destroy your entire floor playing a guessing game.
Call a pro if your pipes are extremely corroded or crumbling when touched. This usually indicates you need a full home repipe, not just a patch.
Finally, if your slab has post-tension cables, do not attempt to cut the concrete yourself. A professional will use ground-penetrating radar to safely navigate the slab.
Cost Estimate: DIY vs. Pro
Understanding the financial breakdown highlights exactly why this DIY project is so popular. The savings are truly substantial.
A professional plumber typically charges between $1,500 and $4,000 to fix a foundation leak. The majority of this cost goes toward labor and concrete excavation.
If you do it yourself, you will spend roughly $100 to $300. This covers a daily jackhammer rental, concrete mix, pipe fittings, and basic safety gear.
Even if you pay $150 for a professional leak detection service first, you still save thousands. Your sweat equity pays off brilliantly here.
Frequently Asked Questions
You likely still have a few questions about this process. Here are the most common concerns homeowners have about fixing foundation plumbing.
Will my homeowner’s insurance cover a slab leak?
Insurance usually covers the water damage caused by the leak, like ruined flooring or baseboards. However, they rarely pay to repair the plumbing pipe itself or the concrete excavation. Check your specific policy details to be certain.
How long does it take to fix this issue?
If you know exactly where the leak is, the repair takes a full weekend. You will spend one day breaking concrete and fixing the pipe, and another day pouring new concrete and letting it cure.
Can I just reroute the plumbing instead of digging?
Yes, rerouting the water line through the walls and attic is often a better long-term solution. It bypasses the underground leak entirely, meaning you do not have to break the floor. However, rerouting requires more extensive plumbing knowledge.
Can I use epoxy pipe lining to fix a slab leak?
Epoxy lining is a trenchless repair method used by professionals. It involves coating the inside of the pipe with a hardening resin. Unfortunately, this requires specialized commercial equipment and is not a viable DIY option.
Are SharkBite fittings safe to bury in concrete?
Yes, push-to-connect fittings are approved for underground burial in most local plumbing codes. However, you must wrap them in a waterproof silicone tape before burying them. This protects the brass fittings from corrosive soil and concrete elements.
Conclusion
A flooded floor feels like a disaster, but it is just a mechanical problem you can solve. Learning how to repair slab leak issues empowers you to take control of your home’s maintenance.
By carefully locating the issue, breaking the concrete safely, and using simple push-to-connect fittings, you can fix this. You will save thousands of dollars and gain serious DIY bragging rights.
Always prioritize safety, take your time with the heavy machinery, and double-check your plumbing connections. You have the tools and the knowledge to get your home dry again.
Ready to tackle more home fixes? Check out our other plumbing repair guides and start building your ultimate homeowner toolkit today!