

Have you noticed ugly dark spots forming around the edges of your favorite bathroom mirror? Or maybe a beautiful vintage piece you found at a thrift store has a flaky, scratched reverse side.
You are not alone. Desilvering is a common issue that ruins the reflective charm of household glass. But before you throw it away and spend hundreds of dollars on a replacement, we have good news for you.
Learning how to repair mirror backing is entirely possible for the average homeowner. It is a rewarding weekend project that restores your favorite decor. Best of all, fixing it yourself keeps perfectly good glass out of the landfill and saves you a ton of cash.
In this comprehensive guide, we will walk you through exactly how to tackle this project. Grab your safety glasses, and let’s get that glass shining like new again.
What Causes Mirror Backing to Deteriorate?
Before we dive into the fix, it helps to understand why your glass is peeling in the first place. Mirrors are simply clear glass sprayed with a thin layer of silver nitrate, copper, and protective paint.
When that protective coating fails, the silver oxidizes. Here are the most common culprits behind the damage:
- Excess Moisture: Bathroom humidity is the number one enemy. Steam seeps behind the glass and eats away at the protective backing over time.
- Harsh Cleaning Products: Ammonia-based glass cleaners can drip down the glass. They pool at the bottom edge and slowly dissolve the protective seal.
- Old Age: Vintage and antique pieces naturally degrade. The chemicals used decades ago break down after years of environmental exposure.
- Poor Ventilation: Spaces without proper airflow trap dampness against the wall. This creates a perfect environment for backing failure.
- Physical Scratches: A scratch on the back from improper hanging tools exposes the silvering. Once exposed to air, the dark spots spread quickly.
Tools & Materials Needed for the Job
Preparation is the secret to any successful DIY project. You need the right supplies before you start scraping away.
Most of these items are readily available at your local hardware store. For the chemicals, you will want to purchase a specialized “mirror resilvering kit” online.
Here is exactly what you need to gather:
The Essential Resilvering Supplies
- Mirror Resilvering Kit: This includes the silvering chemicals, copper spray, and backing paint.
- Chemical Paint Stripper: To remove the old, flaking paint and silver layers.
- Distilled Water: Essential for cleaning the glass without leaving mineral deposits.
- Glass Cleaner: A high-quality, ammonia-free formula.
- Lint-Free Cloths: Microfiber towels work perfectly for a streak-free finish.
Tools and Hardware
- Plastic Putty Knife: For gently scraping away the old backing.
- Soft Bristle Brush: To sweep away loose debris.
- Painter’s Tape: To protect the front of the glass and any remaining good backing.
- Measuring Cups: For mixing the chemical solutions accurately.
- Spray Bottles: To apply the distilled water and chemical mixtures evenly.
Safety Gear
- Heavy-Duty Rubber Gloves: To protect your hands from chemicals and sharp edges.
- Safety Goggles: Because you only get one pair of eyes.
- Respirator Mask: Crucial for filtering out paint stripper and chemical fumes.
- Drop Cloth: To protect your floors or workbench from messy drips.
Step-by-Step Fix Guide: How to Repair Mirror Backing
Now that your tools are ready, it is time to roll up your sleeves. We will break this process down into simple, manageable steps.
Take your time with each phase. Rushing the chemical application is the most common mistake beginners make. Follow these instructions closely for a flawless, reflective finish.
Step 1: Prepare Your Workspace
First, set up your work area in a highly ventilated space. An open garage or a shaded outdoor patio is ideal.
Lay down a heavy drop cloth to catch chemical drips. Place out a few blocks of scrap wood to elevate the glass off the table.
Elevating the piece makes it easier to work on the edges without the glass sticking to your drop cloth.
Step 2: Remove the Glass from the Frame
If your piece is framed, you need to extract the glass carefully. Take photos of the back before removing any screws or clips.
This makes putting it back together much easier later. Use a screwdriver to gently loosen the retaining clips or framing points.
Carefully lift the glass out and place it face-down on your prepared wooden blocks.
Step 3: Mask Off the Good Areas
If you are only doing a spot repair on the edges, you need to protect the healthy backing. Use painter’s tape to tape off the good sections.
Make sure the edges of the tape are pressed down firmly. You do not want paint stripper leaking underneath and ruining the intact silvering.
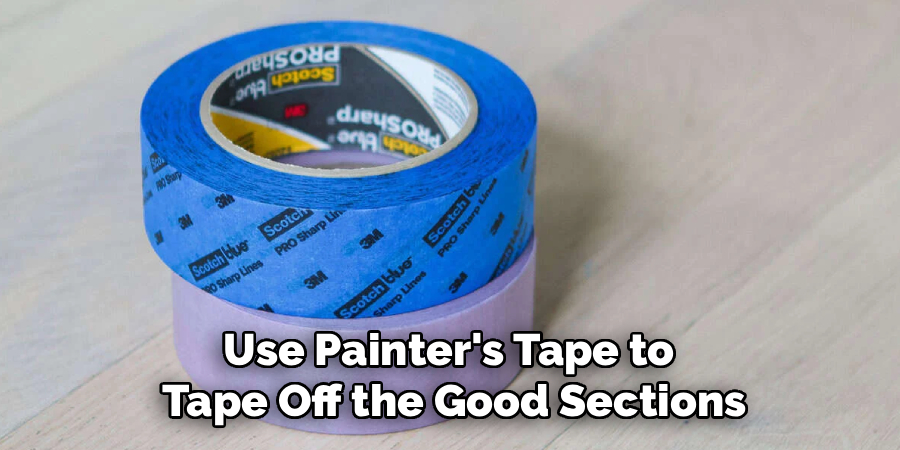
If you are stripping the entire piece, you can skip this taping step.
Step 4: Apply the Paint Stripper
Put on your respirator, safety goggles, and thick rubber gloves. Follow the instructions on your chemical paint stripper.
Brush a thick, even layer of stripper over the damaged backing. Let it sit for the recommended time, usually 15 to 30 minutes.
You will see the old paint and silver start to bubble and lift off the glass.
Step 5: Scrape Away the Old Backing
Once the backing has bubbled, grab your plastic putty knife. Never use a metal scraper, as it will permanently scratch the glass.
Gently push the plastic scraper across the surface to lift the gooey mess. Wipe the scraped debris onto a disposable rag or paper towel.
Be patient and use a light touch. Let the chemicals do the hard work.
Step 6: Thoroughly Clean the Glass
This is arguably the most critical step in learning how to repair mirror backing. The bare glass must be surgically clean.
Wash the stripped area with your ammonia-free glass cleaner and a lint-free cloth. Once it looks clean, rinse it heavily with distilled water.
Tap water contains minerals that will ruin the new silvering, so only use distilled water. Dry it completely.
Step 7: Apply the Silvering Solution
Open your resilvering kit and read the mixing instructions carefully. You will usually mix a silver solution with a reducer.
Pour the mixture evenly over the clean, bare glass. You will start to see the magic happen almost immediately.
The clear liquid will slowly turn into a brilliant, reflective silver surface. Let it deposit and set according to the kit’s timeline.
Step 8: Rinse and Dry the New Silver
Once the silver layer has fully formed, tip the glass slightly to drain off the excess chemicals.
Gently rinse the fresh silver with distilled water. Do not touch the surface with your fingers or a cloth. It is incredibly fragile right now.
Let the glass air dry completely. Setting up a gentle fan in the room can help speed up this process.
Step 9: Apply the Copper Coating
The raw silver needs a protective layer to stop it from tarnishing immediately. Most kits include a copper spray or pour-on solution.
Apply the copper coating directly over the dry silver layer. This acts as a bonding bridge between the delicate silver and the final paint.
Allow the copper layer to dry entirely before moving on.
Step 10: Paint the Final Backing
To finish the repair, you must seal the metal layers with backing paint. Your kit should provide a specialized, non-corrosive gray paint.
Use a high-quality, soft-bristled brush to apply a smooth, even coat over the copper. Do not brush too hard.
Let the first coat dry, and then apply a second coat for maximum durability.
Step 11: Reassemble the Piece
Leave the piece alone for at least 24 hours to let the backing paint fully cure.
Once it is completely dry and hardened, carefully flip the glass over to admire your work.
Place it back into the frame, secure the retaining clips, and hang it proudly back on your wall.
Safety Warnings for Glass Repair
Taking on DIY repairs is fun, but safety must always come first. Working with broken glass and stripping chemicals requires strict precautions.
Please keep the following safety warnings in mind while you work:
- Toxic Fumes: Paint stripper and silvering chemicals emit harsh vapors. Always work outdoors or in a garage with large fans running.
- Chemical Burns: Silver nitrate can stain your skin black for weeks and cause burns. Never skip the heavy-duty rubber gloves.
- Sharp Edges: Even framed pieces can have dangerously sharp, raw edges underneath. Handle the glass by the flat sides, not the sharp borders.
- Proper Disposal: Do not pour leftover silvering chemicals down the drain. Check your local municipal guidelines for hazardous waste disposal.
- Eye Protection: A single drop of chemical splash can cause severe eye damage. Keep your goggles on until cleanup is completely finished.
When to Call a Professional
While learning how to repair mirror backing is a great skill, some jobs are too big for a DIY approach. It is perfectly okay to admit when a project needs a professional touch.
You should contact a local glass restoration expert if you are dealing with a highly valuable antique. DIY kits are great, but they rarely match the flawless factory finish of professional spray booths. If the piece is worth thousands of dollars, do not risk ruining it.
Additionally, very large, wall-sized installations are incredibly dangerous to remove and handle. A sheet of glass that spans a dining room wall can easily crack under its own weight. Leave the massive, heavy panes to the pros who have specialized lifting equipment.
Finally, if the glass itself is cracked or deeply scratched on the front, resilvering will not fix it. A professional will need to assess if the piece can be salvaged or if a replacement is required.
Cost Estimate: DIY vs. Professional Repair
Is fixing it yourself actually worth the effort? In most standard cases, the answer is a resounding yes.
Let’s break down the expected costs so you can make an informed decision for your budget.
The Cost of DIY Repair
A high-quality resilvering kit typically costs between $45 and $80 online. This kit usually contains enough material to cover several square feet of glass.
If you need to buy paint stripper, gloves, and distilled water, expect to add another $20 to your bill. The total DIY cost usually hovers around $65 to $100.
The Cost of Professional Repair
Professional resilvering is a specialized service. Shops usually charge by the square foot, often ranging from $20 to $40 per square foot.
For a medium-sized bathroom piece, professional restoration can easily cost $200 to $400. If the piece requires custom framing work or transportation, the bill climbs even higher.
Ultimately, tackling the job yourself saves you hundreds of dollars and teaches you a valuable new skill.
Frequently Asked Questions
Still have a few concerns before you start scraping? We have gathered the most common questions beginners ask about this process.
Can I use aluminum foil to fix the back?
No. While taping aluminum foil behind a scratched spot might temporarily hide the wall behind it, it looks terrible. It will not reflect light properly and is not a true repair. You need to use liquid silvering chemicals for a real fix.
How long does a DIY resilvering job last?
If you prep the glass properly and seal it with two coats of backing paint, it can last for decades. Moisture control is key. Keep your bathroom well-ventilated, and your repair will hold up beautifully.
Can I just paint over the black spots?
Unfortunately, no. The black spots are oxidized silver. Painting over them seals the damage in, but it will not restore the reflection. You must strip the dead silver away and apply fresh chemicals.
What is the best way to clean my repaired mirror?
Never use ammonia-based cleaners, as they cause black edge rot. Instead, use a simple mixture of white vinegar and distilled water. Spray the cloth, not the glass, to prevent liquid from running down behind the frame.
Will a DIY repair look absolutely perfect?
DIY kits produce highly reflective, beautiful results. However, spot repairs might show a faint outline where the old and new silver meet. For a 100% seamless look, stripping and recoating the entire pane is recommended.
Conclusion
Seeing dark, flaky spots on your favorite decor can be frustrating. However, throwing the piece away is rarely the only option.
By taking the time to learn how to repair mirror backing, you can rescue your glass from the trash pile. The process requires patience, careful cleaning, and respect for the chemicals involved. But the reward of watching clear glass turn into a brilliant reflection is incredibly satisfying.
Remember to work safely, prep your glass meticulously, and let the chemicals do the heavy lifting. You will save money, gain a cool new DIY skill, and preserve your household fixtures for years to come.
Ready to bring your old glass back to life? Order your resilvering kit today and start planning your weekend project. If you found this guide helpful, be sure to share it with your fellow DIY enthusiasts!