

A sagging or tilted fence is an eyesore that can bring down your home’s curb appeal. It also compromises the security and privacy of your backyard. Knowing exactly how to repair a leaning fence is a valuable skill for any homeowner. Fixing it yourself saves you serious money compared to hiring a contractor.
Many people assume a tilted fence means the entire structure needs to be replaced. Fortunately, that is rarely the case. You can usually fix the issue over a single weekend with basic tools. This guide will walk you through the entire process from start to finish. We will cover everything from diagnosing the root cause to pouring fresh concrete.
Grab your work gloves and let us get started.
What Causes a Fence to Lean?
Before you learn how to repair a leaning fence, you need to know why it happened. Fixing the symptom without addressing the cause means your fence will just tilt again.
Here are the most common culprits behind a tilted fence:
- Soil Erosion: Heavy rain and poor drainage wash away the dirt supporting your fence post.
- Wood Rot: Moisture buildup at the base rots wooden posts, destroying their structural integrity.
- High Winds: Severe storms and strong gusts act like a sail against fence panels, pushing posts out of alignment.
- Shifting Ground: Freeze-thaw cycles or natural soil settling can easily push a post out of plumb.
- Poor Initial Installation: If the original builders did not use enough concrete, the post will eventually sag.
Essential Tools and Materials Needed
You cannot fix a fence empty-handed. Gathering your supplies beforehand makes the job much smoother. You probably already have a few of these items in your garage.
Here is what you need for this project:
Tools for the Job
- A sturdy shovel or post-hole digger
- A heavy-duty crowbar or breaker bar
- A standard carpenter’s level
- A power drill or impact driver
- A heavy sledgehammer
- A wheelbarrow or plastic mixing tub
- A garden hose with a spray nozzle
Materials Required
- Fast-setting concrete mix (1-2 bags per post)
- Scrap wood (2x4s) for bracing
- Exterior-grade wood screws
- Gravel for drainage
- Wood preservative (if using wooden posts)
Step-by-Step Fix Guide: How to Repair a Leaning Fence
Now it is time to get your hands dirty. Follow these numbered steps to restore your fence to its former glory. Take your time with each phase to ensure a permanent fix.
Step 1: Detach the Fence Panels
Do not try to fix the post while it is still holding up heavy wooden panels. The extra weight makes the job impossible. Use your power drill to carefully remove the screws holding the rails to the post.

Set the panels aside in a safe spot. If the rails are nailed in, use a pry bar to gently pull them loose. Be careful not to splinter the wood.
Step 2: Excavate Around the Base
Grab your shovel and start digging around the leaning fence post. You need to expose the old concrete footing or the buried base of the wood. Dig a hole about two feet wide around the post.
Make sure you dig all the way down to the bottom of the original hole. If you hit stubborn roots or rocks, use your heavy digging bar to break them up.
Step 3: Remove the Old Concrete
This is often the hardest part of the job. If the post is encased in old, broken concrete, you need to get it out. Use your sledgehammer and crowbar to break the old footing apart.
Sometimes, you can pull the entire post and concrete chunk out as one piece. If the old post is completely rotted at the bottom, pull out the remaining wood fragments. Clear the hole completely before moving forward.
Step 4: Inspect and Replace the Fence Post
Examine the post carefully. If it is suffering from severe rot or termite damage, throw it away. You must use a brand-new pressure-treated post to ensure proper structural integrity.
If the original post is completely healthy, you can reuse it. Treat the bottom portion with a wood preservative to block future moisture damage.
Step 5: Add a Gravel Base for Drainage
Poor drainage is the enemy of a sturdy fence. Pour about three to four inches of gravel into the bottom of your excavated hole. Tamp it down firmly with a scrap piece of wood.
This gravel layer acts as a drainage field. It keeps standing water away from the bottom of your post, drastically reducing the chance of future rot.
Step 6: Position and Level the Post
Place your fence post perfectly into the center of the hole. Hold your carpenter’s level against two adjacent sides of the wood. You need the post to be perfectly plumb (straight up and down).
Ask a friend to hold the post steady while you check the level. If you are working alone, move on to the bracing step carefully.
Step 7: Brace the Post Securely
You cannot hold the post perfectly still while pouring concrete. Grab your scrap 2x4s and create a temporary brace. Drive two wooden stakes into the ground a few feet away from the hole.
Screw the 2x4s from the stakes directly into the sides of the fence post. Check your level one more time. Adjust the braces until the bubble is dead center.
Step 8: Pour the Fresh Concrete
With the post braced, it is time to secure it. Pour dry fast-setting concrete mix directly into the hole. Fill it until the powder is about two inches below ground level.
Add water using your garden hose according to the bag’s instructions. Use a stick to poke the wet mix, eliminating hidden air bubbles. Let the concrete cure completely. This usually takes about four to six hours.
Step 9: Reattach the Fence Panels
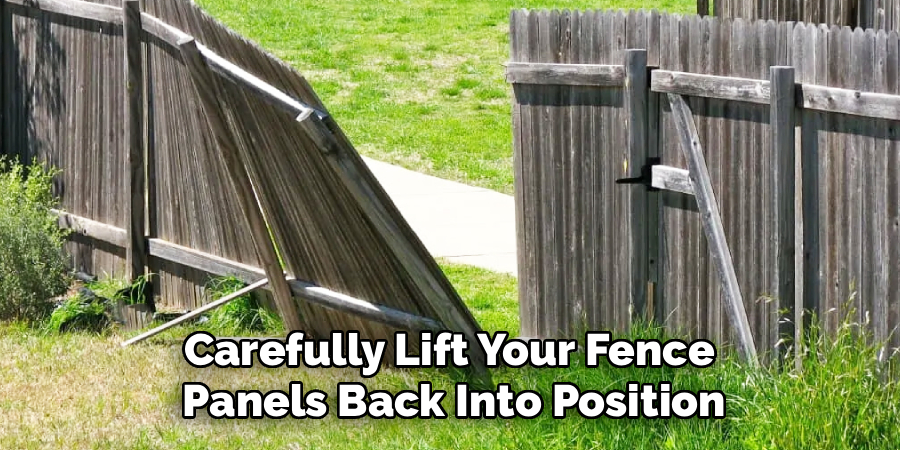
Once the concrete is rock solid, remove your wooden braces. Carefully lift your fence panels back into position. You might need a helper for this heavy lifting.
Screw the rails back into the freshly secured post using exterior-grade screws. Fill the remaining two inches of the hole with dirt to cover the concrete.
Crucial Safety Warnings
DIY repairs are incredibly rewarding, but safety must always come first. Fence repair involves heavy lifting and hidden hazards.
Keep these safety warnings in mind:
- Call 811 before you dig. You must ensure there are no buried gas, water, or electrical lines near your fence.
- Wear steel-toed boots. Dropping a heavy piece of old concrete on your foot will ruin your weekend.
- Protect your eyes and hands. Wear safety goggles when smashing old concrete and heavy leather gloves to prevent splinters.
- Lift with your legs. Fence panels are deceptively heavy and awkward. Ask a neighbor for help moving them.
When to Call a Professional
Most leaning fences are easy weekend DIY projects. However, some situations require professional intervention. Knowing your limits prevents costly mistakes.
Call a professional fencing contractor if:
- More than three posts are leaning in a row. This usually indicates a massive structural failure or severe soil grading issues.
- Your fence is made of masonry, brick, or complex wrought iron. These materials require specialized tools and masonry skills.
- The leaning post is directly adjacent to underground utility lines. A professional team knows how to navigate these hazards safely.
- You simply do not have the physical strength to dig out heavy, stubborn concrete footings.
Cost Estimate: DIY vs. Professional Repair
Fixing a fence yourself is a fantastic way to stretch your household budget. The financial savings are often substantial.
DIY Cost Estimate:
You will spend roughly $30 to $50 per post if you do the labor yourself. This includes a new pressure-treated post, two bags of concrete, and some screws. If you already have the tools, the cost remains incredibly low.
Professional Cost Estimate:
Hiring a local contractor changes the math significantly. Most companies charge between $150 and $300 per post. This covers labor, materials, and old concrete disposal. A professional fix is convenient but certainly impacts the wallet.
Frequently Asked Questions
Can I straighten a leaning fence without replacing the post?
Yes, if the post is not broken or rotted. You can dig out the soil on the leaning side, push the post level, and pour fresh concrete to hold it.
Do I really need to use concrete for fence posts?
Concrete is highly recommended for permanent structural integrity. While some people use tightly packed gravel, concrete prevents shifting during high winds and heavy rain.
How deep should a fence post hole be?
A standard rule of thumb is to bury one-third of the post’s total length. For a standard six-foot fence, you need a hole at least two feet deep.
Why is my fence leaning after heavy rain?
Heavy rain causes soil erosion and softens the dirt holding your footing. Without proper drainage, the ground turns to mud, allowing the heavy post to sink and tilt.
Can I use a metal repair spike instead of digging?
Metal repair spikes work as a temporary fix for slightly rotted wooden posts. However, digging and pouring a new footing is the only permanent way to repair a leaning fence.
Conclusion
Knowing how to repair a leaning fence is a brilliant way to protect your property value. By diagnosing the cause, gathering the right tools, and taking it step-by-step, you can handle this project like a pro. Your structural integrity will be restored, and your yard will look incredible again.
You do not need to settle for a sagging boundary line. With a little sweat equity, some fresh concrete, and an afternoon of work, your fence will stand tall against the elements.
Ready to tackle more home improvements? Check out our other beginner-friendly DIY repair guides to keep your property in perfect shape!