

Discovering a hairline fracture or a spiderweb of damage in your bathroom can feel stressful. You might worry about water leaking into your subfloor. You might even dread the thought of paying a contractor thousands of dollars for a full replacement.
But do not panic just yet. Learning how to repair crack in shower floor surfaces is easier than you think.
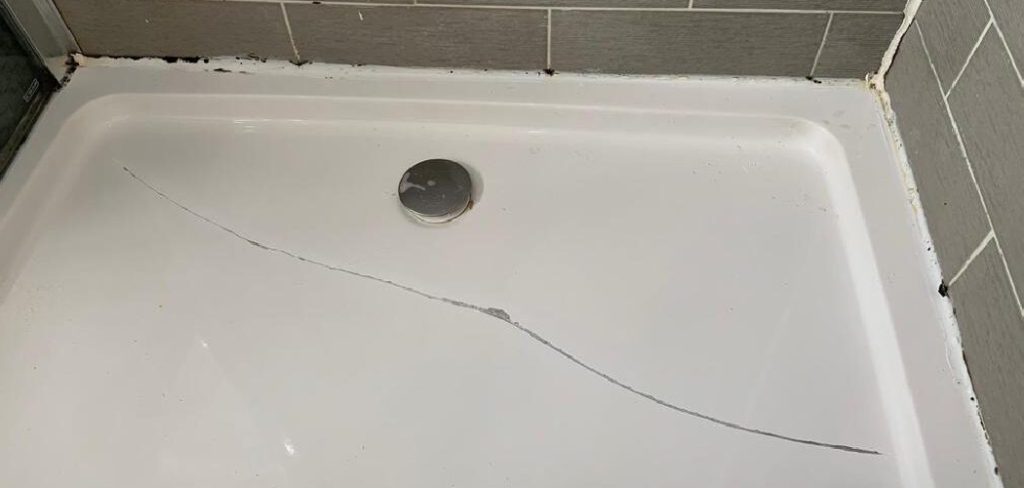
Whether you are a homeowner, a renter, or a weekend DIY enthusiast, you can handle this project. You do not need years of plumbing experience to get the job done right.
Fixing it yourself saves a massive amount of money. Instead of paying for expensive labor and a brand-new shower pan, you only pay for a few basic supplies.
By spending a Saturday afternoon on this project, you protect your home from water damage. You also gain the confidence that comes with mastering a new home repair skill. Let us dive in and fix that shower base together.
Understanding the Damage: Why Does Your Shower Base Break?
Before we start applying epoxy, it helps to know why the damage happened in the first place. Shower pans endure a lot of daily stress. Over time, that stress takes a toll on the fiberglass or acrylic.
Understanding the root cause prevents the issue from happening again. It helps you decide if a simple patch job will hold up over the long term.
What Causes This Problem?
Here are the most common culprits behind your damaged shower base:
- Lack of support underneath: If the installer did not put enough mortar under the pan, the floor flexes when you step on it. This constant bending eventually snaps the material.
- Heavy impact: Dropping a heavy shampoo bottle or a slipping metal razor can easily chip or fracture the surface.
- Age and wear: Fiberglass and acrylic become brittle over time. Years of hot water and chemical cleaners weaken the structural integrity.
- Improper installation: If the base was forced into a tight space or screwed in too tightly, the built-up tension leads to stress fractures.
- Extreme temperature changes: Rapid shifts from freezing cold to boiling hot water cause materials to expand and contract, leading to splits.
Tools & Materials Needed for the Fix
Preparation is the secret to a perfect repair. Gathering everything beforehand saves you from running to the hardware store halfway through the job.
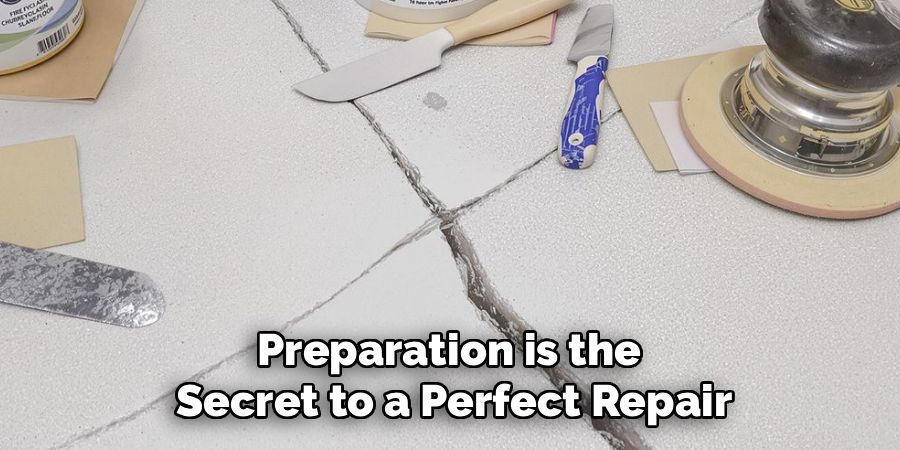
You can find all these items at your local home improvement center. Most of them might already be sitting in your garage.
Essential Tools
Grab these tools to make the repair process smooth and professional:
- Utility knife or rotary tool (like a Dremel) for widening the gap.
- Medium and fine-grit sandpaper (220-grit and 400-grit).
- A clean, lint-free microfiber cloth.
- A putty knife or a wooden craft stick for spreading the filler.
- A small mixing tray (a scrap piece of cardboard works fine).
- A hair dryer or heat gun to speed up drying times.
Must-Have Materials
Next, you need the right chemicals and compounds to seal the leak permanently:
- Fiberglass or acrylic repair kit: This is the star of the show. It usually includes a two-part epoxy or polyester resin.
- Rubbing alcohol or acetone: You need this to strip away soap scum and oils before patching.
- Painters tape: Use this to protect the surrounding floor from messy resin.
- Color match tint: Many kits come with tint, or you can buy a separate tub repair spray paint to match your white or almond base.
Step-by-Step Guide: How to Repair Crack in Shower Floor
Now we reach the fun part. Follow these simple steps carefully, and do not rush the drying times. Patience is your best friend when working with epoxy.
If you want to know exactly how to repair crack in shower floor surfaces safely, just follow this beginner-friendly sequence.
Step 1: Clean and Prep the Area
You cannot patch a dirty surface. Soap scum, body oils, and hard water stains prevent the epoxy from sticking.
Start by scrubbing the damaged area with a heavy-duty bathroom cleaner. Rinse it completely with clean water and let it dry.
Next, take a rag soaked in rubbing alcohol or acetone. Wipe down the damage and the surrounding two inches. This strips away any invisible residue.
Step 2: Widen the Gap Slightly
This step sounds scary, but it is completely necessary. If the fracture is too narrow, the repair compound cannot sink into the material. It will just sit on top and peel off later.
Take your utility knife or a rotary tool with a sanding bit. Very gently, carve out a slight “V” shape along the damaged line.
You only need to go a fraction of an inch deep. Just make enough room for the epoxy to grab onto the edges.
Step 3: Sand the Edges
Once the gap is widened, grab your 220-grit sandpaper. Lightly scuff the area immediately surrounding the damage.
Scuffing removes the glossy finish from the acrylic or fiberglass. The repair compound needs a rough surface to create a strong mechanical bond.
Wipe away all the sanding dust with your lint-free cloth. Give it one more quick wipe with rubbing alcohol to ensure it is spotless.
Step 4: Mix the Repair Compound
Put on your disposable gloves. Open your fiberglass or acrylic repair kit and read the specific mixing instructions.
Most kits use a two-part system. You mix a base resin with a liquid hardener.
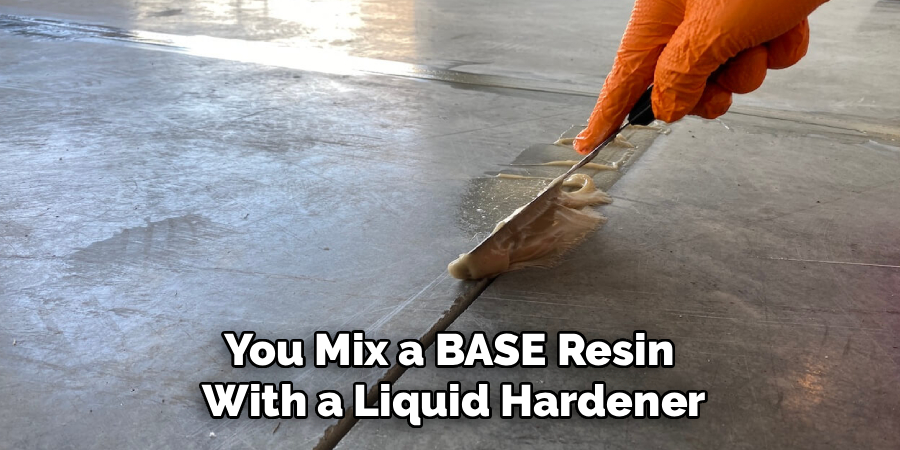
Squeeze the recommended amounts onto your mixing tray. Use a wooden stick to blend them together thoroughly. You usually only have a few minutes to work before it hardens, so move with purpose.
Step 5: Apply the Filler
Scoop up a small amount of the mixed epoxy with your putty knife or craft stick. Press it firmly down into the groove you created earlier.
Make sure the mixture fills the entire depth of the damage. You do not want any air bubbles trapped underneath.
Slightly overfill the area. The epoxy might shrink a tiny bit as it cures, and you will sand it flat later anyway.
Step 6: Let It Cure Completely
Step away from the bathroom. Do not try to rush this process. Read the manufacturer instructions on your kit to find the exact cure time.
Some kits harden in an hour, while others need a full 24 hours to set properly.
Keep the bathroom well-ventilated during this time. Keep pets and family members away so no one accidentally steps on the wet resin.
Step 7: Sand the Repaired Area Smooth
Once the patch is rock solid, it is time to blend it in. Grab your 220-grit sandpaper and gently sand the high spots.
Keep the sandpaper flat so you do not dig into the surrounding good acrylic.
Once it is level, switch to your fine 400-grit sandpaper. Buff the patch until it feels completely smooth to the touch. You should not be able to feel the transition between the old floor and the new patch.
Step 8: Apply the Color Match Finish
The patch will likely be a different color than your base. To make the repair invisible, apply your color tint or tub touch-up spray.
Mask off the surrounding area with painters tape. Apply light, even coats of the spray paint.
Let the paint dry completely before using the shower. Congratulations, you just fixed your own bathroom!
Important Safety Warnings
Working with chemicals requires some basic safety precautions. Protect yourself and your home by following these rules.
Always wear a respirator or a high-quality mask when working with epoxy and acetone. The fumes are incredibly strong and can cause dizziness.
Turn on the bathroom exhaust fan and open a window if possible. Good airflow is essential.
Wear nitrile or latex gloves at all times. Epoxy is notoriously difficult to wash off your skin, and hardeners can cause irritation.
Wear safety glasses, especially when using a rotary tool to widen the gap. Tiny shards of fiberglass can easily fly into your eyes.
DIY vs. Pro: When to Call a Professional
DIY repairs are incredibly rewarding, but you need to know your limits. Sometimes, a patch kit simply is not enough to fix the underlying issue.
If your floor feels spongy or dips heavily when you stand on it, you have structural damage. A surface patch will crack again within a week. You need a pro to replace the mortar bed.
If the fracture is longer than six inches, a standard kit might fail. Large structural splits often require complete base replacement.
If water has been leaking for months, you might have severe wood rot or mold in your subfloor. A plumber or contractor must assess and repair the hidden water damage first.
Cost Estimate: Saving Money on Your Repair
Understanding the financial side of home repairs helps you make smart decisions. Fixing this issue yourself keeps a lot of cash in your wallet.
The DIY Cost
A high-quality fiberglass or acrylic repair kit costs between $20 and $40.
If you need to buy sandpaper, a putty knife, and some rubbing alcohol, add another $15.
Your total DIY cost will rarely exceed $55. You also invest about two to three hours of your own labor.
The Professional Cost
Calling a handyman or a plumber to patch the surface will cost between $150 and $300, depending on your location.
If a professional determines the base needs replacing, the costs skyrocket. A full tear-out and replacement runs anywhere from $800 to over $2,000.
By catching the problem early and doing it yourself, you avoid these massive contractor bills.
Frequently Asked Questions About How to Repair Crack in Shower Floor
You likely still have a few questions about this process. Here are quick answers to the most common concerns homeowners have.
Can I use super glue or caulk to fix the floor?
No. Super glue is not waterproof enough, and silicone caulk will peel away under the pressure of your feet. You must use a dedicated two-part epoxy or fiberglass resin for a permanent, watertight seal.
How long do I have to wait before using the bathroom again?
You should wait at least 24 to 48 hours after applying the final paint or epoxy. Water and soap can ruin the curing process if introduced too early. Check your specific kit instructions to be safe.
Will the patched area look obvious?
If you take your time sanding and use a good color-matching spray, the patch will be nearly invisible. Rushing the sanding process is usually what leaves a highly visible, bumpy scar.
Is it safe to ignore a small hairline fracture?
Absolutely not. Even a tiny split allows moisture to seep into your subfloor. This leads to toxic mold growth and expensive structural rot over time. Fix it immediately.
Conclusion: Ready to Fix Your Bathroom?
Tackling home maintenance does not have to be an intimidating chore. Now that you understand how to repair crack in shower floor surfaces, you can handle this problem with total confidence.
By gathering the right tools, prepping the surface properly, and applying a quality epoxy, you can restore your bathroom to its former glory. You will save hundreds of dollars and protect your home from devastating water leaks.
Remember to take your time, wear your safety gear, and follow the curing times carefully. You have got this!
If you found this guide helpful, check out our other step-by-step DIY tutorials to keep your entire home in perfect shape. Grab your repair kit today and get started on your weekend project.