

Finding broken glass in your home is always a stressful moment. Whether it was a stray baseball or a sudden temperature drop, a broken pane is a real hassle.
You might think you need to call an expensive glazier right away. But you can actually handle minor damage yourself.
Learning how to repair cracked window glass at home is an amazing way to save money. Professional fixes can cost hundreds of dollars for a simple service call.
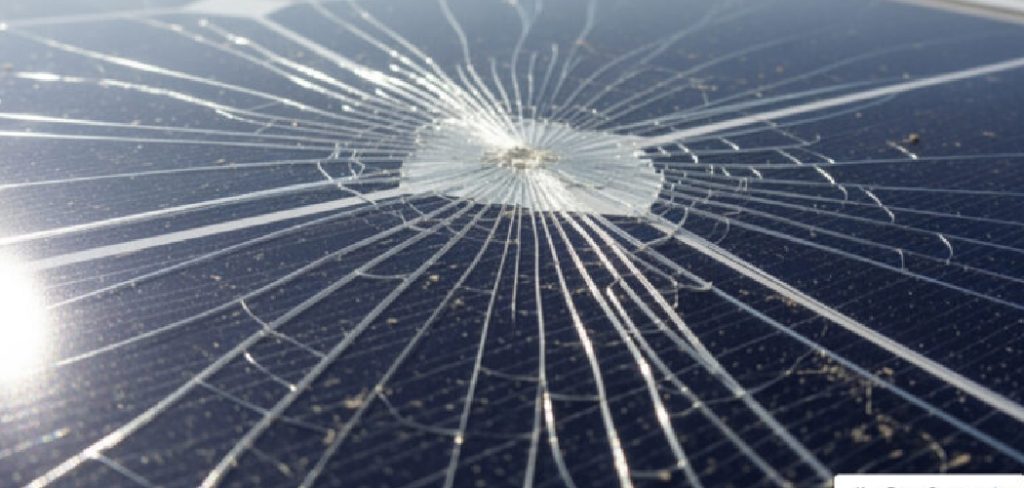
If you are a homeowner or renter willing to roll up your sleeves, you are in the right place. We will walk through this together like neighbors sharing tools over the fence.
By following a few simple steps, you can secure your home, stop drafts, and prevent the crack from spreading. Let us get your glass looking great again!
What Causes Window Cracks?
Before we fix the damage, it helps to know why it happened. Glass is tough, but it certainly has its limits.
Here are five common culprits behind broken glass in homes:
- Impact damage: A stray baseball, golf ball, or flying yard debris hits the glass.
- Thermal stress: Extreme, sudden temperature shifts cause the glass to expand and contract too quickly.
- Pressure cracks: Shifting foundations or improper installation puts too much pressure on the frame.
- Age and wear: Old window frames warp over time, squeezing the delicate glass until it snaps.
- Slamming: Closing a sash too hard sends shockwaves through the pane, leading to stress fractures.
Knowing the cause helps you prevent future headaches. If your foundation is shifting, a simple glass fix is only temporary.
Tools & Materials Needed for the Job
You cannot do good work without the right tools. Luckily, the supplies you need are cheap and easy to find.
Head to your local hardware store and grab these essentials:
- Two-part clear glass epoxy: This is the magic glue that fills and seals the crack.
- Putty knife or wooden craft stick: Used for mixing and applying the epoxy.
- Rubbing alcohol and cotton balls: Essential for cleaning the glass surface before sealing.
- Masking tape or painter’s tape: Keeps the mess contained to the damaged area.
- Razor blade or glass scraper: Helps remove excess dried epoxy for a smooth finish.
- Heavy-duty work gloves: Leather or Kevlar gloves to protect your hands from sharp edges.
- Safety goggles: Protects your eyes from rogue glass splinters.
- Dish soap and warm water: For basic cleaning prep.
Got everything? Great. Let us set up our workspace and get down to business.
Preparing for Your DIY Window Repair
Preparation is the secret to a professional-looking result. Never skip the cleaning phase.
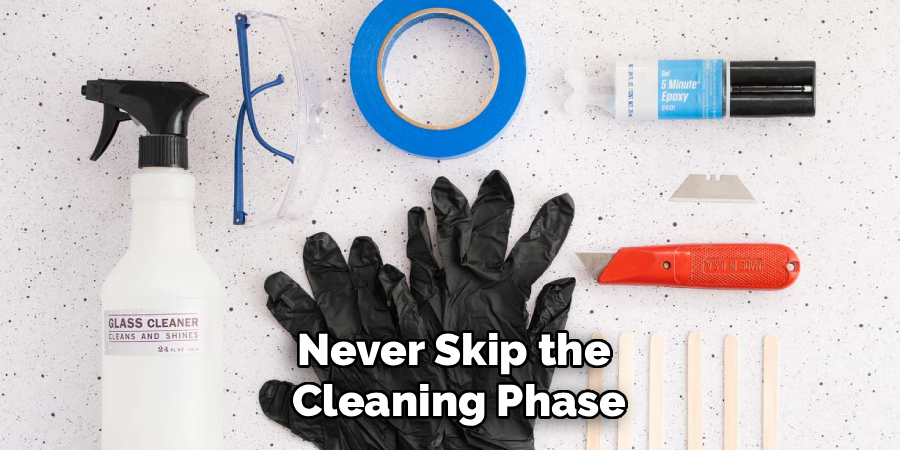
If you apply epoxy to dirty glass, it simply will not stick. You will end up with a messy, cloudy seal that eventually peels off.
Step 1: Clean the Damaged Area
Start by mixing a few drops of dish soap into warm water. Use a soft cloth to gently wash the glass around the crack.
Do not press too hard! Pressing hard can cause the fracture to spread or shatter completely.
Once the dirt is gone, wipe the area with a dry, lint-free cloth.
Step 2: Deep Clean with Alcohol
Next, grab your rubbing alcohol and a few cotton balls. Wipe down the crack and the surrounding inch of glass.
Alcohol removes invisible oils and leftover soap residue. It also evaporates incredibly fast.
Give it about two minutes to dry completely. The surface must be bone-dry before the epoxy touches it.
Step-by-Step Fix Guide: How to Repair Cracked Window Glass
Now comes the fun part. We are going to fill that annoying fracture and make your glass strong again.
Take your time with these steps. Rushing leads to messy results.
Step 1: Set Up Your Tape Border
We want the epoxy in the crack, not smeared all over the pane. Grab your masking tape.
Carefully apply tape just along the edges of the crack. Leave a tiny gap right over the fracture line.
This acts as a stencil. It keeps your work neat and limits the scraping you have to do later.
Step 2: Mix the Two-Part Epoxy
Open your clear glass epoxy package in a well-ventilated area. It usually comes in a double-syringe.
Squirt equal amounts of the resin and hardener onto a disposable surface. A piece of cardboard works perfectly for this.
Use your wooden craft stick to mix them together thoroughly. You usually have about five minutes before it starts to harden.
Step 3: Apply the Epoxy to the Crack
Scoop up a small amount of the mixed epoxy with your putty knife or craft stick.
Gently press the epoxy directly into the fracture. Work from one end of the crack to the other.
Use a smooth, sweeping motion. Try to force the liquid down into the gap, not just on top of it.
Step 4: Let the Epoxy Cure
Once the crack is filled, scrape off any massive globs of excess epoxy with your putty knife.
Now, step away and let it cure. Check the instructions on your specific epoxy brand for curing times.
Most brands require at least a few hours to dry, and up to 24 hours to fully cure. Do not touch it while it dries!
Step 5: Remove Tape and Scrape Excess
When the epoxy is completely dry to the touch, peel away your masking tape.
Take your razor blade and hold it at a 45-degree angle against the glass.
Gently scrape away the dried epoxy that sits above the surface level of the glass.
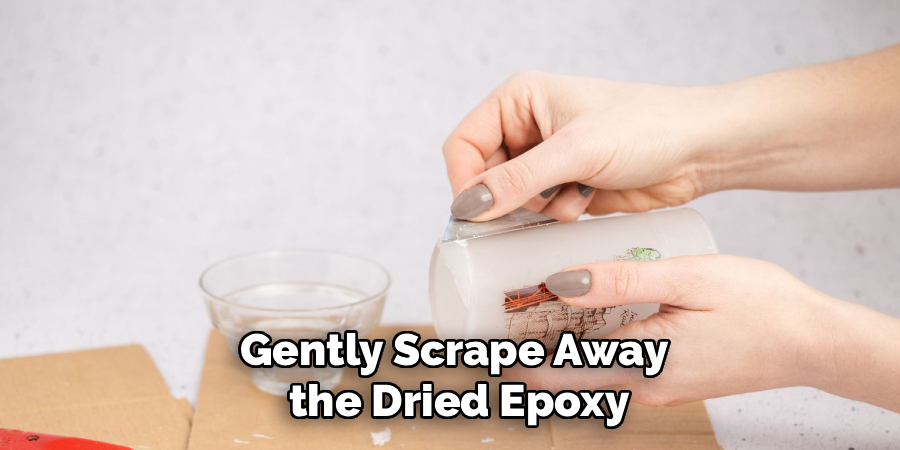
Wipe away the shavings with a damp cloth. You should be left with a smooth, clear seal!
Temporary Quick Fixes for Emergencies
Sometimes, you do not have time for a full epoxy repair right away. Maybe a storm is rolling in.
If you need a quick patch to keep the wind out, try clear nail polish. Paint a thin layer over the crack and let it dry.
Repeat this with two or three coats. It holds the glass together temporarily and keeps drafts out.
Heavy-duty clear packing tape is another decent short-term solution. Place a strip smoothly over the crack on both sides of the glass.
Just remember, these are band-aids. You still need to do a proper repair or replacement later.
Important Safety Warnings
Working with broken glass is risky. Safety should always be your absolute priority.
Never press hard on a cracked pane. Even a slight push can cause the entire window to shatter inward.
Always wear your heavy-duty gloves and safety goggles. Tiny glass shards are practically invisible but incredibly sharp.
If the glass feels loose in the frame, stop immediately. It is no longer structurally sound and could fall out on you.
Keep children and pets out of the room while you work. Stray glass splinters on the floor are a major hazard for bare feet and paws.
When to Call a Professional
DIY is fantastic, but a smart homeowner knows their limits. Some damage is simply beyond a tube of epoxy.
If the crack is longer than six inches, you need a professional. The glass has lost too much structural integrity.
Shattered glass or missing chunks cannot be repaired with glue. You need a full pane replacement.
Double-pane windows are tricky. If a crack breaks the seal between the panes, condensation will build up inside.
You cannot fix a broken thermal seal at home. A glass technician will need to replace the glass unit to restore your home’s energy efficiency.
When in doubt, get an expert opinion. Many local glass shops offer free estimates.
Cost Estimate: DIY vs. Pro Repair
Wondering how much cash you are actually saving? Let us break down the math.
A DIY epoxy repair is incredibly budget-friendly. A good two-part glass epoxy costs around $5 to $10.
If you need to buy a putty knife, razor blades, and alcohol, add another $10. Your total DIY cost is usually under $25.
Calling a professional tells a different story. Glaziers charge for labor, travel time, and materials.

A standard professional repair or single-pane replacement often starts between $150 and $300.
If you have large or specialized double-pane windows, that cost can easily soar above $500.
Doing it yourself for minor cracks keeps hundreds of dollars in your pocket. It is definitely worth the afternoon of effort!
Dealing with Wood Frame Damage
Sometimes the glass is not the only thing hurting. Old wooden frames can rot and swell.
If your frame is warped, it will just break the glass again after you fix it.
Check the window sash for soft, rotting wood before starting your glass repair.
You might need to scrape out old window glazing putty and replace it.
Keeping the frame healthy ensures your new glass repair actually lasts through the seasons.
Upgrading for Better Insulation
While you are working on your windows, it is a great time to check for drafts.
A repaired crack seals one leak, but worn-out weatherstripping causes others.
Consider adding new foam weatherstripping around the sashes. It is cheap and easy to peel and stick.
This simple step lowers your heating bill and makes your home much cozier.
Keeping Your Windows Clean
Once your repair is done, you want to admire your handy work.
Avoid using harsh chemical cleaners on your newly cured epoxy.
Stick to a gentle mix of vinegar and water for your regular window washing.
Wipe with a microfiber cloth to prevent streaks and protect the epoxy seal.
Frequently Asked Questions
Can I use super glue to fix a broken window?
Super glue can hold tiny chips temporarily, but it is not ideal for long cracks. Two-part glass epoxy is much stronger, withstands temperature changes better, and dries clearer.
How long does a DIY window repair last?
If done correctly with high-quality epoxy, a repair can last for years. However, if the frame is shifting or the window faces extreme weather, the crack may eventually spread.
Will the crack be completely invisible after repairing it?
No. The epoxy fills the gap and restores strength, but a faint line will usually still be visible. The goal is structural safety and sealing out drafts, not total invisibility.
Is it safe to leave a cracked window alone?
No, leaving it alone is risky. Temperature changes and wind pressure can cause the crack to grow rapidly, eventually shattering the glass and creating a major safety hazard.
Does homeowners insurance cover a cracked window?
It depends on the cause of the crack. If it was caused by a covered peril like a storm, insurance might pay. However, your deductible is often higher than the cost of a simple repair.
More Tips on How to Repair Cracked Window Damage
If you live in a very cold climate, wait for a warmer day to do your epoxy repair.
Epoxy does not cure well in freezing temperatures. If you must fix it in winter, warm the glass gently with a hair dryer first.
Do not hold the hair dryer too close! Gentle, sweeping heat is best to avoid thermal shock.
Patience is your best tool. The better you prep and cure, the stronger your window will be.
Conclusion
Handling household damage does not have to be a nightmare. Now you know exactly how to repair cracked window glass without draining your wallet.
By taking the time to clean the surface, apply a strong epoxy, and cure it properly, you have extended the life of your window. You should be proud of tackling this project!
Remember, minor DIY fixes are perfect for small fractures, but never hesitate to call a pro if the glass is dangerously shattered. Safety always comes first.
Have you tried this repair method, or are you dealing with a stubborn draft? Drop a comment below and let us know how your window project turned out!