

Seeing a crack in your favorite wooden table is frustrating. You might think the piece is completely ruined. Do not throw it out just yet. You can fix this problem yourself right at home.
Learning how to repair cracks in wood is a valuable skill. It saves you serious money on expensive furniture replacements. It also keeps you from hiring pricey repair technicians.

Anyone can master this simple repair process. You just need a little patience and the right supplies. Homeowners and renters face this issue all the time. Wood is a natural material that changes over time.
We will walk through the entire repair process together. You will feel proud of the results. Let us get that wood looking brand new again.
What Causes This Problem?
Wood is highly sensitive to its environment. Changes in your home directly impact your wooden items. Here are the most common causes of wood cracks:
- Moisture changes: Wood swells when wet and shrinks when dry.
- Temperature swings: Rapid heating and cooling stress the wood fibers.
- Direct sunlight: UV rays dry out the natural oils in wood.
- Heavy weight: Overloading furniture causes structural stress and splitting.
- Natural aging: Older wood naturally loses moisture and turns brittle.
Tools & Materials Needed
Having everything ready makes the job much easier. You do not want to run to the hardware store halfway through. Gather these items before you begin.
Here is your essential DIY shopping list:
- Safety glasses and a dust mask
- A flat putty knife
- High-quality wood filler (for small cracks)
- Two-part epoxy resin (for large cracks)
- Medium and fine-grit sandpaper (120 and 220 grit)
- A sanding block or power sander
- Wood stain or paint to match your piece
- Clean microfiber cloths
- A soft bristle brush or vacuum
- Painter’s tape to protect edges
Best Methods for How to Repair Cracks in Wood
Choosing the right approach is very important. Not all cracks require the exact same treatment. The size of the damage dictates your method.
Here is how to evaluate your specific situation.
Using Wood Filler for Small Cracks
Wood filler is perfect for tiny splits. It is easy to use and dries very fast. This paste fills small gaps nicely. It works best on cracks thinner than a pencil.
You can buy it pre-mixed at any store. Many brands even offer color-matched options. This makes hiding the repair much simpler.
Using Epoxy Resin for Deep Cracks
Large gaps need something much stronger. Epoxy resin provides incredible structural support. It binds the broken pieces together permanently.
Epoxy flows deep into the damaged wood grain. It dries rock hard and prevents further splitting. It is the best choice for structural repairs.
Step-by-Step Fix Guide: How to Repair Cracks in Wood
Now it is time to get your hands dirty. Follow these simple steps carefully. Take your time with each phase of the project. Good prep work leads to great results.
Step 1: Clean the Damaged Area
Start by cleaning the crack thoroughly. Dirt and old finish will block the filler. Use a small brush to sweep out debris.
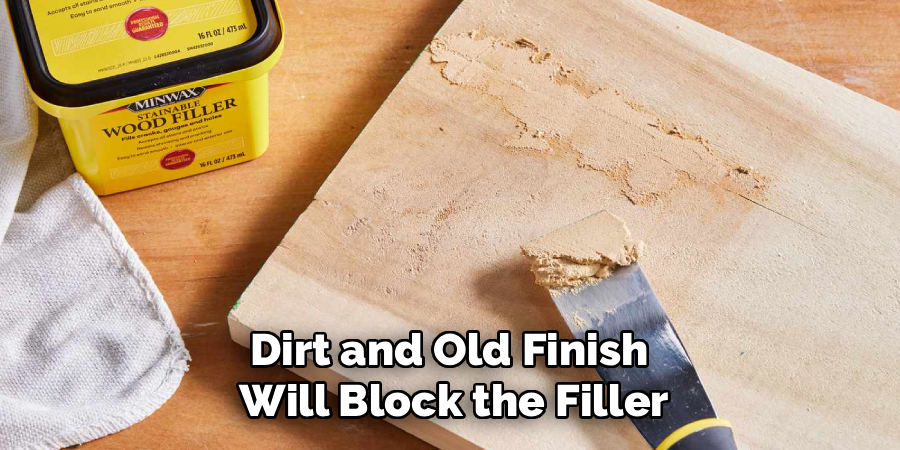
You can also use a shop vacuum. Get all the loose dust out of the gap. Wipe the surrounding wood with a damp cloth. Let the area dry completely before moving on.
Step 2: Tape Off the Edges
Protect the good wood around the crack. Apply painter’s tape along both sides of the damage. This keeps your filler exactly where you want it.
Taping saves you a lot of sanding time later. It keeps the messy epoxy off your nice finish. Press the tape down firmly to seal the edges.
Step 3: Mix Your Materials
If using epoxy, follow the package instructions closely. Mix the two parts together on a scrap board. Stir thoroughly until the color is completely uniform.
If using wood filler, simply open the container. Give it a quick stir with your putty knife. Make sure it is soft and pliable.
Step 4: Apply the Filler or Epoxy
Scoop up your filler with the putty knife. Press it firmly down into the crack. You want to eliminate any trapped air bubbles.
Overfill the crack just a little bit. The material will shrink slightly as it dries. Smooth the top flat with your knife blade.
Step 5: Let It Cure Completely
Patience is key during this step. Do not rush the drying process at all. Wood filler usually dries in a few hours.
Epoxy resin needs much longer to cure. Leave epoxy alone for at least 24 hours. Check the manufacturer label for exact drying times.
Step 6: Begin Sanding the Surface
Remove the painter’s tape very carefully. Now grab your 120-grit sandpaper and sanding block. Sand the patched area until it is almost flush.
Always sand in the direction of the wood grain. This prevents ugly scratches on your piece. Switch to 220-grit sandpaper for the final smoothing.
Step 7: Clean the Dust Away
Sanding creates a massive amount of fine dust. You must remove all of this dust now. Use a vacuum attachment to clean the area.
Wipe the wood down with a clean microfiber cloth. You can also use a specialized tack cloth. The surface must be perfectly clean for staining.
Step 8: Apply Staining and Finishing
Now it is time to hide your hard work. Apply your chosen wood stain with a rag. Blend it into the surrounding natural wood grain.
Wipe away any excess stain immediately. Let the color dry according to the instructions. Finally, apply a clear topcoat to protect the repair.
Important Safety Warnings
Safety must always come first in DIY projects. You are working with chemicals and fine particles. Protect your lungs by wearing a good dust mask.
Always wear safety glasses when sanding wood. Keep your workspace well ventilated during the repair. Open a window or use a fan if indoors.
Wear disposable gloves when handling epoxy resin. It is very sticky and hard to wash off. Keep all chemicals away from children and pets.
When to Call a Professional
DIY is great, but it has limits. Some repairs are simply too dangerous to tackle alone. Structural damage to load-bearing beams requires an expert.
If a large antique cracks, call a professional restorer. They know how to preserve the historical value. Call a pro if you lack the proper tools.
Major damage to expensive hardwood floors is tricky. A bad DIY job can ruin the entire floor. Know your limits and ask for help when needed.

Cost Estimate: DIY vs. Pro Repair
Fixing things yourself keeps cash in your pocket. A DIY wood repair is incredibly budget-friendly. You likely own some of the tools already.
A small tub of wood filler costs about $10. A basic epoxy kit runs around $20 to $30. Sandpaper and stain will cost another $15 total. Your total DIY cost is roughly $45 to $60.
Hiring a professional is much more expensive. A furniture repair specialist charges by the hour. You can expect to pay $100 to $200 minimum.
For complex antiques, the bill easily tops $500. Doing it yourself saves you hundreds of dollars. The small investment in supplies is absolutely worth it.
Frequently Asked Questions
You might still have a few concerns. That is completely normal for a beginner. Here are common questions people ask about this project.
Can I use wood glue to fix cracks?
Wood glue alone is not great for filling gaps. It shrinks too much and lacks structural strength. Mix glue with sawdust to create a basic filler instead.
Will the repaired crack show after staining?
Standard wood fillers do not always absorb stain well. Try to buy a filler that is labeled “stainable.” You can also buy filler pre-matched to your wood color.
How long does epoxy take to fully harden?
Most standard epoxy resins cure in 24 hours. However, temperature and humidity affect this timeline greatly. Always read the specific instructions on your product package.
Do I have to sand the entire piece of furniture?
No, you do not need to sand everything. Just sand the repaired area and slightly beyond it. Blend the new stain carefully into the existing finish.
Can I fix a crack that goes all the way through?
Yes, but it requires extra care. Tape the bottom of the crack securely first. Then pour the epoxy in from the top side.
Conclusion
You now know how to repair cracks in wood. It is a highly rewarding project for any homeowner. You do not need to be a master carpenter.
Take your time with the preparation and sanding phases. Match your stain carefully to the original wood grain. Your furniture will look fantastic once you finish it.
Grab your supplies and start your repair this weekend. You will love saving money and restoring your items. Share your successful repair photos with us online!