

Walking across your living room should not feel like hiking down a steep hill. A sloping, bouncy, or dipping floor can make any homeowner nervous.
You might worry that your house is failing or that a massive repair bill is coming your way. Fortunately, fixing this issue is entirely possible for a dedicated homeowner.
Learning how to repair a sagging floor and save your home thousands of dollars in contractor fees. The process takes patience, some physical effort, and the right tools.
You do not need to be a master carpenter to stabilize your home. We will walk through the entire process together. By the end of this guide, you will know exactly how to tackle this project safely and effectively.
What Causes This Problem?
Before you start lifting anything, you must understand why the wood beneath your feet gave way. Floors dip for several distinct reasons.
If you do not address the root cause, your fix will only be temporary. Here are the most common culprits behind structural dips:
- Excessive Moisture: Damp crawlspaces or basement leaks cause wooden floor joists to rot and weaken over time.
- Termites and Pests: Wood-destroying insects eat away at the structural integrity of your beams and joists.
- Foundation Settling: The ground under your home can shift over the years, taking your foundation supports with it.
- Overspanned Joists: Sometimes, builders place joists too far apart to handle the weight of modern furniture or appliances.
- Compromised Structural Modifications: Plumbers or electricians sometimes cut large notches into joists to run pipes, ruining the wood’s strength.
- Failing Support Columns: Old wooden support posts can rot at the base, or brick piers can crumble from age.
Tools & Materials Needed
You need the right equipment to lift thousands of pounds of wood safely. Do not cut corners on your supplies.
Gather these items before you head into your crawlspace or basement:
- Hydraulic Bottle Jacks: You need at least two 12-ton to 20-ton bottle jacks to do the heavy lifting.
- Adjustable Steel Columns: These permanent jack posts will replace or support your failing wooden beams.
- 4×4 or 6×6 Wooden Posts: Pressure-treated lumber works best for creating temporary lifting cribs or spreading weight.
- Concrete Pavers or Solid Blocks: You need a solid, flat surface to place your hydraulic jacks on.
- Steel Shims: Heavy-duty metal plates help you fine-tune the height between the beam and the new post.
- Long Spirit Level or Laser Level: Essential for determining when the floor is perfectly flat again.
- String Line: A simple string helps you track your progress across long stretches of floor.
- Safety Gear: Wear safety glasses, a hard hat, thick leather gloves, and a high-quality dust mask.
- Bright Work Lights: Crawlspaces are dark, and you need to see every detail of the wood you are working on.
Preparing the Workspace
You must prepare the area properly before attempting to lift your house. Rushing this stage often leads to mistakes.
Inspect the Damage
Crawl under your house with a bright flashlight and inspect every floor joist. Look for dark spots, mold, crumbling wood, or insect damage.
If you find active leaks, fix the plumbing or drainage issue immediately. You must stop the water intrusion before installing new wood.
Find the Lowest Point
Use a laser level or a long straight board inside the house to find the deepest part of the dip. Mark this exact spot on the floor with painter’s tape.
Go back underneath the house and locate that exact spot on the joists below. This is where you will concentrate your lifting efforts.
Clear the Area
Remove all debris, old insulation, and rocks from the ground where you plan to work. You need a completely flat, clean dirt or concrete surface.
If your crawlspace has a dirt floor, dig a shallow, perfectly level footprint for your concrete base blocks. The ground must be solid and undisturbed.
Step-by-Step Fix Guide
This section breaks down exactly how to repair a sagging floor. Take your time with these steps.
Step 1: Build a Solid Base
Place your solid concrete blocks or poured concrete footings directly under the sagging joist. Ensure the block sits perfectly level on the ground.
Never place a bottle jack directly on dirt, as the pressure will simply push the jack into the soil. You need a wide, solid base to distribute the extreme weight.
Step 2: Position the Hydraulic Jacks
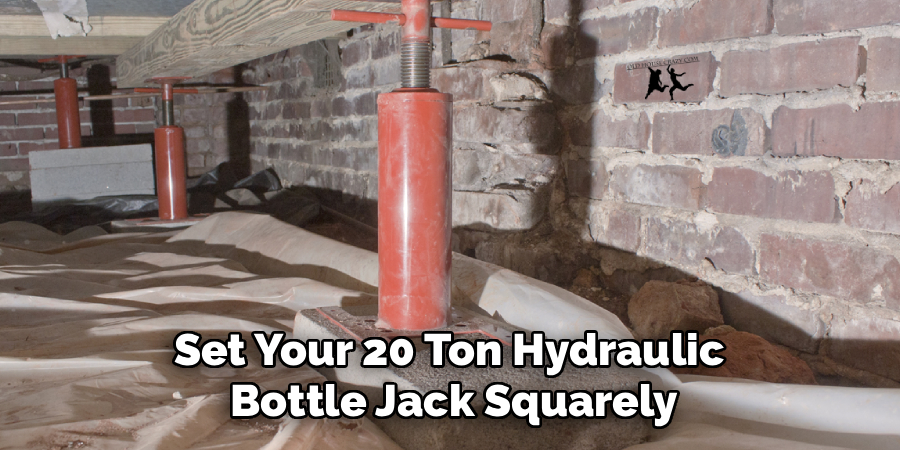
Set your 20-ton hydraulic bottle jack squarely in the center of your concrete base. Place a thick piece of 4×4 lumber on top of the jack.
This piece of lumber will act as a temporary lifting post. Make sure it is cut perfectly straight and stands completely plumb (vertical).
Step 3: Install a Spreader Beam
Never push a bottle jack directly against a single floor joist. The concentrated pressure can crush or snap the old wood.
Place a horizontal 4×4 beam across three or four joists directly above your jack. This spreader beam distributes the lifting force safely across a wider area.
Step 4: Begin the Initial Lift
Pump the hydraulic jack handle slowly until the wooden lifting post makes snug contact with the spreader beam. Check that everything is perfectly straight.
If anything looks tilted or unstable, release the pressure immediately and reset your base. You must have a completely vertical lift to prevent accidents.
Step 5: Lift Slowly Over Time
You cannot push the floor back to a level position in a single day. Lifting too fast will crack your drywall, snap water pipes, and damage doors upstairs.
Pump the jack just enough to raise the floor about 1/8 to 1/4 of an inch. Stop lifting once you hear the wood start to creak.
Step 6: Wait and Repeat
Leave the jack under tension and walk away. Let the house sit for 24 to 48 hours so the wood framing can adjust to the new position.
Return every day or two to give the jack one or two more pumps. Continue this slow process until your string line or laser level shows the floor is flat.
Step 7: Install Permanent Supports
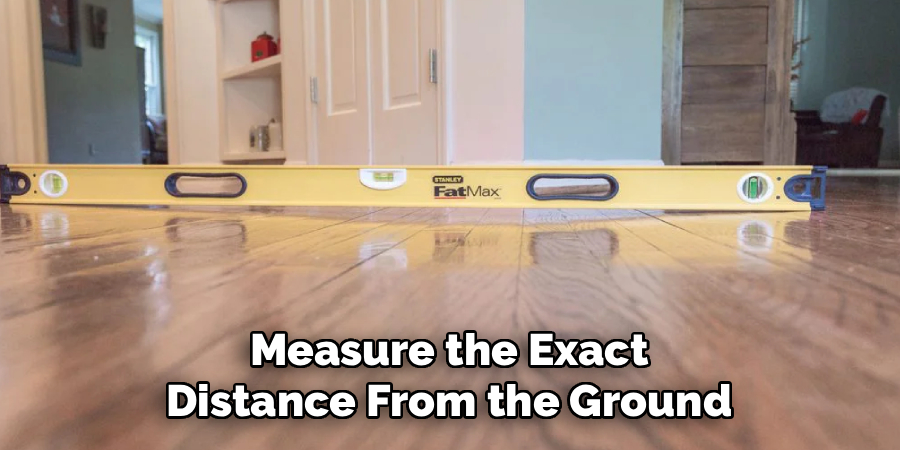
Once the floor is level, measure the exact distance from the ground footing to the bottom of the joist. Cut a permanent 4×4 post to size, or set up an adjustable steel column.
Place the permanent support securely next to your hydraulic jack setup. Use heavy-duty steel shims to fill any tiny gaps between the new post and the beam.
Step 8: Lower and Secure
Slowly release the pressure on your hydraulic bottle jack. The weight of the house will gently transfer onto your new permanent steel or wooden column.
Fasten the new column to the beam using steel brackets and heavy lag screws. Remove your temporary jacks and spreader beams from the crawlspace.
Crucial Safety Warnings
Working under tons of wood and furniture carries serious risks. You must prioritize your physical safety above the repair schedule.
Never place your hands or body directly under a lifted beam while the hydraulic jack supports it. Always keep your hands on the sides of the materials.
Always use secondary, temporary supports (called cribbing) alongside your hydraulic jacks. If a jack fails, the cribbing will catch the beam and save your life.
Keep a close eye on the plumbing pipes and electrical wires attached to the joists. Lifting a floor can stretch and break rigid PVC pipes or pull wires loose.
When to Call a Professional
DIY repairs are incredibly rewarding, but you must recognize your limits. Certain situations require professional engineering and heavy machinery.
If your foundation walls are actively bowing, cracking, or crumbling inward, step away. Foundation failure requires an expert structural engineer to assess the damage.
Extensive termite damage that spans the entire length of your home is rarely a DIY job. You might need to replace entire main carrying beams, which requires temporary house shoring.
If you feel completely overwhelmed or unsafe in the crawlspace, hire a contractor. Your peace of mind is worth the extra expense.
Cost Estimate: DIY vs. Pro Repair
Budgeting for this project depends entirely on who does the labor. Handling the job yourself keeps the expenses incredibly low.
The DIY Cost
Fixing a localized dip yourself usually costs between $150 and $400. You mainly pay for materials like lumber, concrete blocks, and adjustable steel columns.
If you need to purchase a pair of high-quality 20-ton bottle jacks, add another $100 to $150. You can reuse these jacks for future automotive or home projects.
The Professional Cost
Hiring a contractor to level your floors costs significantly more. Most professionals charge between $1,500 and $5,000 for a standard floor leveling job.
If the contractors need to pour new concrete footings or replace severely rotted main beams, the bill can quickly exceed $10,000. Labor is the most expensive factor in structural repairs.
Frequently Asked Questions
People generally have a lot of concerns when dealing with foundation and structural framing. Here are answers to common questions about this repair.
How long does it take to level a floor?
The setup only takes a few hours, but the actual lifting phase takes weeks. You should only raise the structure about 1/8 of an inch per day to prevent drywall damage.
Do I need a permit for this work?
Adding a new support post under your house often requires a basic building permit. Check with your local code enforcement office to ensure you meet regional safety standards.
Can I just put extra flooring over the dip?
Pouring self-leveling compound or adding layers of plywood only hides the problem temporarily. The added weight actually stresses the failing joists further, making the dip worse over time.
Will lifting the floor crack my walls?
Slow lifting minimizes the risk of cracking drywall or plaster. However, you might see minor hairline cracks appear near doorways, which you can easily patch later.
Conclusion
A sloping living room does not mean your home is destined for ruin. Understanding how to repair a sagging floor gives you the power to restore your property’s structural integrity.
By taking your time, diagnosing the root cause, and lifting the joists slowly, you can achieve professional results. You save a tremendous amount of money while gaining valuable home improvement skills.
Make sure you secure all permanent columns tightly and address any underlying moisture issues. A dry, well-supported crawlspace guarantees your floors will remain flat for decades.
Grab your flashlight, inspect your joists today, and start planning your repair strategy. You have the tools, the knowledge, and the capability to fix this problem head-on!