

Crumbling brick weakens your wall, lets water in, and drags down your home’s curb appeal. The good news? You can fix it yourself. Red brick deterioration usually starts small—a flaky surface here, a cracked mortar joint there—but it spreads fast if you ignore it. Left alone, spalling bricks invite moisture, frost damage, and costly structural problems down the line.
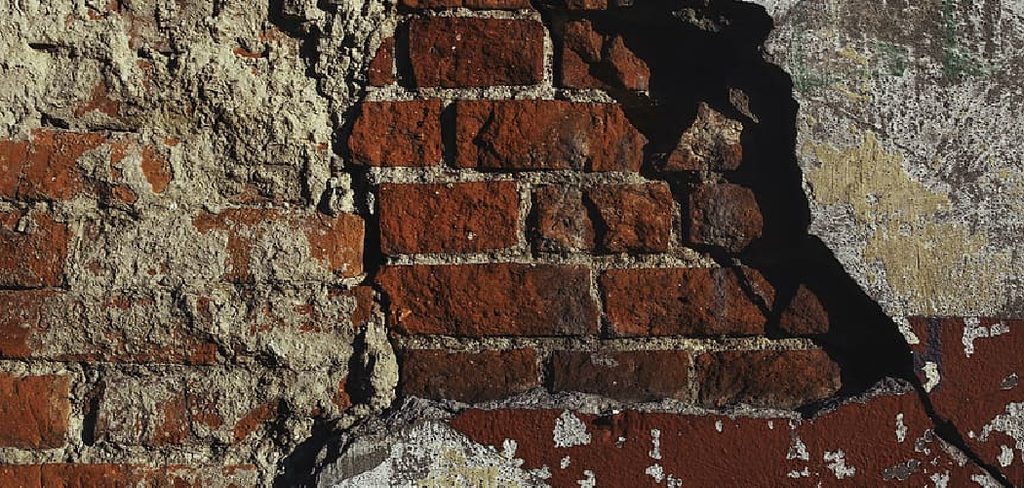
You don’t need a contractor for most of this work. With basic tools, the right materials, and a free weekend, you can stop the damage and restore a solid surface. This guide walks you through how to repair crumbling red bricks step by step, so you understand exactly what to do, why it matters, and how to get a clean, lasting result.
Why Learning to Fix Crumbling Brick Matters
Brick failure rarely stays put. Water seeps into a weak spot, freezes, expands, and breaks the brick apart from the inside. Skip the repair, and a small patch becomes a wall section.
Doing the work yourself saves money. Hiring a mason for minor masonry repair can run hundreds of dollars per visit. You handle it for the cost of a mortar bag and a few tools.
You also gain control. You catch brick deterioration early, before it threatens load-bearing walls or your foundation. You protect your home’s value and keep moisture out of your interior. And once you learn repointing and basic patching, you can maintain every brick surface on your property for years—chimneys, garden walls, steps, and facades included.
Tools and Materials You’ll Need
Gather everything before you start. Stopping mid-job to find a tool wastes drying time and momentum.
- Cold chisel and hammer — remove loose, damaged material
- Wire brush — clean out debris and dust
- Pointing trowel — pack mortar into joints
- Joint raker or grout saw — clear old mortar from joints
- Type N mortar mix — the standard for most residential brick
- Brick matching replacement units — for fully crumbled bricks
- Bucket and mixing paddle — blend mortar to the right consistency
- Spray bottle or hose — keep surfaces damp
- Safety glasses and dust mask — protect against flying chips and silica dust
- Stiff bristle brush — finish and clean joints
- Margin trowel (optional) — makes packing tight joints faster and cleaner
Step-by-Step Guide to Fixing Crumbling Red Bricks
Step 1 – Inspect the Damage
Start by reading the wall. Run your hand across the surface and press the bricks. Sound brick feels hard and solid; failing brick flakes, powders, or shifts under pressure.
Look closely at the mortar joints. Crumbling, hollow-sounding mortar signals you’ll need repointing. Tap suspect bricks with your chisel handle—a dull thud means trouble inside.
Mark every problem area with chalk. Note which bricks need full replacement and which just need surface patching. Check for the real cause too: a leaking gutter, splashing downspout, or rising damp. Fix the moisture source first, or your repair won’t last. This inspection sets your whole plan, so take your time and be thorough.

Step 2 – Clear the Work Area
Set yourself up for clean, safe work. Move furniture, planters, hoses, and anything else within reach of the wall. Lay a drop cloth or tarp at the base to catch debris.
Put on your safety glasses and dust mask now. Brick and mortar dust contains silica, and you don’t want it in your eyes or lungs. Brush away loose dirt, cobwebs, and vines from the area you’ll be working on.
Good light helps you see hairline cracks and loose joints you’d otherwise miss. If you’re working in shade, set up a work light. A clean, clear space lets you focus on the brick instead of dodging obstacles.
Step 3 – Remove the Damaged Brick and Mortar
Now comes the demolition. Use your cold chisel and hammer to chip out crumbling brick and failing mortar. Hold the chisel at a low angle and tap steadily—don’t swing wild.
For repointing, rake out the old mortar joint to a depth of about ¾ inch. Stop when you hit solid mortar. For spalling bricks that have fully broken down, work the chisel around the unit until it loosens, then pull it free.
You’ll hear a sharp crack as weak material breaks away and a duller resistance when you reach sound brick. Listen for that change. Vacuum or brush out all dust and chips when you’re done, because mortar won’t bond to a dirty surface.
Step 4 – Clean and Dampen the Surface
A clean, damp surface is the secret to a strong bond. Run your wire brush through every cleared joint and cavity to strip out fine dust and loose grit.
Dry brick pulls water out of fresh mortar too fast, which weakens the cure and causes cracking. So mist the area with your spray bottle until the brick darkens slightly. You want it damp, not dripping or pooling.
Let surface water absorb for a few minutes before you apply mortar. The brick should feel cool and moist to the touch. This single step separates repairs that last decades from ones that fail in a season. Don’t skip it, even on small patches.
Step 5 – Mix the Mortar
Mix small batches so the mortar stays workable. Add dry Type N mix to your bucket, then pour in water gradually while you stir.
Aim for a consistency like thick peanut butter—it should hold its shape on the trowel without sliding off or crumbling. Too wet, and it slumps out of the joint. Too dry, and it won’t bond.
Let the mix rest for five minutes, then stir again. This “slaking” step improves workability and strength. Only mix what you can use in about 30 minutes, because mortar starts setting fast. Clean your tools between batches so hardened bits don’t ruin your fresh mix.
Step 6 – Repoint the Mortar Joints
Pack the joints tight. Load a small amount of mortar onto your pointing trowel, then press it firmly into the raked joint with the edge of the trowel.
Fill horizontal joints first, then vertical ones. Push hard to eliminate air pockets and overfill slightly. The mortar should feel dense and packed, not loose. This tuckpointing process restores the wall’s strength and seals out water.
Work in sections you can finish before the mortar skins over. As you go, you’ll feel the joint firm up under your trowel. Wipe stray mortar off the brick faces right away with a damp sponge, before it dries and stains your red brick permanently.
Step 7 – Set Replacement Bricks
For bricks that crumbled completely, install fresh ones. Butter the cavity—bottom, sides, and back—with a generous layer of mortar.

Slide the new brick into place and press it firmly so mortar squeezes out around the edges. Tap it gently with your trowel handle to seat it level and flush with the surrounding wall. Check the alignment with a small level or by eye against neighboring bricks.
Scrape away the excess mortar and tool the joints to match the rest of the wall. Match the brick color and texture as closely as you can, so the repair blends in. When you repair crumbling red bricks this way, the patched section should disappear into the wall once it cures.
Step 8 – Tool and Finish the Joints
Shaping the joints makes the repair look professional and sheds water better. Wait until the mortar is firm enough to hold a thumbprint without smearing—usually 30 to 60 minutes.
Run a jointing tool or a piece of rounded tubing along each joint to create a smooth, concave profile. This compresses the mortar, tightens the bond, and channels rain away from the brick. You’ll see the joint take on a clean, uniform curve.
Once the joints firm up further, brush them lightly with a stiff bristle brush to remove crumbs and even out the texture. Step back and check your work. Consistent joints are the difference between a repair that looks DIY and one that looks done by a pro.
Step 9 – Cure and Protect the Repair
Mortar needs slow, moist curing to reach full strength. Mist the repaired area lightly two or three times a day for the first three days, especially in hot or windy weather.
Drape a plastic sheet loosely over the section to slow evaporation if the sun hits it directly. Rushed drying causes shrinkage cracks and weak joints, undoing your effort.
Keep traffic and pressure off the area while it sets. After about a week, the mortar is hard and stable. Once fully cured, consider applying a breathable masonry sealer to block future moisture without trapping water inside the brick. That final layer of protection helps your masonry repair survive years of weather.
Critical Mistakes to Avoid When Fixing Brick
The most common mistake is ignoring the moisture source. People patch the visible damage but never fix the leaking gutter or splashing downspout that caused it. Within months, the same bricks crumble again. Always trace the water and stop it before you touch the brick.
Using the wrong mortar ruins many repairs. Hard, modern Portland-heavy mixes are too rigid for older soft brick. The brick expands and contracts, the stiff mortar won’t move with it, and the brick face cracks and spalls. Match the mortar strength to your brick. Type N suits most homes.
Skipping surface prep is another big one. Mortar bonds to clean, damp brick—not dusty, dry brick. If you pack fresh mortar into a dirty joint, it pulls away as it cures. Brush, vacuum, and dampen every time.
Rushing the cure causes shrinkage cracks. Fresh mortar that dries too fast loses strength and pulls apart. Mist it and keep it shaded for several days.
Finally, don’t smear mortar across the brick faces and leave it. Dried mortar stains red brick and looks sloppy. Wipe spills off immediately with a damp sponge.
Expert Tips
Buy a small bag of mortar dye if your existing joints have aged to a specific tone. Tinting your fresh mix to match keeps repairs invisible.
Work in mild weather. Aim for temperatures between 50°F and 80°F. Cold slows curing and risks freezing; extreme heat dries mortar before it bonds.
Test your mortar consistency on a scrap before you fill real joints. Adjust water by the splash, not the cup—it’s easy to overshoot.
Keep a spray bottle clipped to your belt. Frequent light misting during the job keeps surfaces at the perfect damp level without soaking them.
For large walls, fix the highest sections first. Debris and runoff fall downward, so working top to bottom keeps finished areas clean.
Frequently Asked Questions
Why are my red bricks crumbling in the first place?
Water is almost always the cause. Moisture soaks into the brick, freezes, expands, and breaks the surface apart—a process called spalling. Common culprits include:
- Leaking gutters or downspouts
- Rising damp from the ground
- Failed, cracked mortar joints
- Old, soft brick past its lifespan
Fix the water source first, or the damage returns.
Can I repair brick myself, or do I need a pro?
You can handle most surface and joint repairs yourself. Patching spalling bricks, repointing, and replacing individual units need only basic tools and patience. Call a professional when damage spreads across large areas, when cracks run through load-bearing walls, or when you spot foundation movement. Those signs point to structural issues that go beyond a DIY weekend fix.
What type of mortar should I use?
Use Type N mortar for most residential brick. It’s a medium-strength mix that flexes enough to work with softer red brick without cracking the faces. Avoid hard, high-Portland mixes on older homes—they’re too rigid and accelerate brick deterioration. Match the mortar to the brick, not the other way around. When unsure, Type N is the safe default.
How long does the repair take to fully cure?
The mortar feels firm within an hour and stable within a week. Full cure strength takes about 28 days. During the first three days, mist the repair to slow drying and prevent shrinkage cracks. Keep the area shaded in hot weather. Don’t apply sealer or heavy pressure until the mortar has cured for at least seven days.
Can I just paint or seal over crumbling brick?
No. Paint and standard sealers trap moisture inside the brick, which speeds up decay rather than stopping it. Fix the structural damage first—remove loose material, repoint, and replace failed bricks. Then, if you want extra protection, apply a breathable masonry sealer. Breathable products block rain while letting trapped moisture escape, keeping the brick dry and sound.
Conclusion
Crumbling brick won’t fix itself, and waiting only makes it worse. But you now have a clear path forward. Inspect the damage, stop the moisture, remove the failed material, and rebuild with the right mortar. Repointing, tuckpointing, and setting fresh bricks are skills any homeowner can master with a little practice.
The work rewards you twice. You save the money a mason would charge, and you protect your home from water damage, frost cracking, and spreading deterioration. A solid, well-pointed wall keeps your house dry, strong, and good-looking for decades.
Start small. Pick one damaged section, gather your tools, and follow the steps. Each joint you pack and every brick you set builds your confidence and your skill. Before long, you’ll handle masonry repair across your whole property without a second thought.
You have everything you need to repair crumbling red bricks the right way—so grab your trowel, pick a mild day, and get started. Your walls will thank you.