

A crack in your favorite crash or ride feels like a small disaster. The tone goes dull. The sustain dies early. And that buzzing rattle ruins every hit. The good news? You don’t have to throw it out or pay a tech to repair cracked cymbal damage for you. With a few common tools and a steady hand, you can stop a crack from spreading and bring your cymbal back to playable shape.

Most cracks start small and grow with every strike. Catch one early, and your fix takes under an hour. Wait too long, and the metal fatigue spreads past saving.
This guide walks you through each step how to repair cracked cymbal, from spotting the damage to finishing the repair, so you can rescue your cymbal at home with confidence.
Why Fixing a Cracked Cymbal Is Worth Your Time
A quality bronze cymbal costs anywhere from $80 to $400. Tossing one over a hairline crack wastes real money. Fixing it yourself costs a few dollars in supplies and a slice of your afternoon.
There’s more than money on the line. A cracked cymbal sounds wrong. It chokes the sustain, adds an ugly buzz, and throws off your whole kit. A clean repair restores most of that tone and keeps the crack from creeping further.
You also build a skill you’ll use again. Cymbals crack. It happens to drummers at every level. Once you know the method, you handle the next one in minutes.
Best of all, you keep playing the cymbal you already love instead of breaking in a new one.
Tools and Materials You’ll Need
Gather everything before you start. A clean setup saves time and protects you from mistakes mid-repair.
- Drill with a small drill bit (1/8 inch or 3mm) to stop the crack from spreading
- Rotary tool or fine metal file to smooth rough edges
- Tin snips or a jeweler’s saw for trimming damage near the edge
- Sandpaper (220 and 400 grit) to clean and refine the metal
- Safety glasses and work gloves to protect against sharp shards
- Permanent marker to mark your drill points
- Clamp or vise with soft jaws to hold the cymbal steady
- Rubbing alcohol and a cloth to clean the surface
- Cymbal repair kit(optional) for an all-in-one set of bits and finishing tools
Lay it all out on a stable bench. You’ll move faster and stay safer.
Step-by-Step Guide on How To Repair Cracked Cymbal
Step 1 – Inspect the Crack Closely
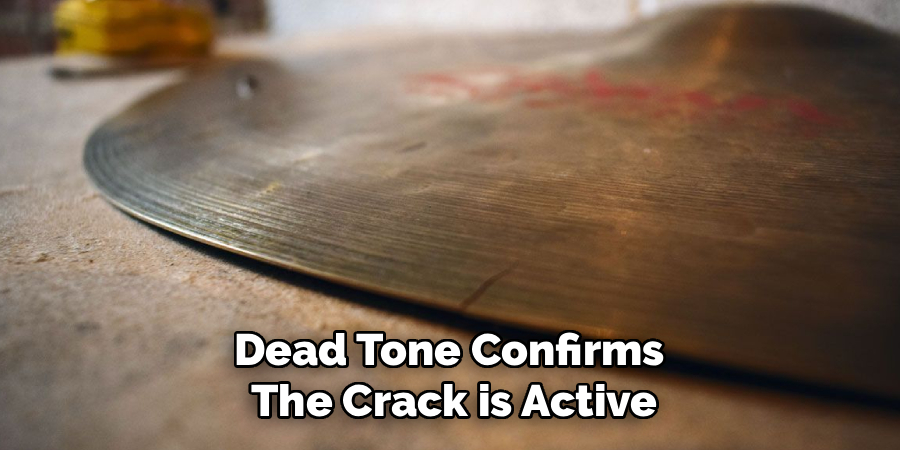
Start by finding the full extent of the damage. Run your finger gently along the cymbal surface until you feel the rough line. Hold the cymbal up to a bright light and tilt it slowly. Cracks often hide in the grooves, catching light like a thin silver thread.
Trace the crack from end to end. Note where it begins and where it stops. Edge cracks behave differently than cracks near the bell, so location matters for your approach.
Tap the cymbal lightly. A buzzing, dead tone confirms the crack is active. Mark both ends with your permanent marker. This tells you exactly where to drill and helps you measure progress as you work.
Step 2 – Clean the Surface
Dirt and grime hide the crack’s true edges. Wipe the whole area with rubbing alcohol and a clean cloth. You’ll feel the surface go from sticky to smooth, and the crack line will sharpen into focus.
Pay attention to the spots around each end of the crack. Stick residue, drumstick marks, and oxidation all blur your view. A clean bronze cymbal shows you precisely where the metal has split.
Let the alcohol dry fully before moving on. A damp surface makes your marker smear and your drill bit slip. Once the metal looks clear and dry, re-check your end marks. Adjust them if the cleaning revealed the crack runs farther than you first thought.
Step 3 – Mark the Drill Points
Drilling stops a crack by removing the sharp tip where stress concentrates. Place a mark about 1/8 inch past each end of the crack, into solid metal. This is the single most important measurement in the whole job.
Press your marker firmly so the dot stays visible under bright light. If the crack has two ends, you’ll mark two points. A crack that reaches the edge needs only one drill point, at the inner tip.
Double-check your placement. Too close to the crack, and the hole won’t relieve the stress. Too far, and you weaken healthy metal for no reason. Aim for that small gap past the tip, and you set up a clean, lasting repair cracked cymbal fix.
Step 4 – Secure the Cymbal
A cymbal that shifts mid-drill ruins your work and risks your hands. Clamp it into a vise with soft jaws, or sandwich it between two scrap boards and clamp the whole stack down. You want zero movement.
Position the marked drill point so it sits flat and accessible. The metal should feel solid under light pressure, with no flex or bounce. If it wobbles, add more support underneath.
Keep your work surface stable too. A shaky bench transfers vibration straight into your drill bit. Press down on the cymbal with one hand to confirm it holds firm. Once it stays put under pressure, you’re ready to cut into the metal safely and accurately.
Step 5 – Drill the Stop Holes
This step halts the spreading crack for good. Fit your drill with a 1/8-inch bit and set a slow, steady speed. Line the bit up directly over your marked point, perfectly vertical.
Apply light, even pressure. Let the bit do the work. You’ll hear the pitch change as it bites through bronze, and a small curl of metal will spiral up. Bronze drills cleaner than steel, so don’t force it.
Drill straight through, then ease off as the bit breaks the back surface. A clean round hole now caps the crack tip. Repeat at the second mark if the crack has two ends. These tiny holes redistribute stress and stop the metal fatigue from racing onward.
Step 6 – Trim or Address Edge Damage
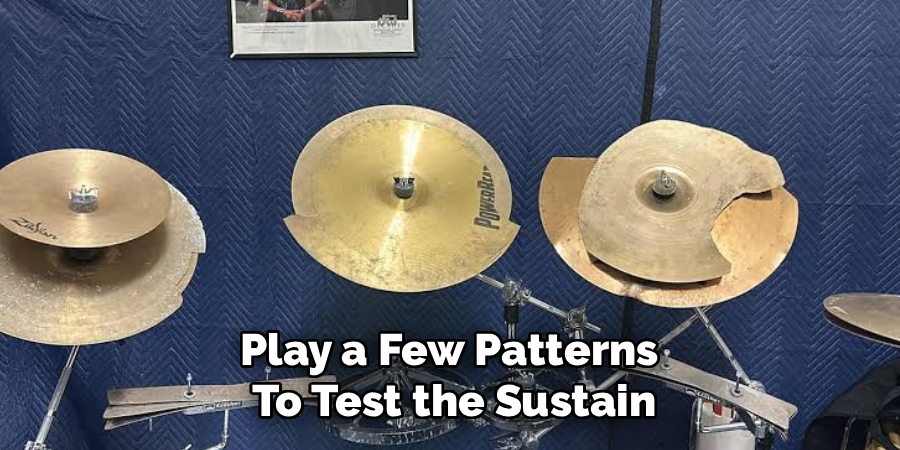
Edge cracks need extra care. If the crack reaches the rim, the buzzing piece between the crack and the edge has to go. Use tin snips or a jeweler’s saw to cut a small, smooth half-moon notch around the cracked section.
Cut slowly and follow a curved line. Sharp corners create new stress points and invite fresh cracks. A gentle arc spreads the load evenly across the remaining metal.
You’ll lose a sliver of the cymbal’s diameter, but you gain a clean, stable edge. The notch may look odd at first. Don’t worry. Many pros use this exact cutting technique to keep a cracked cymbal alive and ringing for years.
Step 7 – Smooth and Sand the Edges
Rough edges cut your fingers and crack again under stress. Run a rotary tool or fine metal file around every hole and cut you made. Knock down the burrs until the metal feels smooth to the touch.
Switch to 220-grit sandpaper and work the area in small circles. Then move to 400 grit for a finer finish. You’ll feel the surface turn from gritty to glass-smooth as you go.
Check your work with your fingertip. Any catch or snag means more sanding. A polished edge resists new cracks far better than a jagged one. Wipe away the metal dust with your alcohol cloth, and inspect the whole repair under bright light one last time.
Step 8 – Test the Sound
Mount the cymbal back on its stand. Tighten the wing nut just enough to hold it, leaving room for natural swing. Give it a soft tap first, then a full strike.
Listen closely. The dead buzz should be gone, replaced by a cleaner ring. The tone won’t match a brand-new cymbal exactly, but it should sound musical and stable again. Slight changes in pitch are normal after a repair.
Play a few patterns to test the sustain. If you still hear a rattle, re-check the crack ends and holes for any spot you missed. A solid, ringing response means your fix held, and you’re back in business.
Critical Mistakes When Repairing a Cracked Cymbal
The biggest mistake is skipping the stop holes. Many people sand the crack, see it disappear from view, and call it done. The crack is still there beneath the surface. Without a drilled hole to relieve the stress at the tip, it spreads again within a few sessions. The drill hole is the heart of the repair, not an optional extra.
Drilling in the wrong spot ranks second. Place the hole on the crack itself instead of past the tip, and you accomplish nothing. The stress point stays active. Always drill into solid metal a fraction past where the crack ends.
Rushing the cuts causes trouble too. Sharp corners in an edge notch concentrate stress and start new cracks fast. Curve every cut and round every corner. Bronze punishes square angles.
Skipping eye protection is dangerous. Bronze shards fly fast and sharp when you drill or cut. Glasses are not optional.
Finally, over-tightening the cymbal on its stand creates fresh metal fatigue. Leave room for the cymbal to swing freely, and you protect both your repair and the metal around it.
Expert Tips
Catch cracks early. Inspect your cymbals every few weeks and feel along the edges for hairline splits. A crack found at 1/4 inch is far easier to stop than one that’s run three inches.
Use sharp drill bits only. A dull bit grabs and wanders, chewing the bronze instead of cutting it clean. Fresh bits make round, precise holes that hold.
Smooth every edge twice. The finish quality directly affects how long your repair lasts, since rough spots invite new cracks. Spend the extra five minutes sanding.
For crack prevention going forward, loosen your cymbals on their stands and use proper felts and sleeves. Most cracks come from tight mounting and harsh playing angles, not bad luck.
Keep a small cymbal repair kit ready, and you’ll handle the next crack in minutes.
Frequently Asked Questions
Can a cracked cymbal ever sound new again?
No, a repaired cymbal won’t sound identical to new, but it can sound very close. The drilling and sanding restore most of the lost tone and remove the buzz. You may notice a slight pitch shift, especially with edge cuts. For practice, gigs, and most playing, the difference is minor and the cymbal stays fully usable.
How long does a cymbal crack repair last?
A proper repair often lasts for years, especially if you drilled the stop holes correctly. The key is relieving stress at the crack tip and smoothing every edge. Lasting results depend on three things:
- Correct drill hole placement past the crack tip
- Smooth, polished edges with no burrs
- Loose mounting that lets the cymbal swing freely
What size drill bit should I use?
Use a 1/8-inch or 3mm drill bit for most cracks. This size removes enough metal to relieve stress without weakening the cymbal. For very thin cymbals, drop to a 3/32-inch bit. Always use a sharp bit and a slow drill speed, since bronze cuts cleaner with patience than with force.
Why do cymbals crack in the first place?
Cymbals crack from metal fatigue caused by repeated stress. Common causes include hitting at a flat angle, mounting the cymbal too tightly, and striking the edge directly with the stick shaft. Thin cymbals and hard hitters face higher risk. Good crack prevention means using felts, loosening wing nuts, and angling your strikes correctly.
Do I need a professional cymbal repair kit?
No, you can repair cracked cymbal damage with basic tools you likely already own. A drill, a small bit, sandpaper, and tin snips cover most jobs. A dedicated cymbal repair kit simply bundles the right bits and finishing tools in one box, which saves time if you plan to fix cymbals regularly.
Conclusion
A cracked cymbal isn’t the end of the road. With a drill, some sandpaper, and a careful hand, you can stop the damage and keep playing the cymbal you love. The whole job comes down to a few clear steps: find the crack, clean the surface, drill past each tip to halt the spread, smooth every edge, and test the sound.
Remember the details that matter most. Drill into solid metal just past the crack, never on the crack itself. Curve your cuts. Sand until the edges feel smooth. And mount the cymbal loosely so it swings free and resists new stress.
You now have everything you need to repair cracked cymbal damage at home, save real money, and rescue gear that still has years of life left. Catch the next crack early, keep your simple toolkit ready, and you’ll handle these fixes with confidence.
Grab your drill, follow the steps, and bring that cymbal back to life.