

Your car clicks but won’t turn over. The lights work. The battery seems fine. Nine times out of ten, the culprit sits right on top of your starter motor: a worn or stuck solenoid. Learning how to fix a solenoid on a starter saves you a tow truck, a repair bill, and a wasted afternoon waiting on a mechanic.
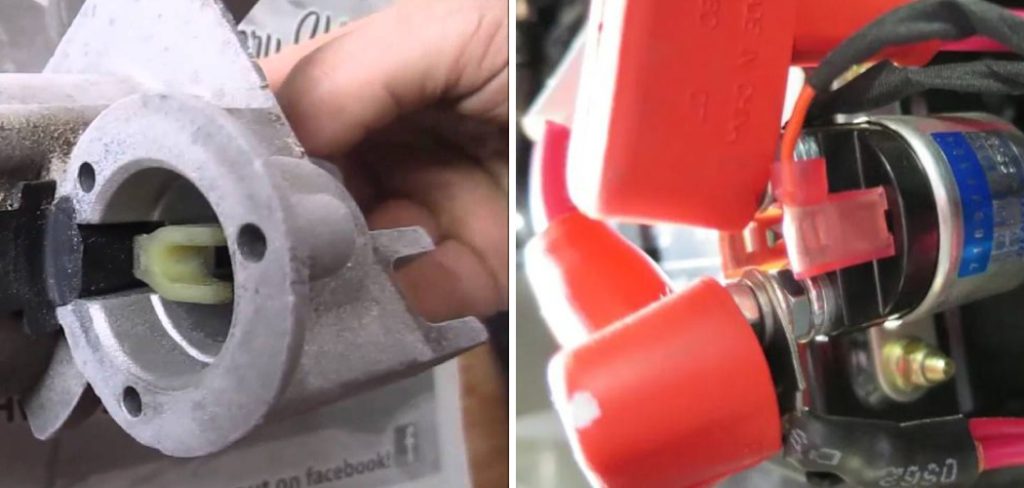
The good news? This repair is well within reach for most DIYers. You don’t need a lift or a shop full of specialty tools. You need patience, a few basic wrenches, and a clear set of steps.
This guide walks you through diagnosing the problem, removing the part, and getting your engine cranking again—step by step, in plain language.
Why Fixing a Starter Solenoid Matters
A dead starter strands you. It happens at the worst times: cold mornings, busy parking lots, the start of a long drive. Knowing how to handle it puts you back in control.
Fixing it yourself does three things. It cuts your repair cost dramatically—shops charge $150 to $400 for a job that costs you the price of a part. It builds real mechanical confidence you carry into every future repair. And it gets you back on the road faster than any appointment slot.
The solenoid is the bridge between your ignition switch and your starter motor. When it fails, the whole starting system stops. Master this single component and you understand the heart of how your car comes to life. That knowledge pays off again and again.
Tools and Materials You’ll Need
Gather everything before you start. Stopping mid-job to hunt for a socket wastes time and patience.
- Socket and ratchet set — removes the starter mounting bolts and battery terminals
- Combination wrenches — handles tight nuts the ratchet can’t reach
- Insulated screwdrivers — disconnects wiring and pries connectors loose
- Wire brush — cleans corroded electrical contact points
- Multimeter — confirms the solenoid is the real problem before you replace anything
- Replacement solenoid or contact kit — matched to your starter model
- Safety glasses and gloves — protects you from debris and battery acid
- Penetrating oil — frees rusted bolts
- Shop towels — keeps your hands and connections clean
- Jack and jack stands (optional) — gives you easier access if your starter sits low
Buy the correct solenoid for your make and model. A mismatched part wastes a trip and your money.
Step-by-Step Guide on How to Fix a Solenoid on a Starter
Step 1 – Confirm the Solenoid Is the Problem
Don’t guess. Test first. Turn the key and listen. A single loud click usually points to a stuck solenoid. Rapid clicking points to a weak battery instead.
Set your multimeter to measure voltage. Probe the small terminal on the solenoid while a helper turns the key. You should read battery voltage—around 12 volts. If voltage arrives but the starter motor stays silent, the solenoid is failing.
Touch the large terminals too. No continuity when energized confirms worn internal contacts. This five-minute check saves you from replacing parts that work fine. Knowing how to fix a solenoid on a starter starts with confirming you’re chasing the right fault, not a flat battery.
Step 2 – Disconnect the Battery
Safety first, always. Pop the hood and find the battery. Loosen the nut on the negative terminal with your wrench and lift the cable off the post. Tuck it aside so it can’t spring back and touch metal.
This single step prevents shocks, sparks, and accidental shorts while you work near live wiring. The starter draws huge current, and the cables stay hot even with the key off.
You’ll smell a faint acidic tang near the battery—that’s normal. Wear your gloves and glasses. If you spot white or green crust on the battery terminals, scrub it later with your wire brush. Clean connections matter for a reliable start. Now you’re safe to dig in.
Step 3 – Locate the Starter Motor
Find the starter before you start unbolting. It’s a cylinder, usually the size of a soda can, mounted low where the engine meets the transmission. The solenoid is the smaller cylinder strapped to its top or side.
On many cars you’ll reach it from above. On others, you’ll need to slide underneath. If access is tight, raise the front with a jack and set it firmly on jack stands. Never trust a jack alone.
Run your hand along the thick cable from the battery. It leads straight to the starter relay and solenoid. Following that wire takes the guesswork out of finding the right part in a crowded engine bay.
Step 4 – Label and Disconnect the Wiring
Take a photo before you touch anything. Snap a clear picture of every wire and where it connects. This single habit saves you from a frustrating puzzle later.
You’ll see two or three connections on the solenoid: one thick battery cable, one starter motor strap, and a thin wire from the ignition switch. Loosen each nut with your wrench and slide the connectors free.
Some terminals feel stubborn after years of heat and grime. A drop of penetrating oil loosens stuck nuts without rounding them off. Wipe each terminal with a shop towel as you go. Clean electrical contact points make reassembly faster and your finished repair more dependable.
Step 5 – Remove the Starter Assembly
Now free the starter itself. Most units bolt on with two or three large fasteners. Spray penetrating oil on rusty bolts and give it a minute to soak.
Brace the starter with one hand while you loosen the last bolt with the other. These units are heavier than they look—often five to ten pounds of dense metal. Letting it drop can damage threads or your knuckles.
Lower it out carefully and set it on your workbench. You’ll feel the heft and notice an oily film from years under the engine. With the assembly on the bench, you finally have room to inspect the solenoid coil and contacts under good light instead of fighting cramped angles.
Step 6 – Replace or Rebuild the Solenoid
Decide your path: full solenoid swap or contact kit rebuild. Unbolt the solenoid from the starter body. Two screws usually hold it, plus a strap to the motor.
Pull it free and inspect inside. Pitted or burnt contacts explain a no-crank fault. A rebuild kit replaces the copper contacts and plunger for a fraction of a new part’s cost. If the solenoid coil reads open on your multimeter, replace the whole unit instead.
Fit the new contacts or solenoid, then bolt everything back tight. Snug, not stripped. You’ll feel the satisfying click of fresh internal parts seating cleanly—a sound that promises strong electrical contact and a return to reliable engine cranking.
Step 7 – Reinstall the Starter
Lift the starter back into place. Line up the bolt holes and start each bolt by hand. Hand-threading first prevents cross-threading the aluminum housing.
Tighten the mounting bolts in a crisscross pattern for even pressure. Then reconnect the wiring using your photo as a map. Match each cable to its terminal: battery feed, motor strap, and the thin ignition switch wire.
Torque each nut firmly so no connection works loose under vibration. A loose terminal arcs, overheats, and fails fast. Give every wire a gentle tug to confirm it’s secure. Knowing how to fix a solenoid on a starter means caring about these small connections as much as the big part you just installed.
Step 8 – Reconnect the Battery and Test
Reattach the negative battery cable last. Tighten it down snug so it won’t rattle loose. Step back and clear any tools from the engine bay.
Turn the key. Listen for a clean, single engagement and the strong whir of the engine cranking. A smooth, immediate start means your repair worked.
If you hear the old click, recheck your connections and the small ignition switch wire first. Loose grounds cause most failed restarts. Test a second time after tightening.
When the engine fires and idles steady, you’re done. That first clean start after a repair you did yourself feels genuinely good—and you saved a shop visit doing it.
Critical Mistakes When Fixing a Starter Solenoid
The biggest mistake is skipping the battery disconnect. People rush, leave the cable attached, and a dropped wrench bridges a live terminal. The spark is sudden, loud, and dangerous. Always pull the negative cable first. No exceptions. This one habit prevents burns, blown fuses, and ruined wiring harnesses.
The second mistake is replacing the solenoid without testing. A weak battery or corroded battery terminals mimic a bad solenoid perfectly. You swap the part, the click returns, and you’ve wasted money and an afternoon. Test with your multimeter first. Confirm the fault lives in the solenoid coil, not somewhere cheaper to fix.
Third, many DIYers forget to label wiring. Three similar-looking connections get reattached in the wrong order, and the starter won’t engage—or worse, it shorts. Snap a photo before you disconnect anything.
Fourth, over-tightening bolts strips aluminum threads. Snug is enough. Forcing them cracks the housing and turns a simple repair into a costly one.
Finally, ignoring corroded electrical contact points guarantees a repeat failure. Clean every terminal with a wire brush before reassembly. Clean metal carries current; crusted metal resists it.
Expert Tips
Buy quality. A cheap solenoid often fails within months, forcing you to repeat the whole job. Spend a few dollars more on a known brand and trust it for years.
Keep your photos organized. Label each one as you shoot it—”battery cable,” “motor strap,” “ignition wire.” Reassembly becomes effortless.
Clean while you’re in there. Scrub the battery terminals and starter relay contacts even if they look fine. Five minutes of cleaning prevents the next no-start.
Apply dielectric grease to finished connections. It blocks moisture and corrosion, extending the life of every electrical contact you just restored.
Finally, keep the old part until your repair proves solid over a week of starts. If something acts up, you’ll have a reference and a backup on hand.
Frequently Asked Questions
How do I know if it’s the solenoid or the starter motor?
Listen and test. A single sharp click with no cranking points to the solenoid. A grinding or whirring sound that doesn’t engage the engine points to the starter motor itself. Use a multimeter to confirm: voltage reaches the solenoid but the motor stays silent means the solenoid contacts have failed. This two-minute check tells you exactly which part to fix.
Can I fix a starter solenoid without removing the starter?
Sometimes, yes. If your solenoid mounts separately or sits in an accessible spot, you can replace contacts in place. Most modern starters, though, have the solenoid bolted directly to the motor body. For those, removing the whole assembly gives you the room and light to do clean, reliable work. Removal usually adds only 20 minutes and produces a far better repair.
How much does it cost to fix a starter solenoid yourself?
A replacement solenoid runs $15 to $60. A contact rebuild kit costs even less—often $10 to $25. Compare that to a shop bill of $150 to $400 for the same job. Your only other costs are basic tools you likely already own. Doing it yourself saves real money and takes most people one to two hours.
Why does my starter click but the engine won’t crank?
A clicking sound usually means the solenoid receives power but can’t pass enough current to the starter motor. Common causes include:
- Worn or pitted solenoid contacts
- A weak or discharged battery
- Corroded battery terminals or ground cables
- A loose connection at the ignition switch
Test the battery first, then the solenoid. Fixing the right cause prevents repeat failures.
How long does a starter solenoid last?
A quality solenoid lasts 100,000 to 150,000 miles or roughly seven to ten years. Heat, vibration, and corroded electrical contact points shorten that life. Frequent short trips and a weak battery also wear the contacts faster. Keep your battery terminals clean and your connections tight, and you’ll get the full lifespan from the part you install.
Conclusion
A clicking car that won’t start feels like a crisis. It isn’t. More often than not, it’s a tired solenoid—and now you know exactly how to handle it.
You’ve learned to test before you replace, disconnect the battery for safety, and follow the wiring straight to the starter motor. You know how to remove the assembly, rebuild or swap the solenoid, and reconnect everything for a clean, reliable start. You also know the mistakes that trip people up and the expert habits that make your repair last.
This is a job you can finish in an afternoon with basic tools and a little patience. The payoff is real: money saved, a skill earned, and the confidence to tackle the next repair without picking up the phone.
Take it slow, stay clean, and trust your testing. Once you’ve mastered how to fix a solenoid on a starter, a no-start morning stops being a disaster and becomes just another problem you can solve. Grab your tools and get that engine cranking again.