

A flat tire on your mower can stop your weekend yard work cold. One minute you’re ready to trim the grass, and the next you’re staring at a sagging wheel that won’t budge. The good news? You don’t need a mechanic or a fat repair bill to fix it. With a few basic tools and a little patience, you can repair a lawn mower tire right in your own garage.
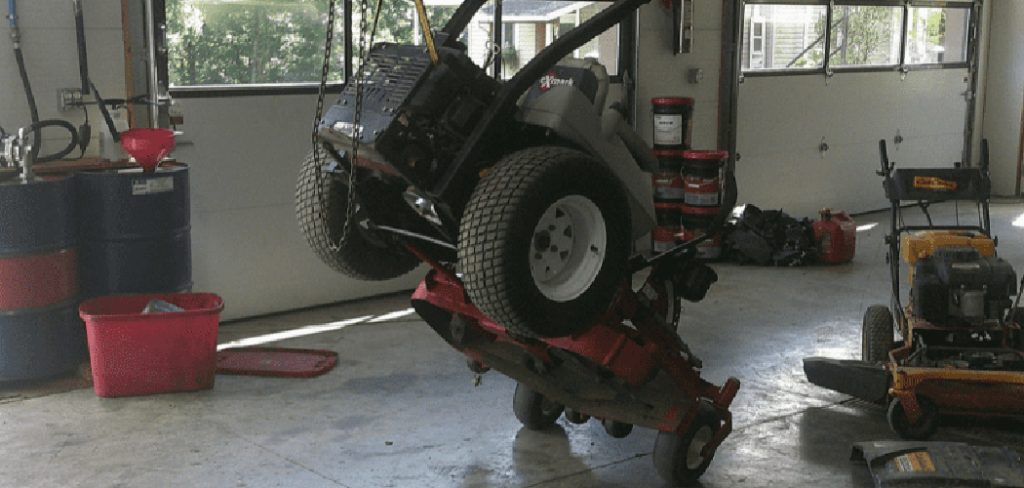
Whether you’ve got a small push mower or a riding model, the steps are surprisingly simple once you know what to look for. Most flats come from punctures, dry rot, or a bead that’s lost its seal. This guide walks you through the whole process how to repair lawn mower tire, step by step, so you can get your mower rolling again with confidence.
Why Repairing Your Lawn Mower Tire Matters
Learning to fix your own mower tire saves you time, money, and a lot of frustration. A trip to the repair shop can cost more than the tire itself, and waiting days for someone else to handle a five-minute job feels like a waste.
When you know how to handle a flat yourself, you stay in control of your yard schedule. A sudden flat won’t ruin your Saturday plans. You’ll also build skills that carry over to other repairs around the house, like patching a wheelbarrow tire or topping off a bike.
For homeowners and renters who like doing things themselves, this is one of those small wins that feels great. You save cash, learn something useful, and keep your equipment running longer. That’s a smart trade for an hour of your time.
Tools and Materials You’ll Need
Before you start, gather everything in one spot so you’re not running back and forth. Here’s what gets the job done:
- A tire plug kit or patch kit (for punctures)
- An air compressor or a manual tire pump
- A pair of tire levers or flathead screwdrivers
- A bucket of soapy water and a sponge
- Pliers or needle-nose pliers
- A socket wrench set to remove the wheel
- A jack or sturdy block to lift the mower
- Dish soap for finding leaks
- Work gloves to protect your hands
- A rag to wipe away dirt and grease
- Optional: A bead sealer or ratchet strap, which makes reseating a tubeless tire much easier
Most of these you likely already own. The plug kit and bead sealer are cheap and worth keeping on hand for next time.
Step-by-Step Guide on How to Repair Lawn Mower Tire
Step 1 – Lift and Secure the Mower
Start by parking your mower on flat, solid ground. Engage the parking brake and disconnect the spark plug so the engine can’t fire while you work.
Slide your jack or a sturdy wooden block under the frame, near the flat tire. Lift slowly until the wheel hangs free and spins without touching the ground. You’ll feel the frame settle as the weight shifts.
Give the mower a gentle nudge to make sure it’s stable. It shouldn’t rock or slide. A wobbly setup is dangerous, so take an extra minute here. Once the tire spins freely and the mower sits firm, you’re ready to move on. This solid base makes the rest of the job safer and far easier.
Step 2 – Remove the Wheel
With the mower secure, find the hub cap or retaining clip on the wheel. Pry it off gently with a flathead screwdriver. You’ll usually hear a soft pop as it releases.
Next, grab your socket wrench and loosen the bolt or nut holding the wheel in place. Turn it counterclockwise. Some wheels use an E-clip instead, which you can pop off with pliers.
Slide the wheel straight off the axle. It might feel snug, so wiggle it side to side as you pull. Set the wheel flat on the ground in front of you, and keep the bolt, washers, and clips together in a small dish. Losing those tiny parts is the easiest way to slow yourself down.
Step 3 – Inspect the Tire for Damage
Now take a close look at the whole tire. Run your fingers along the tread and sidewall, feeling for nails, screws, thorns, or sharp stones stuck in the rubber. Often you’ll spot the culprit right away.
If you don’t see anything obvious, inflate the tire a bit and brush soapy water over the surface with your sponge. Watch for bubbles forming. Those tiny bubbles tell you exactly where air is escaping. A steady stream of bubbles points straight to the puncture.
Check the bead too, that’s where the tire meets the rim. Dry rot or dirt can break the seal there. Knowing the source of the leak tells you whether you need a plug, a patch, or just a clean reseal.
Step 4 – Remove the Object and Clean the Area
Once you’ve found the puncture, pull out whatever caused it. Use your pliers to grip the nail or thorn and twist it free. You might hear a faint hiss as the last of the air escapes.
Wipe the area clean with a rag. Dirt and grime stop plugs and patches from sticking, so don’t skip this. If the rubber around the hole feels rough or torn, smooth it gently.
For a tubeless tire, you’ll work from the outside. For a tube-type tire, you’ll need to pull the tube out, which the next steps cover. Either way, a clean, dry surface gives you the best chance at a lasting fix when you repair lawn mower tire damage like this.
Step 5 – Plug or Patch the Puncture
For a tubeless tire, thread a sticky plug strip into your insertion tool. Push it firmly into the hole until about half an inch sticks out, then pull the tool straight back. The plug stays behind and seals the gap. Trim the extra with a knife.
For a tube-type tire, pull the tube free, find the leak, and rough up the spot lightly. Apply rubber cement, let it get tacky, then press a patch on top. Hold it down firmly for a minute so it bonds.
You’ll smell the rubber cement as it cures, which is normal. Give either repair a few minutes to set before adding air. A rushed patch tends to fail fast.
Step 6 – Reseat the Tire Bead
If your tire popped off the rim, you’ll need to reseat the bead before it holds air. Lay the wheel flat and push the tire edge back into the rim channel all the way around.
Spray a little soapy water around the bead to help it slide. For stubborn tires, wrap a ratchet strap around the center of the tread and tighten it. This squeezes the middle and forces the edges outward against the rim.
Now add air in short bursts. You’ll hear a sharp pop or two as the bead snaps into place. That sound means the seal caught. Loosen the strap once it seats, then keep filling to the right pressure.
Step 7 – Inflate to the Correct Pressure
Check the sidewall of your tire for the recommended PSI, usually printed in small raised letters. Most mower tires run between 10 and 22 PSI, but always follow what’s stamped on yours.
Attach your pump or compressor and fill slowly. Stop often to check the reading with a gauge. Overfilling can warp the tire or blow the bead, so go easy. The tire should feel firm but not rock hard.
Press your thumb into the tread. A properly filled tire gives just slightly. Once you hit the right number, replace the valve cap to keep dirt out. Correct pressure helps your mower roll smoothly and protects the tire from uneven wear down the road.
Step 8 – Reinstall the Wheel and Test
Slide the wheel back onto the axle, lining up the holes. Add the washers and bolt or clip you set aside earlier, then tighten the nut clockwise with your socket wrench. Snap the hub cap back on until it clicks.
Lower the mower off the jack slowly and remove the block. Reconnect the spark plug now that you’re done working near the blades.
Roll the mower forward a few feet and watch the tire. It should spin true without wobbling or hissing. Spray a touch more soapy water over the repair to confirm no bubbles appear. If it stays dry and firm, you’ve done it. Your mower is ready for the lawn again.
Critical Mistakes When Repairing a Lawn Mower Tire
The biggest mistake people make is skipping safety steps. Forgetting to disconnect the spark plug or failing to secure the mower on a jack can lead to serious injury. Always lock things down before your hands go near a wheel or blade. A few seconds of caution beats a trip to the emergency room.
Another common slip-up is rushing the patch or plug. Folks often add air before the rubber cement fully cures, which causes the repair to fail within minutes. Give every adhesive its full set time. Patience here saves you from doing the whole job twice.
Many beginners also overinflate their tires. They figure more air means a firmer ride, but too much pressure stresses the bead and can pop it right off the rim. Stick to the PSI printed on the sidewall and check it with a gauge.
Cleaning gets skipped far too often as well. Dirt and moisture trapped around a puncture stop plugs and patches from bonding. Wipe the area dry first. Finally, don’t ignore dry rot. If the rubber is cracked and brittle all over, a patch won’t last, and replacing the tire is the smarter move.
Expert Tips
Keep a plug kit and a small air pump stored with your mower so you’re never caught off guard. A flat on a busy Saturday is far less stressful when the fix is sitting right there.
Check your tire pressure at the start of each mowing season. Tires lose air slowly over winter, and a quick top-off prevents uneven wear and strain on the rim.
If you mow over rough terrain with lots of thorns or gravel, consider a tire sealant. You pour it through the valve, and it coats the inside, plugging small punctures automatically as they happen.
When a tire keeps going flat despite your best patch, look closely at the valve stem. A cracked or leaky stem is easy to miss and simple to swap out for a few dollars.
Frequently Asked Questions
Can I repair a lawn mower tire without removing the wheel?
Yes, for small surface punctures on a tubeless tire, you can often plug it while the wheel stays on. Just lift and secure the mower first, then locate the leak and insert the plug. However, removing the wheel gives you better access and a cleaner result, especially for sidewall damage or tube-type tires. For tricky leaks, taking the wheel off is worth the extra few minutes.
How long does a tire plug or patch last?
A properly installed plug or patch can last for years, often the remaining life of the tire. The key is doing it right: clean the area, let the adhesive cure fully, and don’t overinflate. Plugs work best for tread punctures, while patches suit tube-type tires. If you notice slow leaks returning, the repair may have shifted, and you’ll want to redo it or replace the tire.
What if my mower tire won’t hold air after patching?
If air keeps escaping, check these spots:
- The bead, where the tire meets the rim, may need resealing
- The valve stem could be cracked or loose
- You may have missed a second puncture
Spray soapy water over the whole tire and watch for bubbles. They’ll reveal any hidden leaks. Sometimes the rubber is simply too old and brittle to seal, which means it’s time for a replacement.
Do I need special tools to fix a flat mower tire?
Not really. A basic plug or patch kit, an air pump, tire levers, and a socket wrench cover most jobs. You probably already own half of these. The one handy extra is a ratchet strap, which makes reseating a stubborn bead much easier. Everything else fits in a small toolbox and costs far less than a single shop visit.
When should I replace the tire instead of repairing it?
Replace the tire when you see widespread cracking, dry rot, or a tear larger than a quarter inch. Sidewall damage is also tough to repair safely, since that part flexes constantly. If the tire has bald spots or the bead won’t hold even after cleaning and reseating, a new tire is the safer, longer-lasting choice.
Conclusion
Fixing a flat mower tire is one of those repairs that looks intimidating but turns out to be genuinely doable. With a jack, a plug kit, and a little soapy water, you can find the leak, seal it up, and get back to mowing in under an hour. No appointments, no waiting, no hefty bill.
The steps stay the same whether you’ve got a push mower or a riding one: secure the mower, remove the wheel, find and fix the puncture, reseat the bead, and inflate to the right pressure. Take your time with safety and let your patches cure, and you’ll get a fix that lasts.
Now that you know how to repair lawn mower tire problems yourself, that sagging wheel won’t slow you down again. Keep your simple tool kit close, check your pressure each season, and you’ll handle the next flat like a pro. Go ahead and tackle it. Your lawn, and your wallet, will thank you.