

That squeaking, slipping, or sudden silence from your treadmill doesn’t always mean you need to call a pro. Most treadmill problems come from simple, fixable issues, and learning how to repair treadmill troubles yourself can save you real money. Whether your belt slips during a jog, the console flickers, or the motor sounds rough, you can often sort it out with a few basic tools and a little patience.

You don’t need to be a mechanic. You just need clear directions and the willingness to roll up your sleeves. From the walking surface to the power cord, every part has a purpose, and once you understand how they work together, fixing them feels far less intimidating. This guide walks you through the entire process step by step, so you can get your machine running smoothly again.
Why Fixing Your Own Treadmill Is Worth Learning
Repair calls add up fast. A single technician visit can cost more than a few replacement parts, and you’ll often wait days for an appointment. When you learn to handle these fixes yourself, you skip the wait and keep more cash in your pocket.
For renters and homeowners alike, this skill pays off again and again. Treadmills take a beating from daily workouts, and small problems like a loose belt or dry deck pop up regularly. Knowing how to spot and solve them keeps your machine healthy for years.
There’s also a confidence boost that comes with DIY work. Once you’ve opened up your treadmill and fixed something, other home repairs feel less scary too. You become the person who fixes things instead of replacing them.
Tools and Materials You’ll Need
Before you start, gather everything in one spot so you’re not hunting for a screwdriver mid-repair. Most of these items already live in a basic home toolbox, and the rest are cheap and easy to find online or at a hardware store.
Here’s what to grab:
- Allen wrench set (hex keys) – usually included with your treadmill for belt adjustments
- Phillips and flathead screwdrivers – for removing the motor hood and console panels
- Silicone-based treadmill lubricant – never use household oil or WD-40
- Soft cloth or rag – for wiping dust and old residue
- Vacuum or compressed air – clears debris from the motor area
- Multimeter – to test the power cord and electrical connections
- Work gloves – optional, but they keep your hands clean and protected
Step-by-Step Guide on How To Repair Treadmill
Step 1 – Unplug and Secure the Machine
Safety comes first, always. Before you touch a single screw, pull the power cord from the wall and remove the safety key. This stops the motor from kicking on while your hands are near moving parts.
Give the machine a few minutes to fully power down. You might hear a faint click as the console shuts off completely. Touch the motor hood, too, since it can hold warmth after a workout.
Position the treadmill in an open space with good lighting. You’ll want room to walk around it and reach both sides. A clear, well-lit area helps you spot loose bolts, frayed wires, and dust buildup that you’d otherwise miss in dim corners.
Step 2 – Diagnose the Problem
Watch and listen before you start fixing. Plug the machine back in, insert the safety key, and run it at a slow speed. Pay close attention to how it behaves.
Does the walking surface jerk or pause? That often points to a worn or loose drive belt. A grinding sound usually means dust or debris near the motor. Flickering numbers on the console suggest a loose wire or power cord issue.
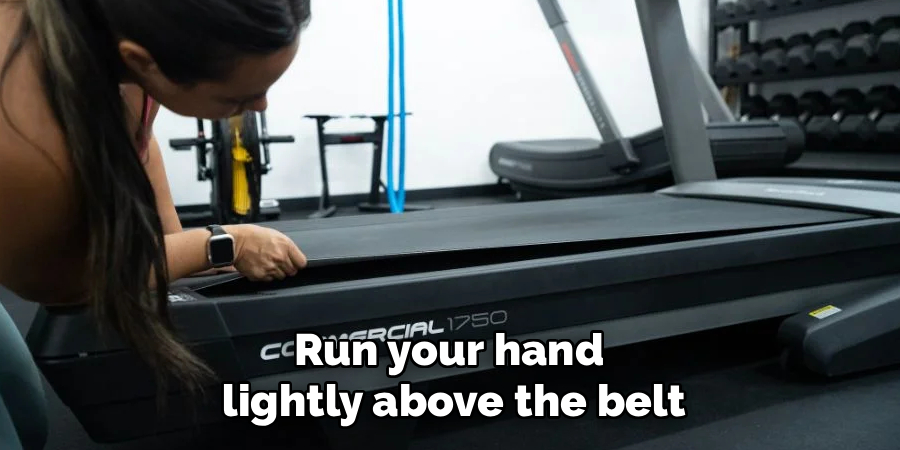
Take notes on what you hear and feel. Run your hand lightly above the belt to sense uneven movement. This quick diagnosis saves time, because it tells you exactly where to focus instead of guessing and taking the whole machine apart.
Step 3 – Clean the Belt and Deck
Dust is a treadmill’s worst enemy. Over time, lint and grime collect under the walking surface, creating friction that strains the motor and wears down the belt.
Unplug the machine again and lift the belt edge with your fingers. Slide a soft cloth underneath and wipe along the deck. You’ll likely pull out a surprising amount of gray fuzz. Use a vacuum or compressed air to clear the gaps near the rollers.
Wipe the top of the belt, too, removing sweat and dirt that build up with every run. A clean deck reduces resistance and helps your treadmill run quieter. This simple cleaning step alone fixes many performance complaints before you even reach for a wrench.
Step 4 – Lubricate the Deck
Friction kills treadmills faster than anything else, and proper lubrication is your best defense. Once the deck is clean, grab your silicone-based lubricant.
Lift one side of the belt and apply the lubricant along the center of the deck, working from front to back. Repeat on the other side. Avoid the edges, since lubricant there does little good and just attracts dust.
After applying, plug in the machine and run it slowly for a minute. This spreads the lubricant evenly across the walking surface. You’ll often notice the belt glides smoother and the motor sounds calmer almost right away. Most manufacturers recommend doing this every three months, so mark your calendar to keep things running well.
Step 5 – Adjust the Belt Tension
A slipping belt is one of the most common complaints, and it’s an easy fix. If the belt hesitates or pauses when you step on it, the tension is probably too loose.
Find the two rear roller bolts at the back of the deck. Using your Allen wrench, turn each bolt a quarter turn clockwise to tighten. Always adjust both sides equally to keep the roller alignment straight.
Test the belt after each small adjustment. You should be able to lift it about two to three inches in the center. If you can lift it higher, tighten a bit more. If it feels drum-tight, loosen slightly. Patience here prevents over-tightening, which strains the motor and shortens the belt’s life.
Step 6 – Center the Belt
A belt that drifts to one side rubs against the frame and frays quickly. Centering it restores smooth, even movement.
Run the treadmill at a low speed and watch where the belt sits. If it creeps left, turn the left rear bolt a quarter turn clockwise. If it drifts right, adjust the right bolt instead. Make small changes and watch the results.
Give the belt a moment to settle after each tweak. Proper roller alignment keeps the belt tracking down the middle without scraping the edges. You’ll hear less rubbing and feel a steadier stride. Take your time here, because rushing leads to over-correction and you’ll end up chasing the belt back and forth.
Step 7 – Inspect the Motor and Wiring
The motor is the heart of your machine, so give it a careful look. Remove the motor hood by unscrewing the bolts along its base, then lift it off gently.
Inside, you’ll see the motor, the drive belt connecting it to the front roller, and various wires. Check for loose connections, scorch marks, or a buildup of dust. Use compressed air to blow out any debris clinging to the motor.
Grab your multimeter to test the power cord for continuity if the machine won’t turn on. A reading of zero means the cord is dead and needs replacing. Tug each wire gently to confirm it’s seated firmly. Reattach the hood once everything looks clean and secure.
Step 8 – Test and Reassemble
Now comes the satisfying part. With the cleaning, lubrication, and adjustments done, reattach any panels you removed and double-check that every bolt is snug.
Insert the safety key, plug in the power cord, and start at a slow speed. Step on carefully and feel how the belt responds. It should move steadily without slipping, drifting, or grinding. Gradually increase the speed and listen for any odd noises.
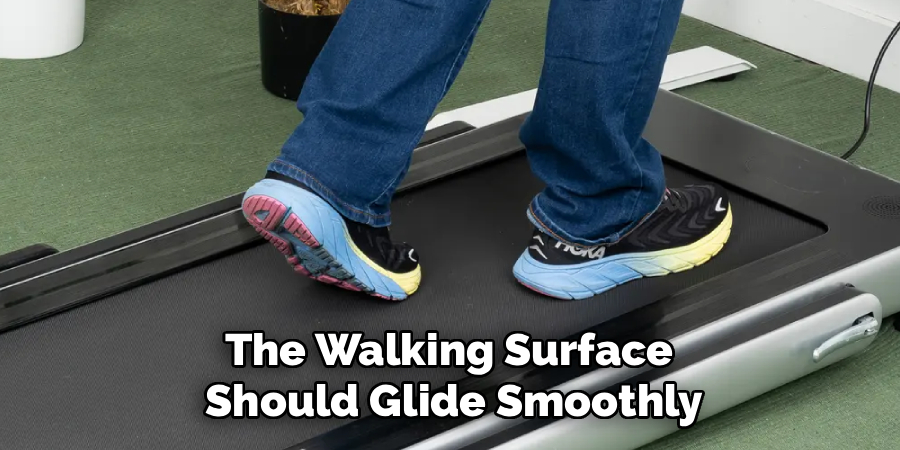
Walk a few minutes to confirm the fix held. The console numbers should read accurately, the walking surface should glide smoothly, and the motor should hum quietly. If everything checks out, you’ve successfully completed the repair and saved yourself a service call.
Critical Mistakes To Avoid When Repairing Your Treadmill
Even careful DIYers slip up, so watch out for these common errors that can turn a quick fix into a bigger headache.
The first mistake is skipping the unplug step. It’s tempting to make a “quick adjustment” while the machine is on, but a moving belt and live wires are a recipe for injury. Always remove the safety key and pull the power cord before reaching inside.
Another frequent error is using the wrong lubricant. Household oils, cooking sprays, and WD-40 might seem handy, but they gum up the deck and damage the belt. Only silicone-based treadmill lubricant belongs on your walking surface.
Over-tightening the belt causes trouble too. Many people crank the rear bolts until the belt feels rock solid, which strains the motor and burns it out faster. Aim for snug, not tight, and adjust both sides equally to protect roller alignment.
Finally, ignoring the manual costs people dearly. Every model differs slightly, and skipping those instructions can void your warranty or lead you to force a part that wasn’t meant to move.
Expert Tips
Set a maintenance schedule and stick to it. Cleaning the deck monthly and lubricating every three months prevents most problems before they start. A treadmill that’s cared for regularly rarely needs major repairs.
Keep your machine on a rubber mat. It cushions the floor, reduces vibration, and stops dust from the carpet getting sucked into the motor. This one cheap accessory extends the life of your belt and deck noticeably.
Listen to your treadmill like you’d listen to a car. New sounds usually mean something needs attention. A squeak often signals dry lubrication, while a thump may point to belt wear. Catching these early keeps small issues from becoming expensive ones, and it makes every workout smoother and quieter.
Frequently Asked Questions
How often should I lubricate my treadmill?
Most manufacturers recommend lubricating every three months or after about 130 miles of use, whichever comes first. If you run daily or live in a dusty area, you may need to do it more often. Listen for friction noises and watch for a sticky belt, both signs that the deck needs fresh silicone-based lubricant. Always check your owner’s manual for model-specific guidance.
Why does my treadmill belt keep slipping?
A slipping belt usually points to one of three causes:
- Loose tension – the rear roller bolts need a quarter-turn tighten
- Worn belt – years of use thin the surface and reduce grip
- Dry deck – lack of lubrication creates uneven friction
Start by tightening and lubricating. If slipping continues after both fixes, the belt itself is likely worn out and needs replacing.
Can I fix a treadmill that won’t turn on?
Often, yes. Check the power cord first, making sure it’s fully plugged in and the outlet works. Confirm the safety key is properly seated, since a missing key blocks power entirely. If those check out, use a multimeter to test the cord for continuity. A dead reading means the cord needs replacing. Loose console wiring can also cause this issue.
Is it safe to repair a treadmill myself?
For routine fixes like cleaning, lubrication, belt adjustment, and basic wiring checks, absolutely. These tasks are beginner-friendly as long as you unplug the machine and remove the safety key first. However, leave complex motor rewiring or circuit board repairs to a professional. Knowing your limits keeps you safe and protects your warranty from accidental damage.
How do I know when to replace the belt?
Flip the belt and check the underside. A smooth, glassy surface or a rough, frayed texture both signal wear. Other clues include persistent slipping after adjustment, dark scorch marks, or a burning smell during use. If lubrication and tightening don’t help, replacement is the smart move. A worn belt strains the motor and shortens its lifespan.
Conclusion
Fixing your own treadmill isn’t nearly as hard as it looks. With a clean deck, fresh lubrication, proper belt tension, and a quick check of the motor and wiring, you can solve the vast majority of problems right in your own home. Each step builds on the last, and once you’ve done it once, the whole process becomes second nature.
Remember the basics: unplug before you start, use the right lubricant, and never over-tighten the belt. Regular care goes a long way, so keep that maintenance schedule handy and listen for early warning sounds. Catching issues early saves you both money and frustration.
You don’t need a technician for everyday repairs, and you certainly don’t need to replace a perfectly good machine. Now that you know how to repair treadmill problems with confidence, you’re ready to tackle that squeak, slip, or stall head-on. Grab your tools, follow these steps, and get back to your workouts knowing you handled it yourself.