

That little click you hear when you turn on your favorite reading lamp? It comes from a small mechanism that takes plenty of wear over the years. Eventually, that switch wears out, sticks, or stops working completely, leaving you in the dark. The good news is you don’t need to toss the lamp or call an electrician. Learning how to repair a lamp switch is a simple, satisfying job that most people can handle in under an hour with a few basic tools.
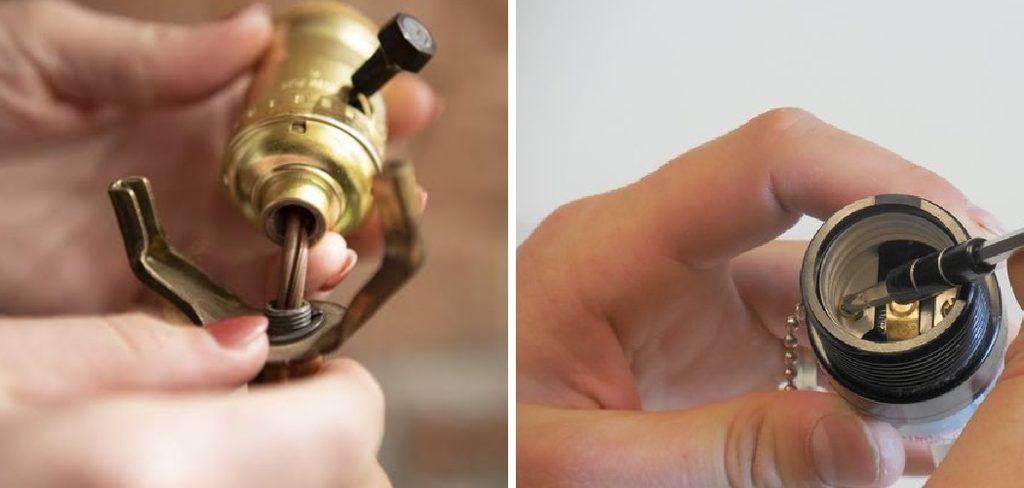
In this guide, you’ll learn exactly what to do, step by step, so you can bring a tired lamp back to life with confidence. This guide walks you through the full process safely, from unplugging the lamp to testing your finished work.
Why Repairing a Lamp Switch Matters
Fixing a switch yourself saves money and keeps a perfectly good lamp out of the landfill. But the skill goes further than that. If you camp, hike, or spend time off the grid, knowing your way around basic wiring is genuinely useful. Battery lanterns, portable lights, and DIY camp setups all rely on the same simple electrical principles you’ll practice here.
Once you understand how a socket, wiring, and switch connect, troubleshooting any small light becomes second nature. You’ll spot a loose wire or a bad connection instantly. For outdoor beginners, that confidence means fewer dark nights and less reliance on replacement gear. And for everyday homeowners and renters, it’s one more handy repair you can knock out without paying a technician.
Tools and Materials You’ll Need
Gather everything before you start so you’re not searching for a screwdriver mid-job. Most of these items are cheap and easy to find at any hardware store.
- Replacement switch (socket switch, inline switch, or rotary switch to match your lamp)
- Flathead and Phillips screwdrivers
- Wire strippers for trimming insulation cleanly
- Needle-nose pliers to twist and bend copper wire
- Utility knife for splitting the lamp cord
- Continuity tester or multimeter to check the old switch and your connections
- Electrical tape for extra insulation
- Replacement lamp cord (only if yours is frayed or damaged)
- A small magnetic tray (optional) to keep tiny screws from rolling away
That magnetic tray isn’t essential, but trust me, it saves a lot of frustration when those little screws like to wander.
Step-by-Step Guide on How To Repair A Lamp Switch
Step 1 – Unplug the lamp completely
Before you touch anything, pull the plug from the wall outlet. This is the single most important rule of electrical safety, so never skip it. Even a lamp that’s switched off can carry current if it stays plugged in.
Set the lamp on a sturdy table where you have good lighting and room to work. Run your fingers along the lamp cord and check for any cracks, brittle spots, or exposed wiring. A damaged cord needs replacing too, so note that now.
Take a moment to feel the switch itself. Does it wobble, stick, or feel loose when you click it? Those clues tell you exactly what kind of fix you’re dealing with before you open anything up.
Step 2 – Identify the type of switch
Lamps use a few common switch styles, and spotting yours helps you buy the right part. The most familiar is the socket switch, that little knob or push-button built into the bulb socket itself. Others use a rotary switch, a toggle, or an inline switch tucked along the cord.
Look closely at where the switch sits. If it’s part of the socket, you’ll be working near the top of the lamp. If it’s an inline type, the repair happens partway down the cord, which is often easier for beginners.
Snap a quick photo with your phone before you take anything apart. That picture becomes your reference when you reconnect the wiring later, and it removes a lot of guesswork.
Step 3 – Open up the socket or switch housing
Most socket shells come apart with gentle pressure. Look for the word “PRESS” stamped near the base of the brass shell. Push there firmly with your thumb while pulling up, and the outer shell should slide off with a soft pop.

Underneath, you’ll find a cardboard insulating sleeve. Slide that off carefully and set it aside, because it protects against shorts and you’ll need it again. Now the socket interior and its two terminal screws come into view.
Work slowly here. The internal parts feel surprisingly delicate, and the screws are small. If anything resists, stop and check that you’re pressing in the right spot rather than forcing it.
Step 4 – Test the old switch for continuity
This is where your continuity tester earns its keep. Touch the probes to the switch terminals and flip the switch on and off. A working switch shows continuity when on and none when off. If the reading stays dead either way, you’ve confirmed the culprit.
Knowing how to repair a lamp switch starts with proper diagnosis, so don’t skip this test. It saves you from replacing parts that work perfectly fine.
You’ll hear a beep or see your meter jump when the connection is good. That instant feedback feels reassuring, especially on your first try. If the switch tests fine, the real problem may be the plug, the cord, or a loose connection elsewhere.
Step 5 – Disconnect the old switch
With the bad switch confirmed, it’s time to free it. Loosen the two terminal screws with your screwdriver, turning counterclockwise. The copper wire ends will lift away once the screws release their grip.
If your wires are wrapped tightly, use your needle-nose pliers to gently unhook them. Notice how each wire connects, because polarized plugs and sockets need wires returned to the same spots. That earlier photo helps here.
Some lamps have wires fastened with push-in connectors instead of screws. For those, press the small release tab beside each wire and pull the wire straight out. Take it slow, and avoid yanking, which can damage the insulation and leave you with a bigger repair than you started with.
Step 6 – Prepare and connect the replacement switch
Take your replacement switch and compare it side by side with the old one to confirm a match. If the wire ends look frayed or oxidized, trim them back and strip about half an inch of insulation with your wire strippers, exposing fresh copper wire.
Twist each stripped end tightly so no loose strands stick out. Loose strands cause shorts, and that’s exactly what good electrical safety prevents. Wrap each wire clockwise around its terminal screw, then tighten firmly until the wire sits snug with no movement.
Match the wiring to your earlier photo, keeping the polarized connections correct. For socket switches, the ribbed wire usually goes to the silver terminal and the smooth wire to the brass one. That small detail keeps your lamp safe.
Step 7 – Reassemble the housing
Now you’ll put everything back together in reverse order. Slide the cardboard insulating sleeve back over the socket interior first. This insulation is easy to forget, but it’s vital for preventing the wiring from touching the metal shell.
Tuck any extra wire neatly into the base so nothing pinches when you close things up. Then slip the outer brass shell over the top and press down until you feel and hear that same satisfying click from before.
Give the assembled socket a gentle wiggle to confirm it’s seated firmly. Nothing should rattle or shift. If the shell won’t seat fully, pop it back off and check that no wire is bunched up or blocking the path inside.
Step 8 – Plug in and test your work
Here’s the rewarding part. Plug the lamp back into the outlet, install a working bulb, and try the switch. You should feel a crisp click and see the bulb light up right away.
Flip it on and off a few times to make sure the action feels smooth and consistent. A properly seated switch responds instantly every time, with no flickering or delay.
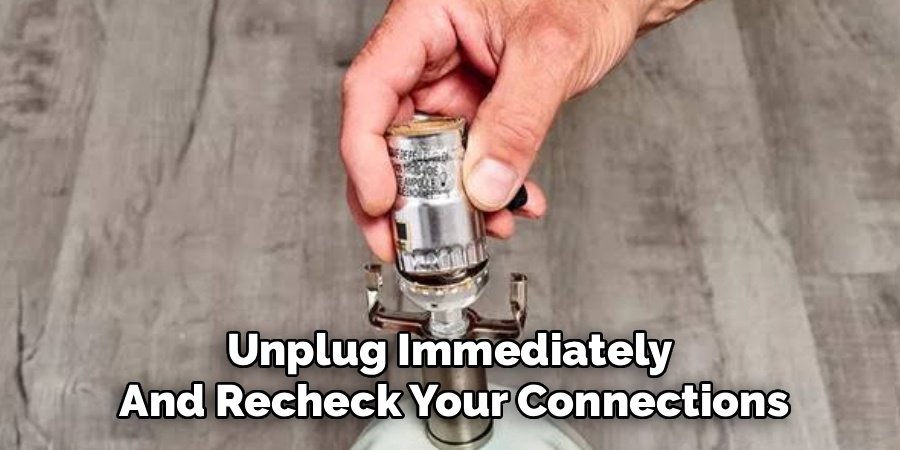
If nothing happens, unplug immediately and recheck your connections. Usually it’s a loose terminal screw or a wire that slipped free during reassembly. Once your lamp glows steadily and the switch clicks cleanly, you’re done. Step back and enjoy the warm light from a lamp you fixed with your own hands.
Critical Mistakes When Repairing a Lamp Switch
The biggest mistake by far is working on a lamp that’s still plugged in. It sounds obvious, yet people forget all the time because the lamp seems harmless. Always unplug first, every single time, with no exceptions. Live current and bare fingers don’t mix.
Another common error is buying the wrong replacement switch. A rotary switch won’t fit where a push-button socket switch belongs, so always match the new part to the old one before you start tearing things apart. Bringing the old switch to the store removes the guesswork.
Many beginners also skip the continuity test and replace parts blindly. You might swap a perfectly good switch when the real fault hides in the plug or cord. A quick test points you straight to the problem and saves both time and money.
Loose wire connections cause trouble too. If you leave a terminal screw half-tight, the lamp may flicker or fail soon after. Tighten everything firmly, and never let stray copper strands stick out where they could short. Finally, don’t forget that cardboard insulation sleeve. Reinstalling it protects against dangerous contact with the metal shell.
Expert Tips
A few small habits separate a sloppy fix from a clean, lasting one. First, keep that magnetic tray nearby for screws, because losing one mid-repair stalls the whole job. Second, when you strip wire, expose just enough copper to wrap the terminal, nothing more, so no bare metal peeks out once tightened.
If you repair lamps often, consider keeping a couple of universal socket switches on hand. They fit most table lamps and turn an emergency into a five-minute job. Wrap finished connections with a single layer of electrical tape for extra peace of mind.
Finally, snap photos at every stage, not just the start. Your phone becomes the best repair manual you’ll ever own, especially when reassembling tricky wiring weeks later.
Frequently Asked Questions
How do I know if my lamp switch is broken or if it’s the cord?
Use a continuity tester on both parts. Test the switch first by checking for continuity when it’s flipped on. If the switch passes but the lamp still won’t light, test the cord and plug next. Watch for these clues:
- A switch that feels loose, mushy, or doesn’t click
- A cord that’s warm, cracked, or frayed near the plug
Testing each part one at a time tells you exactly what needs replacing.
Can I replace a socket switch with an inline switch?
Yes, you can, and many people prefer it. An inline switch sits along the cord, making it easier to reach and simpler to install than working inside a tight socket. You’ll cut the cord, strip the wires, and connect them inside the inline switch housing. Just be sure the new switch matches your cord’s amperage rating so it handles the load safely.
Is it safe to repair a lamp switch myself?
Absolutely, as long as you follow basic electrical safety. The number one rule is unplugging the lamp before you touch anything. Lamps run on low household current and are among the safest electrical repairs for beginners. Keep your connections tight, replace the insulation sleeve, and double-check your wiring before plugging back in. If you ever feel unsure, stop and reassess.
What kind of replacement switch should I buy?
Match the new switch to your old one in both type and amperage. Bring the old switch to the hardware store if you can, since seeing both side by side prevents mistakes. Common choices include push-through socket switches, rotary switches, and inline cord switches. Most lamps use a standard rating, but checking the label avoids buying a part that can’t handle your lamp’s wattage.
Why does my lamp flicker after I fixed it?
Flickering almost always points to a loose connection. Unplug the lamp and check that each wire wraps tightly around its terminal screw with no movement. Also confirm the bulb is screwed in fully and isn’t faulty itself. Stray copper strands touching the wrong spot can cause flickering too, so inspect your connections closely and tighten anything that feels even slightly loose.
Conclusion
Bringing a dead lamp back to life feels great, and now you know it’s well within your reach. You’ve learned how to unplug safely, identify your switch type, open the housing, test for continuity, swap the part, and reassemble everything for a clean, reliable result. None of it requires special skills, just patience and a steady hand.
The real win is the confidence you gain. Once you understand how a socket, wiring, and switch work together, you’ll troubleshoot all kinds of small electrical fixes around your home, and even out on a camping trip. That know-how saves money and keeps useful items out of the trash.
So the next time a beloved lamp goes dark, don’t reach for the bin or the phone. You already have everything you need to repair a lamp switch yourself. Grab your screwdriver, follow these steps, and enjoy the warm glow of a job well done. You’ve got this.