

That low hum under the sink, the unit that won’t budge, or the slow gurgle of water backing up into your basin can stop a busy kitchen in its tracks. You’re scraping plates, the disposal sputters, and suddenly nothing works. It’s frustrating, but it’s rarely the disaster it feels like.
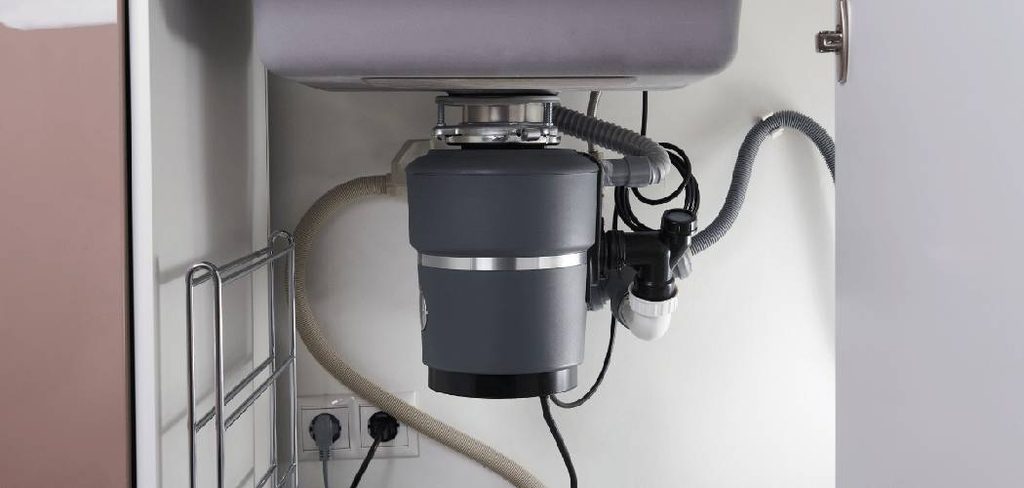
Most disposal problems come down to a few familiar culprits: a jam, a clog, a tripped reset button, or a small leak. The good news? You can sort out the majority of these yourself in under an hour, no plumber required.
Learning how to repair garbage disposal issues saves you money and spares you the wait for a service call. This guide walks you through diagnosing, fixing, and testing your unit safely, while showing you exactly when a problem calls for a pro.
Why Learning To Repair A Garbage Disposal Matters
Self-reliance in the kitchen pays off in ways you’ll feel for years. When you understand how your disposal unit actually works, a sudden hum or stalled motor stops being scary and starts being solvable.
This skill builds real confidence. The same calm, methodical approach you use here, cutting the power, checking the obvious, and working step by step, carries over to other home repairs. You learn to trust your own hands instead of reaching for the phone every time something acts up.
There’s a practical payoff too. A simple jam fix costs you a few minutes, while a service call costs a chunk of cash and half a day waiting around. Whether you own your place or rent it, knowing how to handle small fixes keeps your kitchen running and your wallet happier. That independence is genuinely satisfying.
Tools and Materials You’ll Need
Round up your supplies before you crawl under the sink. Having everything ready keeps the job smooth and quick:
- Allen wrench (hex key) that fits the hole on the bottom of the unit
- Flashlight to see clearly into the sink drain
- Long-handled tongs or pliers for pulling out stuck debris
- A bucket to catch water when checking the drain trap
- Towels or rags for spills and leaks
- A wooden spoon or broom handle to free a stuck flywheel
- Plumber’s putty for resealing connections
- Screwdriver for the mounting ring and dishwasher hose clamp
- A multimeter to test the electrical connection
- Optional: a headlamp so both hands stay free while you work in tight space
A clear, well-lit workspace under the sink makes everything easier and far safer.
Step-by-Step Guide on How To Repair Garbage Disposal
Step 1 – Cut the power completely
Safety comes before anything else, so start here every single time. Never put your hands inside a powered disposal, even for a second.
Flip off the wall switch that controls the unit. Then go to your electrical panel and switch off the breaker that feeds the kitchen. This double step matters because a switch alone can fail or get bumped back on.
Test that the power is truly dead by flipping the wall switch again and listening. You should hear nothing, no hum, no click. Lean in close and confirm the silence.
Only once you’re certain the disposal is fully dead should you reach anywhere near it. This habit protects your fingers from the blades and impellers below, and it’s the single most important rule in this whole job.
Step 2 – Diagnose the problem
Now figure out what’s actually wrong before you start fixing. A quick diagnosis saves you from wasted effort.
A steady hum with no spinning usually means a jam, where the flywheel is stuck. Dead silence often points to a tripped reset button or a lost electrical connection. Slow draining or water pooling in the sink drain signals a clog further down. A puddle in the cabinet means a leak.
Run through these clues with your flashlight and a careful eye. Press the splash guard aside and peer into the chamber for visible debris like bones, fruit pits, or fibrous peels.
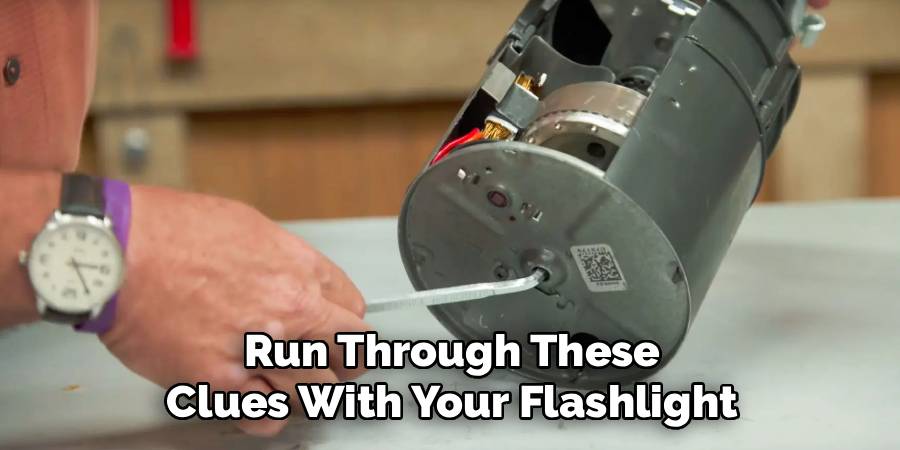
Pinning down the symptom tells you which step comes next, so take a minute here. Knowing how to repair garbage disposal trouble starts with reading these signs correctly.
Step 3 – Free a jammed flywheel
A jam is the most common headache, and thankfully one of the easiest fixes. With the power confirmed off, you can tackle it safely.
Look under the unit for a hex-shaped hole in the center. Fit your Allen wrench (hex key) into it snugly. Turn it back and forth, working it both directions. You’ll feel resistance, then a sudden give as the flywheel breaks free.
If your model lacks that hole, insert a wooden spoon handle into the chamber from above and press against the impellers to rock them loose. Never use your hand.
Once it spins freely, fish out whatever caused the jam with tongs. You’ll often spot a chicken bone or a stubborn cherry stone wedged against the blades. Removing it clears the way.
Step 4 – Press the reset button
If your disposal sits dead and silent, an overload may have tripped its internal breaker. This calls for the reset button.
Reach under the unit and feel for a small, usually red, button on the bottom of the motor housing. If it’s popped out, the motor shut itself off to protect against overheating.
Wait a few minutes to let the motor cool, then press the button firmly until it clicks and stays in. You’ll feel it seat into place.
Don’t keep mashing it if it pops right back out, because that signals a deeper problem. Give the unit time to rest. A motor that’s worked too hard needs a breather before it’ll cooperate, so patience here often brings it right back to life.
Step 5 – Clear a clog or slow drain
Slow draining or standing water means a clog is choking the line below your unit. Cold water and a little muscle usually clear it.
Place a bucket under the drain trap, the curved pipe beneath the disposal. Unscrew the slip nuts by hand or with pliers and let the trapped gunk and water spill out. The smell can be sharp, so breathe through your mouth.
Check inside for grease, food sludge, or buildup, then rinse the trap clean. Reattach it snugly without overtightening.
Avoid chemical drain cleaners, which can damage the disposal and your pipes. Once reassembled, you’ll know the clog is gone when water rushes down freely instead of pooling and gurgling back up at you.
Step 6 – Find and fix leaks
A puddle in the cabinet needs a careful look, since leaks come from a few different spots. Dry everything first, then trace the source.
Check the top mounting ring where the disposal meets the sink. A loose flange here drips with use. Tighten the mounting bolts, and if the seal looks worn, reseal it with fresh plumber’s putty.
Next, inspect the dishwasher hose connection and the drain trap fittings. A loose clamp or slip nut is a common, easy fix. Snug them up and watch.
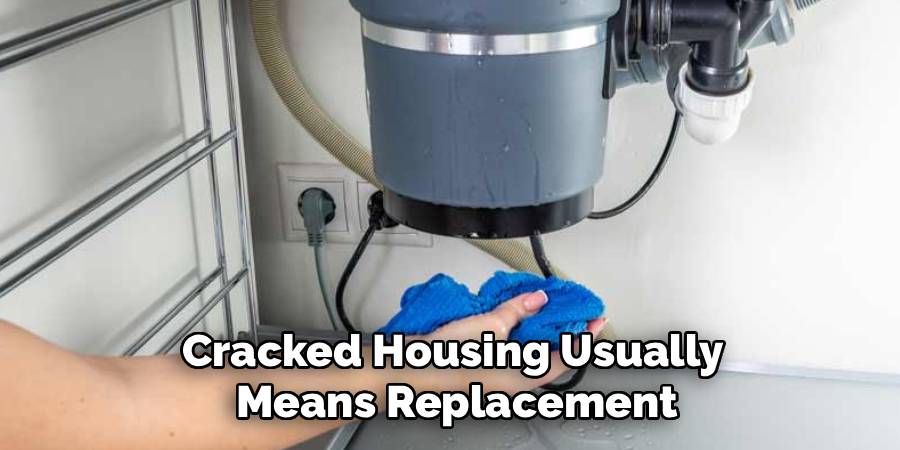
Run a little water and feel around each joint with a dry fingertip. If you find a leak coming from the body of the disposal itself, that cracked housing usually means replacement, not repair.
Step 7 – Clean the splash guard and chamber
Lingering odor and grime often hide in the rubber splash guard, that flexible flap at the mouth of the drain. Cleaning it freshens the whole sink.
Lift each flap and you’ll likely find a slimy buildup of trapped food clinging underneath. Scrub both sides with an old toothbrush and warm soapy water. The grungy smell fades fast once this layer is gone.
For the chamber below, drop in a handful of ice and some coarse salt, then later run the unit with cold water to scour the impellers. A few citrus peels leave a fresh scent behind.
You’ll know it’s clean when the sour kitchen odor lifts and water runs clear. This simple habit prevents most smell complaints down the road.
Step 8 – Restore power and test safely
With your repairs done, it’s time to bring the unit back to life and confirm everything works. Reassemble any parts you removed first.
Switch the breaker back on at the panel. Turn on a steady stream of cold water at the sink, then flip the wall switch. Listen for a smooth, even spin rather than a strained hum.
Let it run for fifteen seconds with the water flowing. Feel under the cabinet for any new drips while it works.
If it spins cleanly, drains well, and stays dry, you’ve succeeded. If it still hums, stalls, or leaks from the body, you may be facing a burned-out motor or cracked housing that calls for a licensed plumber or a full replacement.
Critical Mistakes When Repairing A Garbage Disposal
The biggest and most dangerous mistake is reaching into the disposal without killing the power. A wall switch alone isn’t enough, since it can fail or get flipped by accident. Always disconnect power at both the switch and the breaker, and never put your hands inside the unit. Use tools to remove debris, every single time.
Another common slip is pouring chemical drain cleaners down a clogged disposal. These harsh products can corrode the seals and pipes, eat at the metal, and even splash back dangerously. Clear clogs mechanically through the drain trap instead, and stick to cold water for flushing.
People also tend to overtighten fittings when fixing a leak, cracking plastic nuts or stripping threads and creating a worse problem. Snug is enough; crank it down and you’ll regret it.
Forcing a stubborn jam is another trap. If the flywheel won’t turn with gentle back-and-forth pressure, grinding harder can burn out the motor. Work it patiently instead.
Finally, many folks ignore the warning signs of a failing unit, repairing the same leak or motor fault over and over. Persistent body leaks, a burned smell, or a dead motor mean it’s time for replacement or a professional.
Expert Tips
Run cold water before, during, and a few seconds after every use. Cold keeps grease solid so it chops up and flushes away instead of coating your pipes and causing clogs.
Feed waste in small batches rather than stuffing the chamber full. A patient pace keeps the motor cool and the impellers spinning freely.
Skip the trouble foods entirely. Fibrous peels, bones, coffee grounds, and starchy scraps like potato skins are the usual jam culprits.
Grind a handful of ice cubes weekly. The cubes knock buildup off the blades and keep things running clean without harsh chemicals.
Keep a hex key taped inside your sink cabinet. When a jam strikes, you’ll have the right tool within arm’s reach instead of hunting through a drawer.
Frequently Asked Questions
Why is my garbage disposal humming but not working?
A hum without spinning almost always means a jam, where something has stopped the flywheel from turning. First, cut the power at the switch and breaker. Then fit an Allen wrench into the hex hole on the bottom and work it back and forth until the flywheel turns freely. Remove the trapped debris with tongs, never your hand, before restoring power.
Where is the reset button on a garbage disposal?
The reset button sits on the bottom of the motor housing, usually a small red or black button in the center. Reach under the unit and feel for it. If the disposal went completely dead, this button likely popped out due to an overload. Let the motor cool for a few minutes, then press the button firmly until it clicks and stays seated.
Can I use chemical drain cleaner in my disposal?
No, avoid chemical drain cleaners in your disposal. They can corrode the seals, damage the impellers, and harm your pipes, and they may splash back and burn your skin. Instead, clear clogs by hand:
- Check and clean the drain trap below the unit
- Flush with plenty of cold water
- Grind ice cubes to scrub the chamber
These methods are safer and gentler on the whole system.
Why does my garbage disposal leak from the bottom?
A leak from the bottom often signals a worn internal seal or a cracked housing, which usually means the disposal is failing. Leaks from the top mounting ring or the dishwasher hose are fixable by tightening connections or resealing with plumber’s putty. But water dripping from the body itself rarely responds to repair. In that case, plan on replacing the unit.
When should I call a professional instead of fixing it myself?
Call a licensed plumber or electrician when you face problems beyond simple fixes. These include a burned-out motor, persistent leaks from the disposal body, a cracked housing, or any electrical fault like sparking or repeated breaker trips. Wiring work in particular calls for a pro. Jams, clogs, reset issues, and minor connection leaks are safe to handle yourself, but serious faults need expert hands.
Conclusion
A misbehaving disposal doesn’t have to derail your day or drain your budget. Most problems trace back to a handful of familiar causes, and you now have the road map to handle them. Cut the power at both the switch and the breaker, diagnose the symptom, then work through the fix calmly and safely.
Remember the rhythm: free jams with a hex key, press the reset button for a dead unit, clear clogs through the drain trap, and tighten or reseal leaky connections. Always test with cold water running, and never, ever reach inside a powered unit. Cleaning the splash guard keeps odors away too.
Know your limits as well. A burned-out motor, a cracked housing, or a stubborn leak from the body means it’s time to replace the unit or bring in a plumber.
Now that you understand how to repair garbage disposal problems the right way, you can tackle that hum or clog with confidence and keep your kitchen humming along. Grab your tools, kill the power, and get that sink working again.