

Your air conditioner kicks on, you hear a low humming noise, but no cool air follows. Just warm air drifting through the vents while the sweat starts to bead on your forehead. The culprit often sits inside your outdoor condenser unit: the compressor.
Before you panic and assume you need a whole new system, take a breath. Many compressor problems trace back to simple parts like a worn capacitor or a stuck relay—things a careful DIYer can troubleshoot and fix.
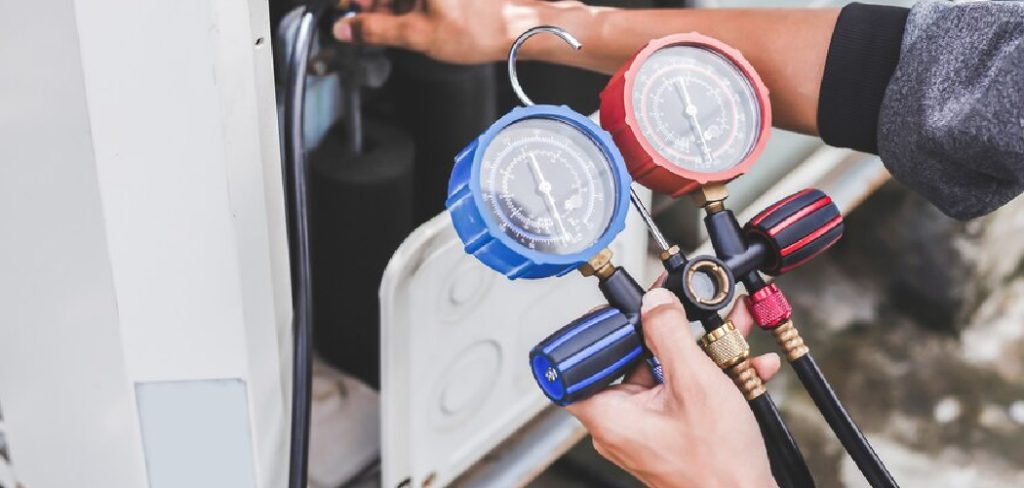
That said, learning how to repair air conditioner compressor issues also means knowing your limits. Some jobs demand a licensed pro, and we’ll be honest about which ones.
This guide walks you through safely diagnosing and fixing the common, beginner-friendly compressor problems while flagging exactly when to call in an expert.
Why Repairing an Air Conditioner Compressor Matters
A failing compressor doesn’t just leave you sweating—it drains your wallet fast if you ignore it.
Learning to diagnose and fix the simple stuff builds real troubleshooting confidence. Once you understand how a capacitor, contactor, and relay work together, you can spot problems early instead of paying for an emergency service call every summer.
These same skills carry over beautifully for campers and outdoor beginners. If you run a portable AC unit, an RV rooftop cooler, or a generator-powered setup at a remote campsite, understanding electrical components and motor starting parts keeps you cool when no technician is within fifty miles.
There’s also the savings angle. A new capacitor costs a few dollars, while a service visit can run into the hundreds.
Most importantly, catching minor faults early protects the compressor itself—the single most expensive part in your entire system.
Tools and Materials You’ll Need
Gather everything before you start so you’re not running back and forth while the unit sits open.
- A multimeter to test voltage, continuity, and capacitor readings
- A screwdriver set (Phillips and flathead) for panels and terminals
- A nut driver or socket set for access screws
- Insulated gloves to protect against electrical shock
- Safety goggles for eye protection
- A replacement capacitor matched to your unit’s specs
- A replacement contactor or relay if testing shows a fault
- A hard start kit to help a struggling compressor turn over
- A shop vacuum and soft brush for cleaning debris
- A flashlight or headlamp to see inside the cabinet
Optional but handy: a non-contact voltage tester. It lets you confirm the power is truly off with a quick wave near the wires—a simple step that adds a real layer of safety before you touch anything.
Step-by-Step Guide on How to Repair Air Conditioner Compressor
Work through these steps in order. Knowing how to repair air conditioner compressor problems starts with cutting the power and working safely every single time.
Step 1 – Cut the Power Completely
Safety comes first, always. Compressors run on high voltage that can seriously hurt you, so never skip this step.
Walk to your outdoor unit and find the disconnect box mounted on the wall nearby. Pull the disconnect block straight out, or flip the switch to the off position. You’ll feel a firm click as it releases.
Next, head to your main electrical panel and switch off the breaker labeled for the AC. Don’t trust one shutoff alone—use both.
Wave your voltage tester near the wires inside the access panel to confirm no power remains. A silent tester means you’re safe to continue. If it beeps or lights up, stop and recheck both the disconnect and the breaker before going further.
Step 2 – Inspect the Condenser Unit
With the power confirmed off, take a good look at the outdoor condenser unit. A lot of problems hide in plain sight.
Remove the access panel with your screwdriver and set the screws somewhere safe. Shine your flashlight inside and look for obvious trouble: scorched wires, a swollen capacitor, melted insulation, or a thick mat of leaves and dirt.
Run your fingers gently along the wiring—anything brittle, loose, or smelling faintly burnt needs attention. That sharp, acrid odor often points to an electrical fault.
Clear away debris around the fan motor and coils using your soft brush and shop vacuum. Sometimes a clogged, dirty unit overheats and trips the compressor’s overload protector. Cleaning alone can revive it.
Step 3 – Test the Capacitor
The capacitor is the most common reason a compressor hums but won’t start. Think of it as the battery that gives the motor its initial kick.
Look for a small cylindrical or oval metal can inside the unit. Check the top—if it’s bulging, leaking, or domed instead of flat, it’s clearly bad and needs replacing.
Before touching the terminals, discharge the capacitor by carefully bridging its terminals with an insulated screwdriver. You may hear a faint pop. This releases stored charge that can shock you even with the power off.
Now set your multimeter to capacitance mode and touch the probes to the terminals. Compare the reading to the rating printed on the label. A number far off the mark confirms a faulty capacitor.
Step 4 – Replace a Faulty Capacitor
If your test points to a dead capacitor, swapping it is one of the most satisfying fixes you can do yourself.
Snap a clear photo of the wiring first. Capacitors have multiple terminals—often labeled HERM, FAN, and C—and getting them mixed up causes new problems.
Carefully pull the wires off the old capacitor one at a time, noting where each connects. Mount the new capacitor, matching the microfarad and voltage rating exactly to the original.
Reattach each wire to its matching terminal, pressing the connectors on until they feel snug. A loose connection here can spark or fail early.
Double-check your photo against the finished work. When everything matches, you’ve handled one of the most common compressor faults on your own.
Step 5 – Check the Contactor and Relay
The contactor is the switch that sends power to your compressor when the thermostat calls for cooling. Over time, its contacts pit and burn.
Look at the contactor’s contact points. Black, pitted, or crusty surfaces mean poor connection. You might also notice a chattering or buzzing sound when the unit tries to run.
Set your multimeter to continuity and test across the contactor while it’s engaged. No continuity, or wildly inconsistent readings, tells you it’s worn out.
Replacing a contactor follows the same careful approach as the capacitor: photograph the wiring, transfer one wire at a time, and match the part to your unit’s specs. Inspect the start relay too, since a stuck relay can stop the compressor from kicking on at all.
Step 6 – Test the Compressor Terminals
Now you’ll check the compressor itself. This tells you whether your problem is a cheap external part or something far more serious.
Locate the three compressor terminals, usually labeled C, S, and R for Common, Start, and Run. Pull off the wires after photographing their positions.
Set your multimeter to ohms and measure resistance between each pair of terminals. You’re looking for low, steady readings that follow a logical pattern.
Then test each terminal to the bare metal compressor casing. This checks for a ground fault. A reading near zero to ground means the compressor windings have shorted internally—and that’s bad news.
If the windings test fine, your issue lies in the external parts you already checked. If they’re shorted or open, the compressor itself has failed.
Step 7 – Try a Hard Start Kit
Sometimes a compressor is mechanically sound but struggles to start. It hums, strains, and trips the breaker without ever spinning up. A hard start kit can give it the extra boost it needs.
This small device wires into the compressor’s start circuit and delivers a stronger jolt of power at startup. It’s an affordable fix that often buys an aging compressor more life.
Follow the kit’s wiring diagram closely, connecting it to the correct compressor terminals and the capacitor. The instructions are usually clear and color-coded.
Once installed, restore power and listen. A healthy start sounds like a smooth, climbing hum rather than a strained groan. If the compressor now spins up and cool air returns, you’ve solved it cheaply.
Step 8 – Know When to Call a Pro
Here’s the honest truth: some compressor problems are not DIY jobs, no matter how handy you are.
If your terminal test showed shorted or grounded windings, the compressor needs replacement—and that means handling refrigerant. Anything involving the sealed system, refrigerant lines, or recharging requires a licensed HVAC technician by law in most places.
Refrigerant is dangerous to breathe, harmful to the environment, and illegal to release. Compressor replacement also involves brazing and high-voltage work that can injure or kill an untrained person.
So fix the capacitor, contactor, relay, and cleaning issues yourself with pride. But when the diagnosis points to a failed compressor or anything inside the sealed refrigerant loop, put down the tools and pick up the phone.
Critical Mistakes When Repairing an Air Conditioner Compressor
The single most dangerous mistake is working on the unit with the power still on. High-voltage components can stop your heart, and capacitors store a lethal charge even after shutoff. Always pull the disconnect, flip the breaker, and confirm with a tester before touching anything inside.
Another frequent error is forgetting to discharge the capacitor. Folks assume that cutting power makes everything safe, then grab the terminals and get a nasty shock. That stored energy lingers, so discharge it every time.
People also rush to replace the compressor when the real villain is a five-dollar capacitor or a worn contactor. Test the cheap, external parts first. You’ll often fix the whole problem without spending much at all.
Mismatching replacement parts causes trouble too. Installing a capacitor with the wrong microfarad rating or a contactor with the wrong voltage leads to early failure or damage. Match specs exactly.
Finally, the most serious overreach is attempting refrigerant or sealed-system work without a license. It’s unsafe, often illegal, and best left to a certified HVAC technician.
Expert Tips
Always snap photos before disconnecting any wires. When parts have three or four terminals, a clear reference photo saves you from guesswork and dangerous mistakes during reassembly.
Keep a notepad listing your unit’s model number and part ratings. When you head to the supply store, exact specs mean you walk out with the right capacitor or contactor the first time.
Listen closely to your unit before and after the repair. A smooth, even hum signals health, while clicking, buzzing, or a strained groan points to lingering electrical trouble.
Clean your condenser unit twice a year. Clearing leaves, grass, and dust keeps the compressor cool and prevents the overload protector from tripping during peak heat.
And respect your limits. Knowing when to stop and call a licensed technician isn’t failure—it’s the smartest move a beginner can make around high voltage and refrigerant.
Frequently Asked Questions
Why does my compressor hum but not start?
A humming noise without startup usually points to a failed capacitor. The capacitor gives the motor its initial jolt, and when it dies, the compressor strains but can’t turn over. Check for these signs:
- A bulging or leaking capacitor
- A clicking or buzzing contactor
- The breaker tripping shortly after startup
Test the capacitor first—it’s the cheapest and most common fix by far.
Can I replace an AC compressor myself?
Honestly, no. Replacing a compressor involves recovering and recharging refrigerant, brazing sealed lines, and handling high-voltage connections. Refrigerant is hazardous and illegal to release, so the law requires a licensed HVAC technician for this work. You can safely replace external parts like the capacitor, contactor, or relay yourself, but full compressor replacement should always go to a certified professional.
How do I know if my capacitor is bad?
Start with a visual check. A healthy capacitor sits flat on top, while a failing one bulges, domes, or leaks oily residue. For a sure answer, discharge it safely, then test it with a multimeter set to capacitance mode. Compare the reading to the microfarad rating printed on the label. If the number is far off or shows zero, the capacitor has failed and needs replacing.
Why is my AC blowing warm air?
Warm air often means the compressor isn’t running, even if the fan spins. Common causes include a dead capacitor, a burnt contactor, or a tripped overload protector. It can also signal low refrigerant from a leak. Check the cheap electrical parts yourself first. If those test fine and the system still blows warm, you likely have a refrigerant issue that needs a licensed technician.
Is it worth repairing an old compressor?
It depends on the problem. If the fault is a capacitor, contactor, or relay, repair makes great sense—those parts are cheap and easy. But if the compressor windings have shorted internally, replacement costs are high. For a unit over ten to twelve years old with a failed compressor, replacing the whole system often delivers better value and efficiency.
Conclusion
A compressor that hums, blows warm air, or trips the breaker feels alarming, but you now know how to tackle it methodically. Knowing how to repair air conditioner compressor problems comes down to a clear routine: cut the power safely, inspect the condenser unit, then test the capacitor, contactor, and relay before assuming the worst.
Most cooling failures trace back to inexpensive parts you can swap yourself with a multimeter and a screwdriver. Fixing those builds real confidence and saves you a small fortune in service calls.
Just as importantly, you’ve learned where to draw the line. Refrigerant handling, sealed-system repairs, and full compressor replacement belong to a licensed HVAC technician—no exceptions. Respecting that boundary keeps you safe and legal.
So grab your insulated gloves, pull that disconnect, and troubleshoot with care. When you feel cool air flowing again after fixing a faulty capacitor with your own hands, you’ll be glad you trusted yourself, worked safely, and knew exactly when to call for backup.