

That gentle, whisper-quiet lid that once floated down on its own? Now it slams, sags, or sits crooked on the bowl. A failing soft close toilet seat is one of those small annoyances that nags at you every single day.
The good news is you don’t need a plumber for this. Learning how to repair a soft close toilet seat takes basic tools, a little patience, and about twenty minutes of your time.
Whether your seat wobbles, won’t stay lifted, or the slow-close mechanism has stopped doing its job, the fix is usually simple and cheap. Most problems trace back to loose hardware or worn dampers, both of which you can handle yourself.
This guide walks you through diagnosing the issue, tightening or replacing the parts, and getting that smooth, silent close back where it belongs.
Why Repairing a Soft Close Toilet Seat Matters
A broken seat isn’t just a daily irritation—it’s a small problem that grows if you ignore it.
When the seat wobbles, the mounting bolts work loose over time. That constant shifting cracks the seat, scratches your toilet bowl rim, and can even chip the porcelain. A quick fix now saves you from buying a whole new seat later.
There’s a quieter benefit too. A loose seat lets moisture and grime collect under the hinge caps, where bacteria love to hide. Tightening things up keeps your bathroom cleaner and more hygienic.
Then there’s peace and quiet. The slamming lid that wakes the house at 2 a.m. disappears once the dampers work properly again. Fixing it yourself also builds real confidence. Tackle this little job, and you’ll feel ready for the next home repair that comes your way.
Tools and Materials You’ll Need
Gather your supplies before you start so you’re not searching mid-job with the seat half off. Most of these are already in your toolbox.
- A flathead screwdriver to pop off the hinge caps
- A Phillips screwdriver for the mounting screws
- An adjustable wrench to grip the underside nuts
- A clean rag and mild cleaner for the hinge area
- Replacement hardware (bolts, nuts, or new dampers) if parts are worn
- A flashlight to see behind the bowl clearly
- Disposable gloves to keep your hands clean
Optional but handy: a basin wrench makes reaching those tight underside nuts behind the toilet far easier, especially if your bathroom has a cramped layout. It saves your knuckles and your patience when space is tight.
Step-by-Step Guide on How to Repair a Soft Close Toilet Seat
Work through these steps in order. Knowing how to repair a soft close toilet seat starts with figuring out exactly what’s failing before you grab a wrench.
Step 1 – Diagnose the Problem
Before you touch a single screw, spend a minute watching how the seat behaves. The symptom tells you what to fix.
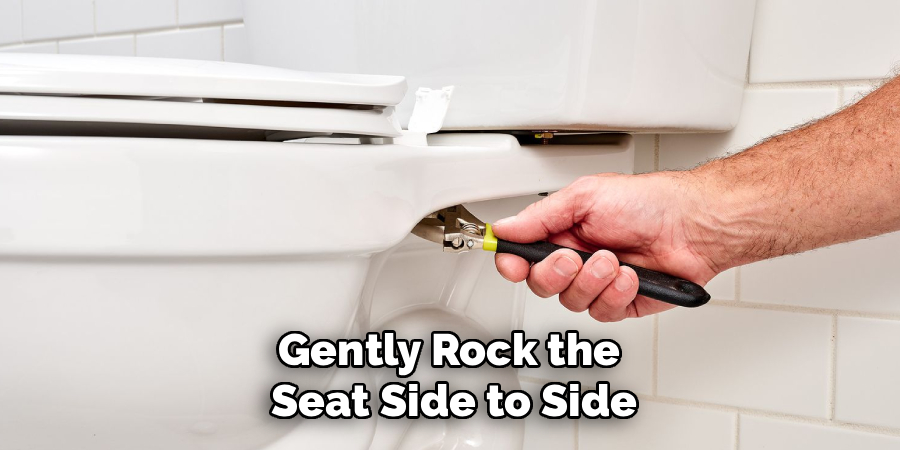
Lift the lid and let go. If it drops fast and slams, the dampers in the slow-close mechanism have likely worn out. Gently rock the seat side to side. If it shifts or wobbles, your mounting bolts have come loose.
Look closely at the seat itself. A crooked lid that won’t sit straight usually points to a misaligned or damaged hinge. Run your finger along the seam where the seat meets the bowl and feel for any grinding or catching.
Identifying the real issue now means you won’t waste time tightening parts that aren’t the problem. Most repairs fall into one of these three buckets.
Step 2 – Pop Off the Hinge Caps
Most soft close seats hide their bolts under small plastic hinge caps at the back. These flip up or slide open to reveal the hardware.
Slide your flathead screwdriver gently under the lip of each cap. You’ll feel a slight resistance, then a satisfying little click as it releases. Some caps flip backward on a tiny hinge; others lift straight off.
Work slowly here. These caps are thin plastic and crack if you force them. If yours feels stuck, wiggle the screwdriver along the edge instead of prying hard at one spot.
Once open, you’ll see the mounting screws or bolts underneath. Take a quick photo with your phone so you remember how everything fits back together later.
Step 3 – Tighten the Mounting Bolts
If your seat wobbles, loose mounting bolts are usually the culprit, and this is the easiest fix of all.
Hold the bolt head steady from the top with your screwdriver. Reach underneath the toilet bowl rim and find the underside nuts with your other hand. They’re often plastic wing nuts you can turn by hand.
Tighten each nut clockwise until it feels snug. You’ll feel the seat stop shifting as the bolt draws tight against the porcelain. If the nuts are too tight to turn by hand, grab your adjustable wrench for a little extra leverage.
Don’t crank too hard—porcelain cracks under pressure. Snug and stable is the goal, not bone-crushingly tight. Give the seat a wiggle to confirm it’s solid.
Step 4 – Check and Reset the Lid Alignment
A crooked lid usually means the hinges have drifted out of position. Many soft close seats let you adjust this without removing anything.
Loosen the mounting nuts just slightly—enough to shift the whole seat assembly. You’ll feel it free up and move a little. Nudge the seat until the lid sits perfectly centered over the bowl.
Lower the lid and check the gap on both sides. Even spacing means good lid alignment. If one side hugs the bowl tighter than the other, keep adjusting until they match.
Once it looks straight, hold the seat in place and retighten the nuts underneath. Test it again by lowering the lid slowly. A well-aligned seat closes evenly and looks clean from across the room.
Step 5 – Inspect the Slow-Close Dampers
The magic of a soft close seat lives in its dampers—small cylinders inside the hinges filled with thick grease or fluid that slow the lid’s descent.
Look at the hinge area where the seat connects to the bowl. You may see a small rotating barrel or piston. Over time, the fluid inside dries out or leaks, and the lid loses its gentle glide.
Press the lid down slowly with your hand. A healthy damper pushes back with smooth, even resistance. A worn one feels loose, jerky, or offers no resistance at all.
If the damper still has some grip, you might restore it temporarily. But if it’s completely dead, you’ll need to replace the hinge assembly in the next step.
Step 6 – Replace Worn Hinges or Dampers
When the dampers give out completely, replacement is your best move. Most brands sell matching hinge kits, so check the seat’s underside for a model number.
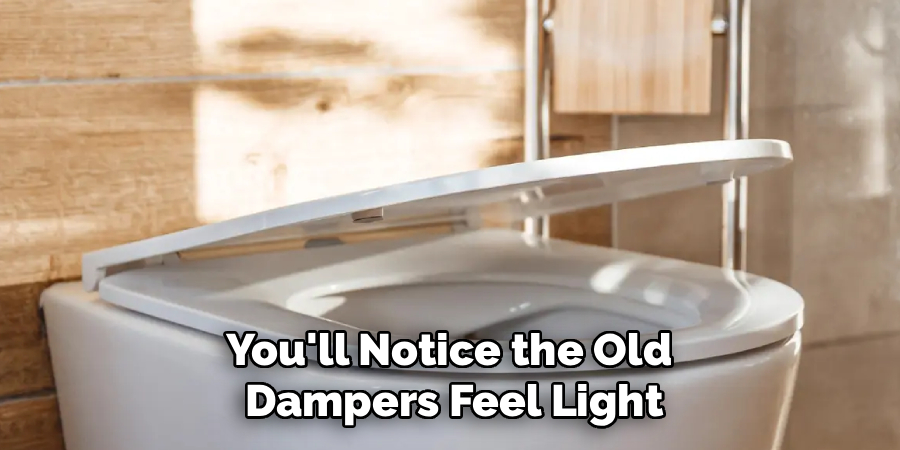
Unscrew the old hinges fully and lift the entire seat free. Set it on a towel to avoid scratches. You’ll notice the old dampers feel light and spin freely, with none of that controlled drag.
Snap the new hinge assembly into the seat, matching the orientation from your earlier photo. The fresh dampers feel firm and resistant when you rotate them.
Line up the new hardware with the mounting holes on the toilet bowl rim. Slide the bolts through, thread on the underside nuts, and hand-tighten. The new slow-close mechanism should feel buttery smooth right away.
Step 7 – Reassemble and Secure Everything
With your repair done, it’s time to lock everything back into place. Double-check that the seat sits centered before you commit to tightening.
Snug down each mounting nut, alternating between left and right so the seat seats evenly against the porcelain. You’ll feel both sides draw flush at the same time. Avoid overtightening—stop the moment the seat stops moving.
Flip the hinge caps back down until they click shut. That small snap tells you they’re locked. Wipe away any fingerprints or cleaner residue with your rag so the finish looks fresh.
Run your hand around the base of the seat one last time. Nothing should shift, rattle, or catch. A solid, quiet seat means your hardware is properly secured and ready for daily use.
Step 8 – Test the Soft Close Action
The final step proves your work paid off. Lift the lid fully and let it go without touching it.
A properly repaired seat drifts down in a slow, silent arc, settling onto the bowl with barely a whisper. No slam, no thud, no jolt. That smooth descent is the sound of success.
Repeat the test a few times, lifting both the lid and the seat ring separately. Each should glide down gently on its own. If either one drops too fast, recheck that damper’s seating in the hinge.
Give the seat a final wobble test too. It should feel rock solid with zero side-to-side play. Once everything moves smoothly and stays put, you’ve earned that quiet, satisfying close back in your bathroom.
Critical Mistakes When Repairing a Soft Close Toilet Seat
Even an easy repair can go sideways if you rush it. The most common mistake is overtightening the mounting bolts. Porcelain is brittle, and cranking those underside nuts too hard can crack your toilet bowl rim or even the tank. Tighten until the seat stops moving, then stop—snug is plenty.
Another frequent error is forcing the plastic hinge caps open. These thin covers snap easily when you pry hard at one corner. Work the screwdriver gently along the edge instead, and you’ll save yourself a trip to the store for replacements.
Many beginners also try to repair dead dampers instead of replacing them. Once the fluid inside the slow-close mechanism dries out, there’s no fixing it. Swap the whole hinge assembly and skip the frustration.
Buying mismatched replacement hardware trips people up too. Seats and hinges vary by brand, so always check your model number before ordering. Generic parts often don’t seat correctly and leave the lid crooked.
Finally, don’t skip the diagnosis step. Tightening bolts won’t help a worn damper, and replacing hinges won’t fix a simple loose nut.
Expert Tips
Want your repair to last? Clean the hinge area thoroughly before reassembling. Grime and mineral buildup around the dampers shorten their life, so a quick wipe with mild cleaner goes a long way.
Keep your seat’s model number saved in your phone. When a part fails later, you’ll order the exact matching hardware in seconds instead of guessing.
Avoid harsh bathroom cleaners directly on the hinges. Bleach and abrasive sprays degrade the plastic and dry out the slow-close fluid faster than normal use ever would.
When tightening underside nuts, alternate sides like you would with car lug nuts. This keeps pressure even and prevents the seat from sitting crooked.
And if your seat is more than a few years old and parts keep failing, consider replacing the whole unit. A fresh seat often costs less than repeated repairs and gives you years of quiet, reliable use.
Frequently Asked Questions
Why does my soft close toilet seat slam shut instead of closing slowly?
A slamming lid almost always means the dampers inside the hinges have worn out. These small cylinders hold thick fluid that slows the descent, and over time that fluid dries up or leaks. Check the resistance by pressing the lid down by hand. If it offers no smooth pushback, replace the hinge assembly to restore the gentle, silent close.
How do I stop my toilet seat from wobbling?
A wobbly seat usually comes from loose mounting bolts. To fix it:
- Pop open the hinge caps at the back
- Hold each bolt steady from the top
- Tighten the underside nuts by hand or with a wrench
Stop once the seat feels snug and stable. Don’t overtighten, since too much force can crack the porcelain bowl underneath.
Can I replace just the hinges on a soft close seat?
Yes, in most cases you can. Many manufacturers sell replacement hinge kits that include fresh dampers, bolts, and nuts. Check the underside of your seat for a model number, then order the matching kit. Swapping just the hinges costs far less than buying a whole new seat and takes only a few minutes once you have the right parts.
How tight should the toilet seat bolts be?
Tighten the bolts until the seat stops shifting and feels solid, then stop. Snug is the goal, not maximum force. Overtightening risks cracking the porcelain or stripping the plastic nuts. Give the seat a gentle wobble test after tightening. If it stays firmly in place with no side-to-side movement, you’ve reached the right tension.
Is it worth repairing a soft close toilet seat or should I replace it?
It depends on the seat’s age and condition. If only the bolts are loose or one damper failed, a quick repair makes sense and saves money. But if the seat is old, cracked, or parts keep failing repeatedly, a full replacement is the smarter choice. A new seat often costs about the same as multiple repair kits anyway.
Conclusion
A noisy, wobbly toilet seat doesn’t have to be a daily frustration. Now you know how to repair a soft close toilet seat from start to finish—diagnose the real problem, pop the hinge caps, tighten the bolts, fix the lid alignment, and replace worn dampers when needed. None of it requires special skills, just a screwdriver, a few minutes, and a little patience.
The payoff is real. You get back that smooth, silent close, protect your toilet from cracks and grime, and skip the cost of calling a plumber for such a simple job. That’s a cleaner bathroom and a quieter house, all thanks to your own two hands.
So grab your tools, take a quick photo of the hardware before you start, and tackle that seat today. Once you feel the lid drift down silently again, you’ll wonder why you waited. Keep your model number handy, clean the hinges now and then, and enjoy a seat that works exactly like it should.