

Few things ruin a project faster than a bolt that just spins and spins, refusing to grip. Maybe you over-tightened a screw, cross-threaded a spark plug, or stripped out a soft aluminum hole. The fastener won’t hold, and the part it’s supposed to secure flops loose. The good news? You don’t need a machine shop or a pricey mechanic to fix it. With a little patience and the right kit, you can rebuild that hole and make it stronger than before.
Learning how to use thread repair kit tools saves money, rescues expensive parts, and gets your gear working again. Whether you’re patching a wobbly cabinet hinge or a stripped engine bolt, the process is simpler than it looks. This guide walks you through every step, from drilling the damaged hole to testing your freshly repaired fastener.
Why Learning to Use a Thread Repair Kit Matters
Stripped threads happen to everyone, and they always seem to strike at the worst moment. For homeowners, a thread insert can save a stripped appliance mount or a stripped bolt on the lawnmower deck. Renters love that this fix is quick, cheap, and doesn’t require calling in a pro.
DIY beginners gain a core skill here. Once you learn stripped threads repair, you stop tossing out parts that look ruined but aren’t. The savings add up fast, especially on metal components that cost a fortune to replace.
Campers and outdoor beginners benefit too. When a bike crank strips out on the trail, or a tent pole bracket or engine bolt fails miles from town, a small rethreading kit can rescue the trip. This is real mechanical fastener repair you can do anywhere.
Tools and Materials You’ll Need
Gather everything before you start so you’re not hunting for parts with a half-drilled hole staring at you. Most thread repair kits bundle the core pieces together, but double-check the box.
Here’s what you’ll need:
- Thread repair kit matched to your bolt size and thread pitch
- The correct drill bit size (usually included in the kit)
- A power drill or hand drill
- Tap and tap wrench for cutting new threads
- Insertion tool for the thread insert
- Tapping fluid or cutting oil
- Safety glasses and work gloves
- Clean rags and a small brush for clearing metal shavings
- A vacuum or magnet to catch debris
Optional but handy: a thread pitch gauge. It takes the guesswork out of matching your fastener, so you order the right kit the first time and avoid a frustrating mismatch.
Step-by-Step Guide on How to Use Thread Repair Kit
Take each stage slowly, especially drilling and tapping. Rushing those creates crooked threads that never grip properly.
Step 1 – Identify the Damage and Match the Kit
Start by sizing up the problem. Look closely at the bolt and the hole. Are the damaged bolt threads on the fastener itself, or are the stripped threads inside the hole? Most repairs target the hole, since that’s the harder part to replace.
Measure the bolt’s diameter and thread pitch with a gauge or by matching it to a known fastener. This tells you which kit to buy, whether it’s a standard helicoil repair or a solid insert system.
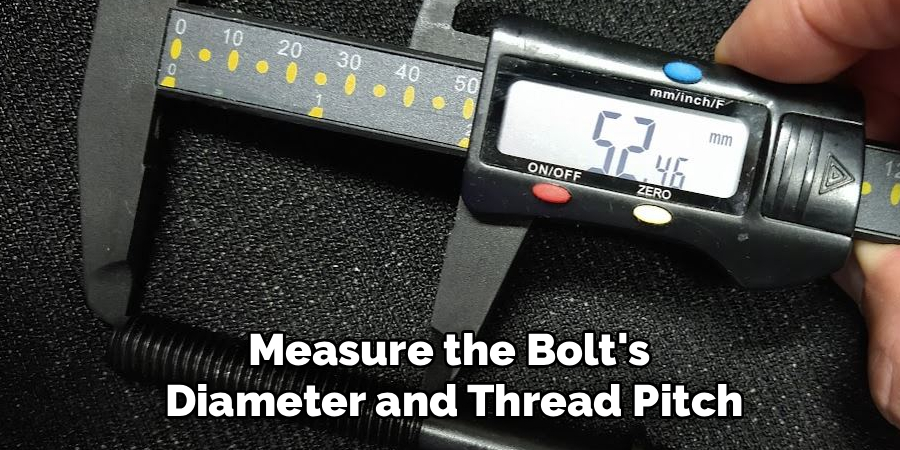
Getting this match right matters more than any other step. A kit that’s slightly off size will leave you with a loose, useless repair. Run your fingers along the threads and confirm the damage before you commit to drilling anything out.
Step 2 – Clean and Prep the Damaged Area
Before any drilling, clean the area thoroughly. Brush away grit, old thread-locker, and any loose metal flakes around the hole. A clean surface lets your drill bit bite straight and true.
Wipe the surrounding metal with a rag so you can see the hole clearly. If the part is greasy, a quick degreaser helps. You want a clear view of the opening and a stable surface to work against.
Secure the part if you can, clamping it in a vise or bracing it firmly. A wobbling piece throws off your alignment fast. Put on your safety glasses now, because the next steps send sharp metal shavings flying. A tidy, steady setup makes everything that follows easier.
Step 3 – Drill Out the Stripped Hole
Now you’ll open up the damaged hole. Chuck the correct drill bit size into your drill; the kit specifies this exactly, so don’t guess. The right bit removes the ruined threads while leaving enough metal for the new ones.
Hold the drill perfectly straight, lined up with the original hole’s axis. Squeeze the trigger gently and let the bit do the work with light, steady hand pressure. You’ll hear the metal cut and see fresh shavings curl out of the hole.
Keep the drill level, especially in damaged threads in aluminum, which cuts soft and fast. Stop when you reach the depth the kit calls for. Blow out the shavings and check that your hole looks round and clean.
Step 4 – Apply Tapping Fluid and Cut New Threads
This stage is where how to use thread repair kit tools really comes together. Apply a few drops of tapping fluid to the freshly drilled hole. This lubricant cools the cut, eases the tap’s travel, and gives you cleaner, stronger threads.
Fit the tap into your tap wrench and set its tip squarely into the hole. Press down lightly while turning clockwise. Go slow and feel the tap bite into the metal.
Turn the tap forward a half turn, then back a quarter turn to break the chip. You’ll feel the resistance ease each time. Repeat this rhythm, adding fluid as you go. The back-and-forth clears metal shavings and keeps the threads crisp instead of torn.
Step 5 – Clear Out the Metal Shavings
Don’t skip this cleanup. Fresh threads fill with tiny metal curls and dust, and those bits will jam your insert if you leave them behind. A clean hole means a smooth installation.
Back the tap all the way out, turning counterclockwise until it’s free. Blow into the hole or use compressed air to clear loose debris. A small magnet works wonders on steel shavings, while a vacuum catches the rest.
Run a brush around the opening and wipe the surrounding surface. Tilt the part and tap it gently so any trapped chips fall out. Peer into the hole; you should see clean, evenly cut threads with no clinging fragments. This quick step protects all the careful work you just did.
Step 6 – Install the Thread Insert
Here comes the satisfying part. Thread the new insert onto the installation tool that came with your kit. For a helicoil repair, you’ll wind the coiled insert onto a mandrel until it sits ready.
Line the insert up with the hole and turn it in slowly with steady hand pressure. It should thread in smoothly, sinking just below the surface of the metal. If it fights you, stop and check your alignment rather than forcing it.
Wind it down until the top of the insert sits a fraction below the surface. For coiled types, you’ll then snap off the small tang at the bottom using the tool provided. Give it a gentle tug to confirm the insert seated firmly and won’t back out.
Step 7 – Inspect the New Threads
Pause and check your handiwork before testing under load. Look into the repaired hole and confirm the insert sits flush or slightly recessed, never sticking out. A proud insert can interfere with the part you’re bolting down.
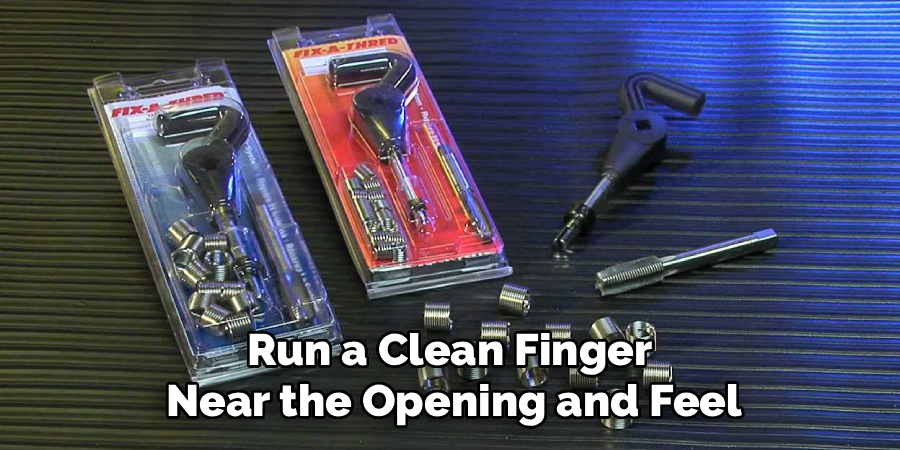
Run a clean finger near the opening and feel for any rough edges or stray shavings you missed. The threads inside should look uniform and tightly wound, whether you used a solid insert or a coil.
Shine a light into the hole if it’s deep. You want to see clean metal all the way down with no gaps or cross-threading. This quick inspection catches problems now, while they’re easy to fix, instead of after you’ve torqued a bolt and felt it slip again.
Step 8 – Test the Repaired Fastener
Time for the moment of truth. Take the original bolt, add a touch of oil to its threads, and start it into the repaired hole by hand. It should thread in smoothly with light resistance, catching firmly rather than spinning free.
Turn it down most of the way by hand, feeling for that solid, even grip. Then snug it with your wrench to the proper torque, listening and feeling for steady tightening.
The bolt should hold tight and pull the part securely into place, just like new metal. Give it a firm test pull to confirm. If it grips and holds, you’ve nailed a real mechanical fastener repair, and that hole is often stronger than the original.
Critical Mistakes When Using a Thread Repair Kit
The most common mistake is choosing the wrong size kit. People eyeball the bolt instead of measuring the diameter and thread pitch, then end up with an insert that’s loose or won’t fit at all. Always measure carefully, and use a thread pitch gauge if you have one. Matching the kit to the fastener is the foundation of the entire repair.
Another frequent error is drilling crooked. If you tilt the drill even slightly, the new threads angle off-center, and the bolt never seats straight. Brace the part, line up with the original hole, and keep the drill level, especially in soft damaged threads in aluminum that cut fast.
Skipping the tapping fluid causes plenty of grief too. Dry tapping tears the threads, overheats the metal, and can snap the tap right off inside the hole. A few drops of lubricant and a steady forward-and-back rhythm keep the threads clean and crisp.
Finally, many beginners rush past cleanup and leave metal shavings in the hole. Those chips block the insert and ruin the fit. Clear every fragment before installing, then inspect the threads before you torque anything down.
Expert Tips
Work in good light and keep a magnet nearby. Stray steel shavings hide in shadows and cling to threads, so a quick sweep after drilling and tapping saves you a jammed insert later.
When tapping, let the tool set its own pace. Forcing it forward shreds the threads, while the gentle half-turn-forward, quarter-turn-back rhythm breaks each chip cleanly and feels almost effortless once you find it.
For a spark plug thread repair or any high-heat spot, choose an insert rated for the temperature and use a thread-locker designed for the job. These spots vibrate and heat constantly, so a proper insert holds far better than the original soft threads ever did.
Finally, keep a small rethreading kit in your toolbox or camping gear. Stripped threads always strike at the worst time, and having the right tools on hand turns a trip-ending failure into a ten-minute fix.
Frequently Asked Questions
Can I repair stripped threads without a thread insert?
Sometimes, yes. Lightly damaged threads can be cleaned up with a tap or a rethreading tool that simply re-cuts the existing threads. This works when the metal is mostly intact and only the peaks are nicked. But once threads are badly stripped or torn out, a thread insert is the stronger fix, since it rebuilds the hole with fresh, durable threads.
What drill bit size should I use?
Always use the drill bit size specified by your kit. Each kit is engineered so the bit removes the damaged threads while leaving enough metal for the tap to cut new ones. Guessing or using a random bit leads to a loose, useless repair. If your kit didn’t include the bit, check the instructions for the exact size and thread pitch combination.
Will a thread insert hold as well as the original threads?
In most cases, it holds even better. A properly installed insert, especially a steel coil in soft metal, often creates stronger threads than the original. This is why inserts are common in:
- Aluminum engine blocks
- Spark plug holes
- High-vibration brackets
The key is matching the kit correctly and installing it straight and clean.
How do I fix stripped threads in aluminum specifically?
Aluminum is soft, so work gently. Drill slowly to avoid grabbing, use plenty of tapping fluid, and keep your tap perfectly straight since the metal cuts fast. A steel thread insert is ideal here, because it gives the soft aluminum a hard, durable thread surface. Go slow on every step, and your repaired hole will hold better than the original aluminum threads did.
Can I use a thread repair kit on engine parts?
Absolutely, and it’s one of the most common uses. Stripped spark plug holes, oil pan bolts, and head bolts all respond well to inserts. For high-heat or high-vibration spots, choose an insert rated for the conditions and follow the torque specs. Clear every metal shaving before installing, since debris in an engine can cause serious damage down the road.
Conclusion
Rescuing a stripped, spinning bolt is far more doable than it first appears. You’ve learned to identify the damage, match the right kit, drill the hole straight, lubricate and tap fresh threads, clear away the shavings, install the insert, inspect your work, and test the repaired fastener under load. The real secret isn’t fancy equipment; it’s measuring carefully and taking each step slow. Match the size right, keep the drill level, and never skip the tapping fluid or cleanup.
Take pride in the strong, reliable hole you’ve built. That part you almost threw away now grips tighter than ever, and you saved yourself the cost and hassle of a replacement or a repair bill.
Knowing how to use thread repair kit tools turns a frustrating failure into a quick, confident fix, whether you’re at the workbench, under the hood, or out on the trail. So grab your kit, line up that drill, and start rebuilding those threads. Once you feel that bolt catch and hold firm, you’ll wonder why you ever worried.