

You hit the button on your remote, expecting your garage door to close securely. Instead, it stops, reverses, and the lights start blinking.
If this sounds familiar, you are not alone. Thousands of homeowners deal with this frustrating issue every single year.
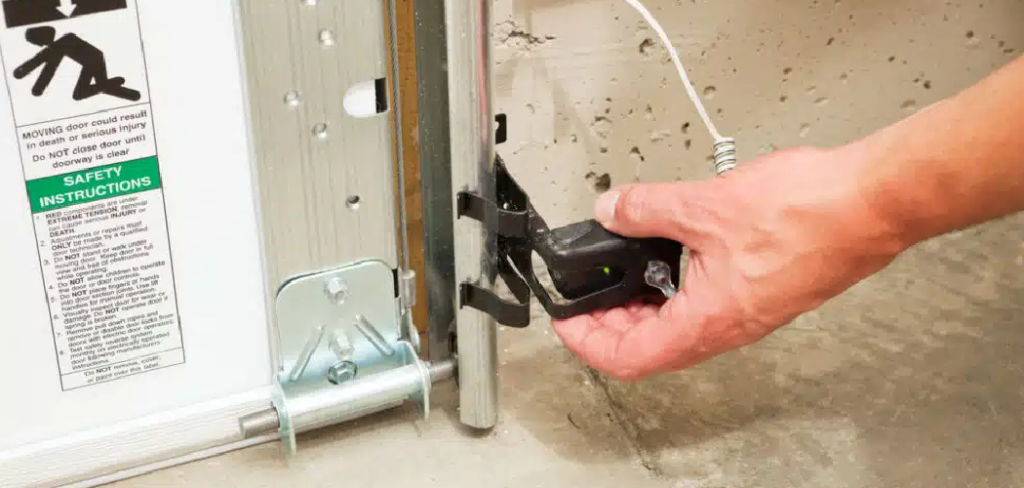
Most of the time, the culprit is a simple issue with the safety eyes located near the floor. Knowing exactly how to repair garage door sensor issues will save you major headaches.
Hiring a technician to come out and fix this small problem can cost you a lot of money. You are paying for their travel time and expertise for a job you can easily do yourself.
With a little patience and a few basic household tools, you can get your door running smoothly again. We are going to walk through this together, step by step.
What Causes This Problem?
Before we start fixing things, it helps to understand why your system is acting up. Garage door sensors are designed to keep you and your family safe.
They work by sending an invisible beam of light across the opening of your garage. If anything breaks that beam, the door reverses to prevent crushing it.
When your door refuses to close, the sensors usually think something is in the way. Here are the most common reasons why this happens:
- Dirty lenses: Dust, dirt, and spiderwebs can easily block the delicate safety eyes.
- Poor alignment: If the two sensors are bumped, they will not point directly at each other.
- Direct sunlight: Bright sun shining directly into the receiving sensor can wash out the infrared beam.
- Damaged wiring: Small animals, vibrations, or regular wear and tear can fray the wires connecting the sensors.
- Moisture damage: Heavy rain or washing the garage floor can short out the sensitive electronics inside.
- Object interference: Sometimes, a stray garbage can or fallen broom handle is simply blocking the path.
Tools & Materials Needed
You do not need an advanced engineering degree or a massive toolbox for this project. In fact, you probably already have everything you need sitting in your house.
Gathering these items before you begin will make the entire process much faster and smoother. Here is what you should grab:
- A clean, dry microfiber cloth (for wiping the lenses).
- A mild glass cleaner or warm soapy water.
- A standard Phillips-head screwdriver.
- A standard flathead screwdriver.
- A tape measure (to check the sensor height).
- A level (to ensure perfect alignment).
- Electrical tape and wire strippers (just in case we find bad wiring).
- Your smartphone (to take photos of the current setup before you change anything).
Once you have these items ready, clear the area around the base of your garage door. You will want plenty of space to work comfortably.
Step-by-Step Fix Guide: How to Repair Garage Door Sensor
Now we get to the fun part. Fixing this issue is incredibly satisfying, and you will feel like a total pro when it is done.
Take your time with each of these steps. Do not rush the process, as small details matter when dealing with safety systems.
Step 1: Clear the Area and Inspect the Lights
First, thoroughly check the area around your garage door opening. Make sure absolutely nothing is blocking the invisible path between the two sensors.
Even a loose leaf or a hanging spiderweb can trigger the safety mechanism. Sweep the floor near the tracks to be completely sure.
Next, look closely at the small LED lights on both of your sensors. Most modern systems have an amber (sending) light and a green (receiving) light.
The amber light should always be solid, as it simply indicates the unit has power. The green light tells you if it is successfully receiving the beam.
If the green light is flickering or completely dark, you know exactly where the problem lies.
Step 2: Clean the Safety Eyes
Garages are incredibly dusty environments. Every time you drive your car in or sweep the floor, dirt gets kicked into the air.
Over time, this grime settles directly onto the small glass lenses of your sensors. A dirty lens will scatter the infrared beam, causing the system to fail.
Take your clean microfiber cloth and gently wipe the front of both lenses. Do not press too hard, as you do not want to scratch the glass.
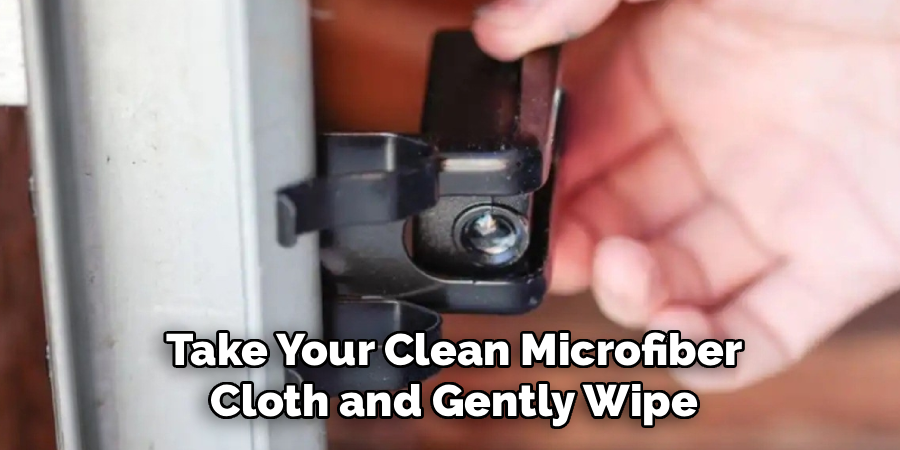
If there is stubborn grime, lightly dampen the cloth with a bit of glass cleaner. Never spray cleaner directly onto the sensor unit itself.
Once both lenses are perfectly clean, check the green light on the receiving unit again. Often, this simple cleaning is all it takes to fix the issue.
Step 3: Check and Fix the Alignment
If cleaning did not solve the problem, alignment is the next most likely culprit. Sensors are easily bumped by trash cans, bikes, or even your foot as you walk by.
If they are off by even a fraction of an inch, the beam will not connect. The sending unit must point squarely at the receiving unit.
Grab your tape measure and check the height of both sensors from the floor. They should both be mounted at the exact same height, typically about six inches off the ground.
If one is higher than the other, use your screwdriver to loosen the mounting bracket. Gently slide it up or down until the heights match perfectly.
Next, use your hands to gently pivot the receiving sensor. Move it slowly side to side, watching the green LED light as you do.
When the green light becomes completely solid and stops flickering, stop moving the sensor. Hold it firmly in that position and tighten the bracket screws so it stays put.
Step 4: Inspect the Wiring for Damage
If your lenses are clean and perfectly aligned, but the green light is still off, we need to check the power. The sensors rely on thin wires that run all the way up to the main motor head.
These wires are surprisingly fragile and can be damaged quite easily. Start at the sensor itself and trace the wire upward with your eyes and hands.
Look for any places where the wire might be pinched by a staple or chewed by a mouse. Check the connections at the back of the sensor to ensure they are tight and secure.
If you find a broken wire, you can easily splice it back together. Use your wire strippers to expose a bit of fresh copper on both ends.
Twist the two bare ends together tightly. Wrap the connection securely with high-quality electrical tape to protect it from moisture.
Finally, grab your stepladder and look at the back of the overhead motor unit. Make sure the sensor wires are firmly pushed into their correct terminals.
Step 5: Test the System Thoroughly
Now that you have cleaned, aligned, and checked the wires, it is time for a test. Move your tools out of the way and clear the area completely.
Press the button on your wall console or remote control. Watch the door carefully as it travels downward.
If it closes all the way and stays closed, give yourself a massive pat on the back. You have successfully solved the problem!
To be absolutely sure everything is safe, you need to test the reversal feature. Open the door again.
Hit the close button, and while the door is moving, wave your broom handle across the sensor path. The door should immediately stop and reverse back upward.
If it does, your safety system is working perfectly. Your family and pets are completely protected.
Important Safety Warnings
Working around heavy machinery always requires a good dose of caution. Your garage door is likely the heaviest moving object in your entire home.
The springs and cables hold massive amounts of tension and can be very dangerous. Never attempt to adjust the large overhead springs, the bottom brackets, or the lift cables.
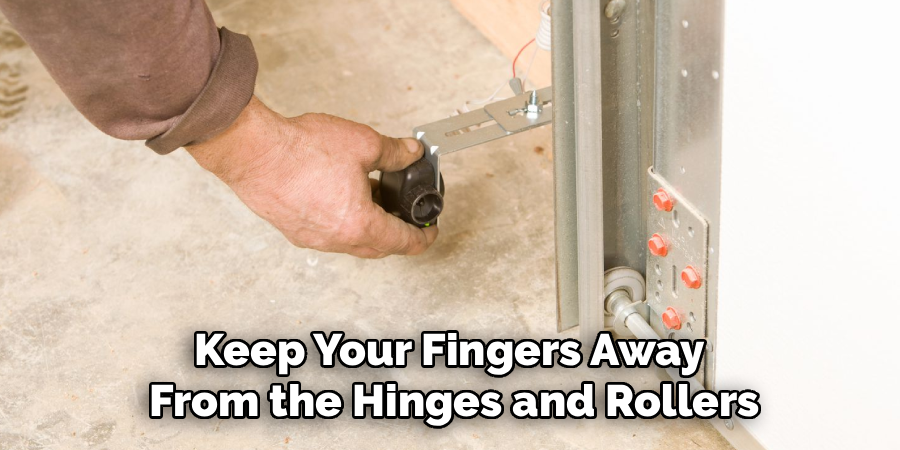
When working near the tracks, keep your fingers away from the hinges and rollers. It is very easy to get pinched if the door moves unexpectedly.
Always unplug the main motor unit from the ceiling outlet before splicing any wires. Even though the sensor voltage is low, you do not want to risk a short circuit.
If you need to use a ladder to check the motor connections, make sure it is on a stable, level surface. Never stand on a bucket or a wobbly chair to reach the ceiling.
When to Call a Professional
DIY repairs are incredibly rewarding, but it is equally important to know your limits. There is absolutely no shame in calling in an expert when things get tricky.
If you have tried cleaning, aligning, and checking all the wires without success, the sensors might simply be dead. Internal electronic failures cannot be fixed with a screwdriver.
If you notice that the logic board on the main overhead motor looks burned or smells like smoke, stop immediately. Replacing a logic board is often best left to a professional.
Likewise, if your door is making horrible grinding noises, or if the metal tracks look severely bent, call for help. These issues go beyond basic sensor maintenance.
A professional technician can diagnose complex electrical issues quickly and safely. They have the specialized tools to test voltage drops and logic board faults.
Cost Estimate: DIY vs. Professional
One of the best parts of fixing this yourself is keeping your hard-earned money in your wallet. The cost difference between DIY and professional repair is staggering.
If you fix the alignment or clean the lenses yourself, your cost is literally zero dollars. You only spent a few minutes of your time.
If you need to replace a damaged wire, a roll of electrical tape costs about three dollars. Even buying a brand-new set of replacement safety eyes usually costs between thirty and fifty dollars.
On the other hand, calling a professional garage door company comes with a steep price tag. Most companies charge a service fee just for driving to your house, which ranges from $75 to $150.
Once they diagnose the issue, you will pay for parts and labor. A simple sensor realignment or replacement by a pro can easily cost between $150 and $250.
By taking twenty minutes to troubleshoot this yourself, you are saving a substantial amount of money.
Frequently Asked Questions
You might still have a few lingering questions about your specific setup. Here are some of the most common questions homeowners ask about this exact issue.
Can I bypass my garage door sensors entirely?
No, you should never permanently bypass your safety sensors. It is extremely dangerous, illegal in most places, and violates federal safety regulations.
Why does the sun affect my sensors?
Bright, direct sunlight can mimic the infrared beam, confusing the receiving unit. You can fix this by building a small cardboard shade over the sensor lens.
Are garage door sensors universal?
Not usually. You generally need to buy replacement sensors that match your specific brand (like Chamberlain, LiftMaster, or Genie) and manufacture year.
How often should I clean the safety eyes?
It is a good habit to wipe the lenses down every three to four months. Doing this when you do seasonal yard work is a great way to remember.
Why is one sensor light yellow and the other green?
The yellow (or amber) light is the sending unit, meaning it has electrical power. The green light is the receiving unit, which illuminates only when it catches the beam perfectly.
Conclusion on How to Repair Garage Door Sensor
Dealing with a stubborn door can definitely ruin your morning. But as you have seen, it is rarely a reason to panic.
By understanding how your system works, you take the mystery out of home maintenance. You now know exactly what to look for when the lights start blinking.
Remember to start with the simplest solutions first: clear the path, clean the lenses, and check the alignment. Most of the time, that is all it takes to get things moving again.
You do not need to be a master electrician to maintain a safe and functional home. Trust your abilities, take your time, and follow the steps outlined above.
If this guide on how to repair garage door sensor issues helped you out, share it with a neighbor! If you still need parts, check out our recommended replacement sensors below to finish the job today.