

Do you have a beautiful garden path that goes completely dark at night?
You are not alone.
Outdoor solar lamps are fantastic additions to any yard. They add charm, improve security, and do not impact your electricity bill. But when they stop shining, it is incredibly frustrating.
Most people just throw them away and buy new ones. This is a huge waste of money. Instead, learning how to repair solar lights is easier than you might think.
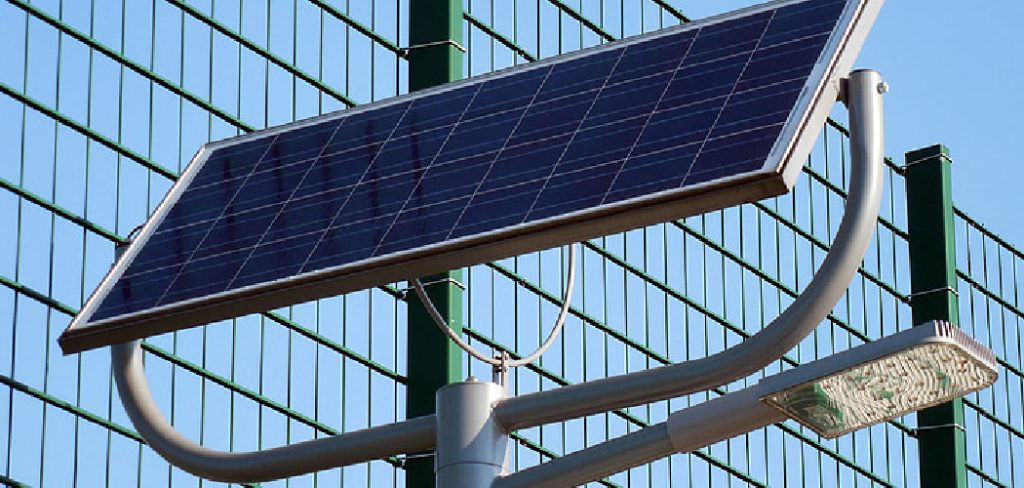
You do not need to be an electrician. With a few basic tools, you can easily bring your landscape lighting back to life.
Let’s dive into why your pathway lights stop working and exactly how to fix them.
What Causes This Problem?
Before you start fixing things, it helps to understand what went wrong. Outdoor lighting faces harsh weather all year round.
Here are the most common culprits keeping your yard dark:
- Dead or faulty batteries: Rechargeable batteries lose their ability to hold a charge over time.
- Dirty solar panels: Dust, mud, and hard water stains block sunlight from reaching the solar cells.
- Water accumulation: Rain can seep into the housing and corrode the metal contacts.
- Loose or broken wiring: Sometimes, a simple wire comes loose from a drop or rough handling.
- Faulty light sensors: The photoresistor (the sensor that detects darkness) might be dirty or broken.
- A simple switch issue: Believe it or not, the on/off switch might just be in the wrong position.
Tools & Materials Needed
You do not need an expensive toolkit to get the job done. In fact, you probably have most of these items sitting in a kitchen drawer right now.
Gather these supplies before you begin:
- A small Phillips-head screwdriver
- A flat-head screwdriver (for prying open tough casings)
- A soft, damp microfiber cloth
- Rubbing alcohol (isopropyl alcohol)
- A soft-bristled toothbrush
- Replacement rechargeable batteries (match the exact type, usually NiMH or NiCd)
- Clear nail polish or a specialized plastic restorer (for cloudy panels)
- A basic multimeter (optional, but helpful for testing voltage)
Step-by-Step Fix Guide: How to Repair Solar Lights
Now it is time to roll up your sleeves. Do not worry if you have never fixed electronics before.
These devices are incredibly simple on the inside.
Follow these beginner-friendly steps to troubleshoot and fix your broken outdoor lighting.
Step 1: Check the Power Switch
This might sound a bit silly, but it happens all the time.
Many outdoor lamps have a small physical power switch located under the top housing. If you recently moved your lamps, or if an animal bumped into them, the switch might be off.
Flip the lamp over and twist off the top cover. Look for a tiny switch labeled “On/Off.”
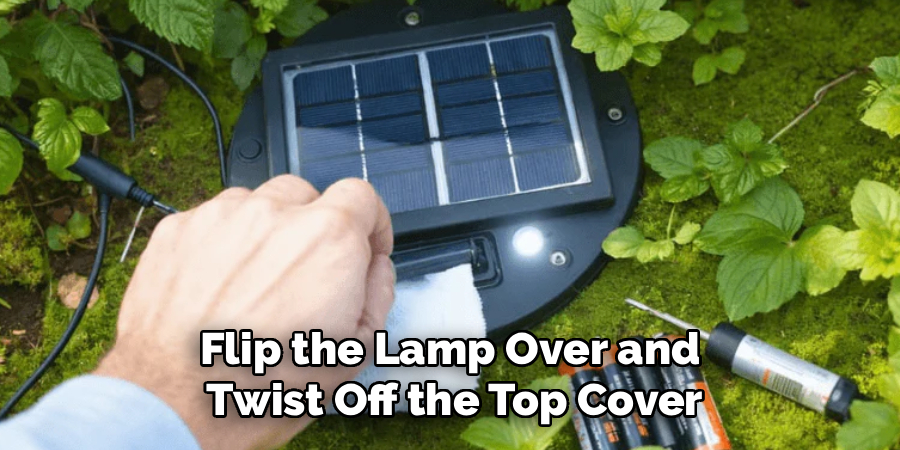
Make sure it is pushed firmly into the “On” position. Test the light by taking it into a dark room or covering the solar panel with your hand.
Step 2: Clean the Solar Panel
If the switch is on but the lamp is still dark, check the solar panel on top.
Over time, panels build up a thick layer of dust, pollen, and hard water residue. If the sun cannot reach the solar cells, the battery will never charge.
Take your soft microfiber cloth and wipe away any loose dirt.
Next, dip the cloth in rubbing alcohol and gently scrub the panel. The alcohol cuts through tough grime and dries quickly.
Step 3: Fix Cloudy Plastic Panels
Sometimes, cleaning the dirt is not enough. The plastic covering the solar cells can become cloudy and white due to sun damage.
This oxidation ruins the charging efficiency.
To fix this, wipe the clean panel with a coat of clear nail polish. This fills in the microscopic scratches and instantly makes the plastic clear again.
Allow the nail polish to dry completely before placing the unit back outside.
Step 4: Inspect and Replace the Batteries
If the panel is clean but the light is dead, the battery is almost always the culprit.
Rechargeable batteries usually only last one to two years.
Use your small screwdriver to open the battery compartment. Take out the old battery and look at the ends. Do you see white, crusty buildup? That is battery acid corrosion.
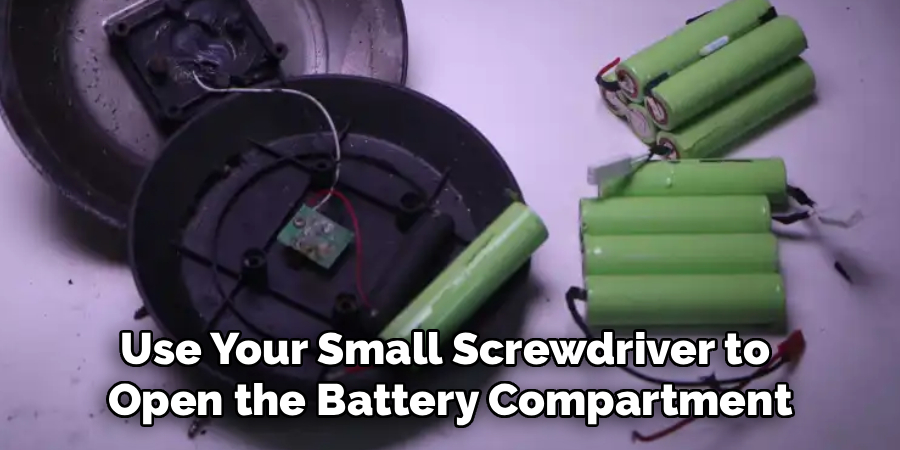
If you see corrosion, clean the metal contacts with an old toothbrush and a drop of vinegar.
Once the compartment is clean and dry, pop in a fresh rechargeable battery. Make sure you use the exact same type (like AA or AAA NiMH). Never use standard alkaline batteries, as they will ruin the unit.
Step 5: Check for Loose Wiring
Still no light? It is time to look a little deeper inside.
Gently unscrew the housing that holds the circuit board and the LED bulb. Be very careful when pulling the pieces apart.
Look closely at the thin wires connecting the battery pack, the solar panel, and the LED light.
Are any of the wires detached? If a wire has snapped off its soldering point, the power circuit is broken.
If you have a soldering iron and know how to use it, you can easily reattach the wire. If not, a tiny piece of electrical tape can sometimes hold it in place temporarily.
Step 6: Dry Out Water Damage
Outdoor fixtures are supposed to be waterproof, but seals fail over time.
If you open the housing and find water pooled inside, this is likely causing a short circuit.
Carefully disassemble the unit as much as possible. Dry all the parts with a paper towel.
Leave all the components spread out on a dry towel indoors for at least 24 hours. Once everything is completely bone dry, reassemble it.
You can add a thin layer of silicone sealant around the edges before putting the cover back on to prevent future leaks.
Step 7: Test the Sensor
Solar lamps use a tiny photoresistor to detect when the sun goes down.
If this sensor is broken, the light will not know when to turn on.
To test it, turn the switch on and take the unit into a pitch-black room. If the light turns on, the sensor works.
If it stays off, try shining a flashlight directly into the sensor, then turning the flashlight off. If there is still no response, the sensor or the LED bulb itself is likely burned out.
Safety Warnings to Keep in Mind
Even though these are small, low-voltage devices, safety is always a priority.
Keep these cautions in mind while working on your project:
- Handle corrosion carefully: Battery acid can irritate your skin and eyes. Wash your hands immediately after cleaning battery contacts.
- Watch out for sharp plastic: Old, sun-baked plastic becomes brittle. Be gentle when prying open covers to avoid snapping pieces into your fingers.
- Do not mix battery types: Never put a non-rechargeable alkaline battery into a solar charging device. It can overheat, leak, or even burst.
- Avoid working in wet conditions: Always bring your broken lamps indoors to a dry, well-lit workbench before opening them up.
When to Call a Professional (or Buy New)
We love saving money with DIY fixes. However, there are limits to what makes sense.
If you have followed all the steps above and your lamp is still dead, the main circuit board is likely fried.
Unlike heavy landscape lighting wired into your home’s electrical system, individual stake lights do not require a professional electrician.
If the internal motherboard fails, hiring a repair technician will cost far more than the light is worth.
If you have cleaned the panel, replaced the battery, and checked the wires to no avail, it is okay to retire the unit. Simply salvage any working parts (like the new battery) and purchase a replacement.
Cost Estimate: DIY vs. Professional Replacement
Why bother fixing these small yard accessories? The math speaks for itself.
A high-quality set of outdoor pathway lights can cost anywhere from $40 to $150.
If you hire a landscaper to come troubleshoot and replace your fixtures, you can expect to pay $50 to $100 just for the labor call out.
On the other hand, the DIY cost is practically zero.
A bottle of rubbing alcohol and some clear nail polish cost about $5. A multi-pack of replacement rechargeable batteries usually runs between $10 and $15.
For less than twenty bucks, you can easily repair an entire dozen lamps. That keeps money in your wallet and plastic out of the landfill.
Frequently Asked Questions
You might still have a few questions about your landscape setup. Here are some quick answers to the most common queries.
Can I use regular batteries in my solar lights?
No, you must never use regular alkaline batteries. These devices are designed to push electricity back into the battery during the day. Standard batteries cannot handle this and will leak or burst. Always use rechargeable NiMH or NiCd batteries.
How long do solar light batteries usually last?
With typical daily use, rechargeable batteries will last between one and two years. Extreme hot or cold weather can shorten their lifespan. If your lamp only stays lit for an hour after a full day of sun, it is time for a replacement.
Do my panels need direct, full sunlight to charge?
While direct sunlight is best, they will still charge on cloudy days or in partial shade. However, the charge will be weaker. If your lamp is under a thick tree canopy, consider moving it to a brighter spot for better performance.
How often should I clean the solar panels?
Make it a habit to wipe down the panels every two to three months. If you live in an area with heavy dust, frequent rain, or lots of pollen, you might need to clean them once a month.
Why do my lights blink or flicker?
Flickering is usually a sign of a loose connection or a battery that is struggling to hold a consistent charge. Open the battery compartment, ensure the battery is seated firmly, and check that the metal contacts are free of rust.
Conclusion: Get Your Yard Glowing Again
A dark garden path does not mean you need to rush to the hardware store.
By understanding how to repair solar lights, you can maintain a beautiful, well-lit yard on a budget.
Remember, most issues come down to a dirty panel or a tired battery. Take ten minutes this weekend to gather your broken fixtures, clean them up, and swap out the batteries.
You will be amazed at how quickly they bounce back to life. Plus, fixing things with your own two hands is incredibly rewarding.
Ready to tackle more easy home maintenance? Grab a screwdriver, head out to your garden, and let’s get those lights shining bright tonight!