

Nothing sinks your heart quite like seeing a fresh gouge across your favorite dining set. Whether it was caused by a sliding plate or a pet’s claws, wood damage is frustrating.
Many homeowners immediately panic and think they need to buy new furniture. Others assume they must hire an expensive carpenter. But knowing how to repair scratches on wood table surfaces is actually quite simple. You do not need to be a master woodworker to fix these annoying marks.
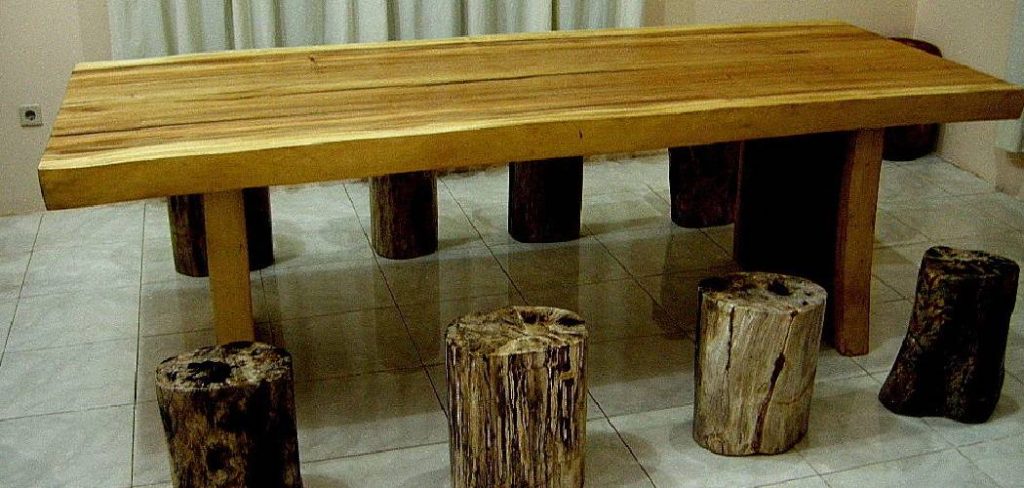
Fixing it yourself saves you a massive amount of money. You only need a few basic supplies and a free afternoon to restore your furniture’s original beauty. This guide will walk you through the entire process from start to finish. We will cover everything from assessing the damage to achieving a perfect buffing at the end.
Grab your tools, roll up your sleeves, and let’s get that table looking perfect again.
What Causes This Problem?
Before we start fixing, it helps to know how the damage happens. Wood is beautiful but surprisingly soft.
Even hard woods like oak or mahogany can suffer from everyday wear and tear. Preventing future damage starts with understanding the main culprits.
Here are the most common causes of wooden table scratches:
- Sliding rough objects: Pushing ceramic mugs, rough-bottomed plates, or heavy centerpieces across the surface.
- Pet claws: Cats jumping onto the table or dogs putting their paws up on the edge.
- Keys and hardware: Tossing keys, metal briefcases, or purses with metal studs onto the tabletop.
- Improper cleaning: Using abrasive sponges, harsh chemicals, or rough rags that wear down the clear coat.
- Kids’ activities: Pencils pressing too hard through paper, careless use of scissors, or dropping heavy toys.
- Dust buildup: Wiping a dusty table with a dry cloth acts like sandpaper, causing micro-scratches over time.
Tools & Materials Needed
You cannot start a repair without the right gear. Gathering your supplies beforehand makes the job much smoother.
Most of these items are already sitting in your garage or kitchen. Anything you do not have is cheap and easy to find at a local hardware store.
Here is exactly what you need:
- Soft microfiber cloths (several)
- Gentle dish soap and water
- Wood finish markers or blending pencils
- Raw walnuts or pecans (for light surface marks)
- Fine-grit sandpaper (220-grit and 400-grit)
- Quality wood filler or wood putty (matching your table’s color)
- A small plastic putty knife
- Matching wood finish or wood stain
- Paste wax or furniture polish for buffing
Step-by-Step Fix Guide on How to Repair Scratches on Wood Table
This section breaks down the exact repair process. We will tackle this step by step so you never feel overwhelmed.
Remember to take your time. Rushing a wood repair often leads to messy results.
Step 1: Clean the Surface Thoroughly
You cannot fix a scratch if it is full of dirt and grease. Always start with a completely clean surface. Mix a few drops of mild dish soap into warm water. Dip a microfiber cloth into the suds and wring it out until it is barely damp.
Gently wipe down the entire damaged area. Make sure to remove any sticky residue, dust, or old furniture polish. Once clean, use a dry microfiber cloth to wipe away any remaining moisture. Let the wood dry completely for about ten minutes before moving forward.
Step 2: Assess the Damage Level
Not all wood damage requires the same approach. You need to figure out exactly what kind of scratch you are dealing with. Look closely at the mark. Run your fingernail gently across the surface of the table.
If your nail glides over the mark without catching, you have a light surface scratch. This means only the clear topcoat is damaged. If your fingernail catches in the groove, you have a deep scratch. This means the damage has gone through the finish and into the raw wood below.
Step 3: Fix Light Scratches with Simple Tricks
Light surface scratches are the easiest to handle. You often do not even need to sand or fill the wood. One great trick is using a raw walnut. Break the walnut in half and rub the exposed meat over the scratch diagonally.
The natural oils from the nut will darken the scratch and blend it into the surrounding wood. Let the oil sit for a few minutes, then wipe it away with a soft cloth. Another option is using a colored wax stick or wood blending marker. Simply color over the mark and wipe away the excess with your finger.
Step 4: Prep Deep Scratches for Filling
If your fingernail caught in the groove, the walnut trick will not cut it. You need to fill the gap with a proper wood filler. First, clean inside the groove itself. Use a toothpick or the edge of a clean cloth to gently scrape out any trapped dirt.
If the edges of the scratch are jagged, you need to smooth them out. Take a small piece of 220-grit sandpaper and lightly sand just the edges of the gouge. Always rub in the direction of the wood grain. Never sand across the grain, or you will create more scratches.
Step 5: Apply the Wood Filler
Now it is time to fill that annoying gouge. Choose a wood filler that closely matches the natural color of your table. Take a small amount of filler on your plastic putty knife. Press it firmly down into the scratch.
Make sure you overfill the hole slightly. Wood filler tends to shrink just a bit as it dries. Use the flat edge of your putty knife to scrape away the heavy excess around the scratch. Then, step back and let the filler dry completely according to the package directions.
Step 6: Sanding and Smoothing
Once the filler is hard to the touch, you need to level it out. This is where your sandpaper comes back into play. Start with your 220-grit sandpaper. Gently sand the patched area until the filler is flush with the rest of the tabletop.
Keep your pressure light and even. Once the patch feels smooth, switch to your 400-grit sandpaper. This ultra-fine grit will polish the patch and prepare it for the final color. Wipe away all the sanding dust with a dry cloth.
Step 7: Apply the Wood Finish
Now we need to hide the patch by blending its color. This is where your matching wood finish or stain comes in. Dip a clean cloth or a small artist’s brush into the stain. Apply a very light coat directly over the sanded filler.
Let the stain sit for a minute, then wipe away the excess with a clean cloth. If the color is too light, apply a second coat. Let the stain dry completely. This usually takes a few hours, so patience is key here.
Step 8: Buffing and Polishing
The final step is bringing back that beautiful shine. The patched area probably looks a bit dull right now. Grab your paste wax or high-quality furniture polish. Apply a small amount to a clean microfiber cloth.
Rub the wax into the repaired area using a circular motion. Once the wax dries to a haze, use a fresh cloth for buffing. Buff vigorously until the table shines evenly. Your scratch should now be completely invisible to the naked eye.
Important Safety Warnings
Safety should always come first when doing home repairs. Even simple tasks carry a few minor risks.
When sanding wood or filler, always wear a basic dust mask. Inhaling fine wood dust is terrible for your lungs.
If you are using chemical stains, varnishes, or strong waxes, ensure your room has good airflow. Open a window or turn on a fan to keep fumes moving.
Finally, be incredibly careful with rags soaked in wood stain or oil-based products. They can spontaneously combust if thrown into a pile.
Always lay stain-soaked rags flat outside to dry completely. Once they are stiff and dry, you can safely throw them in the trash.
When to Call a Professional
We love DIY projects, but some jobs require an expert touch. Knowing your limits prevents you from ruining valuable furniture.
You should absolutely call a professional if your table is a certified antique. DIY repairs can destroy the historical value of antique furniture.
Call a pro if the scratch is actually a massive split or structural crack. Wood filler cannot hold two broken pieces of wood together safely.
You should also seek help if the table has a high-gloss, factory-sprayed lacquer finish. These glass-like finishes are nearly impossible to patch invisibly without specialized spray equipment.
If you feel completely overwhelmed at any point, stop. A local furniture restorer can easily take over and fix the issue.
Cost Estimate: DIY vs. Pro Repair
One of the biggest reasons to learn how to fix this yourself is the financial savings. Professional furniture repair is an expensive trade.
If you hire a professional restorer, you are paying for their time, travel, and expertise. A pro usually charges between $150 and $300 to come to your home and fix a single tabletop scratch.
If they have to take the table back to their shop to refinish the entire top, costs can easily exceed $500.
Now look at the DIY route. A pack of fine sandpaper costs around $5.
A small tube of wood filler runs about $8. A high-quality wood finish marker or small can of stain is perhaps $10.
Even if you buy paste wax and brand-new microfiber cloths, your total DIY cost stays under $35. By investing just an hour of your time, you save hundreds of dollars.
Frequently Asked Questions
Does olive oil fix scratched wood?
Olive oil mixed with vinegar can temporarily hide very light surface scratches. However, it can go rancid over time, so using a proper wax or walnut oil is a much better long-term solution.
Can I use a sharpie to color in a wood scratch?
You can use a brown permanent marker in a pinch for tiny dots. However, standard markers lack wood grain tones, so a dedicated wood finish marker always looks much more natural.
How do I stop my pets from scratching my wood table?
Keep your pets’ nails neatly trimmed to minimize damage. You can also use a protective table runner or clear protective mat if your pets frequently jump onto the furniture.
Will mayonnaise really fix water rings and scratches?
Mayonnaise contains oils that can lift cloudy white water rings from wood. It does not actually repair physical gouges or scratches, as it cannot replace missing wood material.
Do I need to sand the whole table to fix one scratch?
No, you do not need to sand the whole table for a minor localized scratch. You only need to strip the whole piece if there are dozens of deep scratches ruining the overall finish.
Conclusion
Seeing damage on your favorite furniture is annoying, but it does not have to be permanent. Now that you know how to repair scratches on wood table surfaces, you can handle these little accidents with ease.
By taking your time with the sandpaper, carefully matching your wood filler, and finishing with a good buffing, your table will look fantastic again. You just saved yourself a lot of money and learned a valuable new skill.
Do not let that scratch bother you for another day. Grab your supplies, follow these simple steps, and bring your dining table back to life!