

Noticing soft spots, peeling paint, or pest damage under your roof’s overhang? You are likely dealing with a damaged soffit. If you are wondering how to repair soffit, you have come to the right place.
I have spent years helping homeowners tackle exterior repairs. Fixing your soffit might seem intimidating at first glance. However, it is a highly rewarding project that most DIY enthusiasts can handle over a weekend.
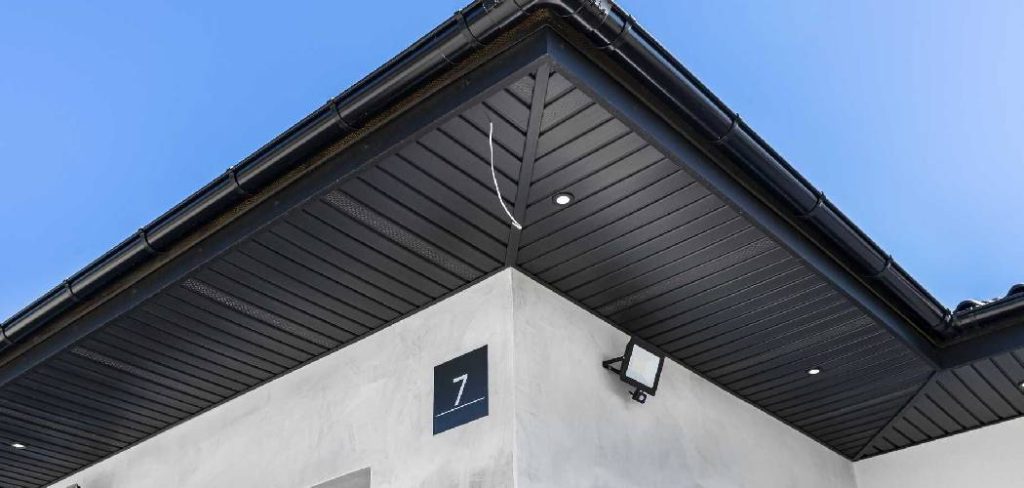
Tackling this project yourself saves you significant labor costs. It also gives you peace of mind knowing your roof is protected against the elements. Let’s walk through everything you need to know to get your roof’s overhang looking perfect again.
What Causes This Problem?
Before diving into how to repair soffit damage, we must understand why it happens. Identifying the root cause ensures your hard work actually lasts.
If you just slap a new board over a hidden leak, the rot will inevitably return. Here are the most common culprits behind soffit damage.
1. Clogged Gutters and Water Damage
Gutters are designed to channel water away from your roof. When they clog with leaves and debris, water overflows directly onto the wood underneath.
This constant moisture exposure quickly leads to wood rot. Over time, the material weakens, crumbles, and falls apart completely.
2. Pest Infestations
Birds, squirrels, and wasps love hiding under roof overhangs. They often chew through weakened wood or nest in existing gaps.
Once pests breach the exterior barrier, the damage accelerates rapidly. You might even hear scratching noises from your attic.
3. Poor Attic Ventilation
Your attic needs to breathe. If your soffit vents are blocked, heat and moisture become trapped inside your attic space.
This condensation eventually settles on the wooden structural components. It causes mold growth and severe decay from the inside out.
4. General Aging and Weathering
No building material lasts forever. Depending on your local climate, sun exposure and freezing temperatures take a heavy toll.
Older homes with original wooden soffits are particularly vulnerable to age-related warping and splitting.
5. Improper Flashing Installation
Roof flashing directs water away from vulnerable joints. If it was installed incorrectly, water can easily seep behind the fascia boards.
This hidden moisture trickles down and destroys the supporting woodwork.
Tools & Materials Needed
Having the right gear makes this project much easier. Gather these items before climbing up your ladder.
Essential Tools:
- A sturdy, reliable extension ladder
- Safety goggles and work gloves
- Flat pry bar and a claw hammer
- Circular saw or a hand saw
- Power drill with screw bits
- Caulking gun and a utility knife
- Tape measure and a carpenter’s square
Necessary Materials:
- Replacement soffit material (wood, aluminum, or vinyl to match your home)
- Exterior-grade wood screws or galvanized nails
- High-quality, paintable exterior caulk
- Wood primer and exterior paint
- Replacement vents (if the old ones are damaged)
Step-by-Step Fix Guide: How to Repair Soffit Sections
Ready to get to work? Follow these beginner-friendly steps to execute a flawless repair.
Take your time with each phase. Precision is much more important than speed when working on your home’s exterior.
Step 1: Inspect the Damage
Set up your ladder safely on level ground. Climb up and carefully poke the suspected area with a screwdriver.
If the wood feels spongy or easily flakes away, it absolutely needs replacing. Mark the damaged boundaries with a pencil.
Step 2: Remove the Old Material
Use your utility knife to score the caulk lines along the edges. This prevents you from peeling away good paint.
Wedge your flat pry bar under the damaged board. Gently pry it downward, removing the nails as you go.
Step 3: Check the Rafter Tails
Once the old board is removed, look up inside the roof cavity. You will see the exposed rafter tails.
Inspect these wooden supports for signs of rot or pest damage. If they are slightly soft, treat them with a liquid wood hardener.
Step 4: Measure and Cut the New Soffit
Measure the empty space carefully. Remember the old carpentry rule: measure twice, cut once.
Transfer those measurements to your replacement material. Use your circular saw to cut the new board to the exact size needed.
Step 5: Install the New Board
Lift your freshly cut board into place. It should fit snugly against the fascia and the wall of your house.
Secure it by driving exterior-grade wood screws or galvanized nails into the rafter tails. Make sure the board is completely flush and secure.
Step 6: Seal the Edges
Grab your caulking gun and load it with high-quality exterior caulk. Apply a smooth bead along all the seams and edges.
This creates a watertight seal that prevents future moisture penetration. Wipe away any excess caulk with a damp cloth.
Step 7: Prime and Paint
Once the caulk is completely dry, apply a coat of exterior wood primer. Let the primer dry according to the manufacturer’s instructions.
Finally, apply two coats of exterior paint that perfectly matches your home’s trim. Your repair is now completely invisible!
Safety Warnings for Exterior Repairs
Working at heights always carries inherent risks. Never compromise on safety when tackling exterior home repairs.
Always ensure your ladder is placed on solid, level ground. Have a friend or family member hold the base of the ladder for extra stability.
Wear safety goggles to protect your eyes from falling debris, sawdust, and old paint flakes. Use a dust mask if you suspect mold or are working on a very old house that might have lead paint.
If it is raining, heavily windy, or icy outside, postpone your project. No DIY repair is worth risking a dangerous fall.
When to Call a Professional
While this is a great DIY project, some situations require expert intervention. Know your limits to avoid making costly mistakes.
Call a professional contractor if the water damage extends far into your roof decking. Structural rot requires extensive framing knowledge to fix safely.
You should also seek help if you discover a massive pest infestation, like a live hornets’ nest. Pest control experts need to clear the area before you can safely work.
Finally, if your home is taller than two stories, hire a pro. The equipment required to work safely at extreme heights goes beyond standard DIY gear.
Cost Estimate: DIY vs. Professional
Understanding the financial breakdown helps you decide how to approach this project.
If you choose the DIY route, expect to spend between $50 and $150. This covers the cost of new lumber, exterior caulk, nails, and paint.
If you already own the necessary tools, your expenses will sit at the absolute lower end of that spectrum.
Hiring a professional contractor changes the math significantly. Most pros charge between $300 and $1,000 for standard soffit repairs.
The final professional cost depends on your location, material choices, and the extent of the hidden damage. Doing it yourself clearly keeps extra cash in your wallet.
Frequently Asked Questions
You probably still have a few questions. Here are the most common inquiries I get from homeowners.
Can I just paint over rotting wood?
No, painting over rot will not fix the problem. The decay will continue spreading underneath the paint, eventually causing structural failure. You must remove the damaged material entirely.
What is the best material for replacement?
Vinyl and aluminum are fantastic because they never rot and require zero painting. However, if you have a historic home, you should use treated wood to maintain the original aesthetic.
Do I really need soffit vents?
Yes, absolutely. Vents provide crucial airflow to your attic space. Without them, you risk severe moisture buildup, mold growth, and decreased energy efficiency inside your home.
How often should I inspect my roof overhang?
I recommend a visual inspection twice a year. Check it once in the spring after heavy storms, and once in the fall while cleaning your gutters. Catching issues early prevents major headaches.
Final Thoughts on How to Repair Soffit Damage
Fixing your roof’s overhang does not have to be a stressful ordeal. By following these steps, you can confidently protect your home from water and pests.
Now that you know exactly how to repair soffit sections, you are ready to tackle the weekend. Remember to prioritize safety, take accurate measurements, and seal those edges perfectly.
You will save money, gain valuable DIY experience, and boost your home’s curb appeal.
If you found this guide helpful, be sure to subscribe to our newsletter for more weekly home repair tips and expert DIY strategies!