

You just discovered a rip in your favorite winter jacket or a hole in your trusty camping tent. Do not throw it away just yet. Learning how to repair nylon is easier than you might think.
Nylon is a fantastic, durable material used in everything from backpacks to windbreakers. But even the toughest fabrics can suffer from snags, tears, or simple wear and tear. When this happens, a quick DIY fix can save your gear.
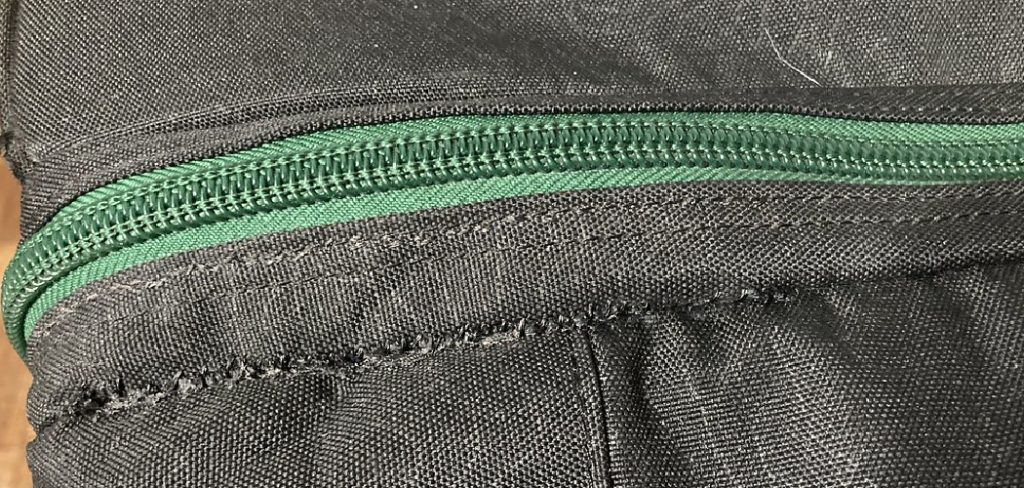
Replacing outdoor gear is incredibly expensive. A new high-quality tent or jacket can easily cost hundreds of dollars. Fixing it yourself keeps that money in your pocket.
By taking a few minutes to patch or sew the damage, you extend the life of your equipment. Plus, it feels incredibly rewarding to fix something with your own two hands. We will walk you through the entire process right here.
What Causes Nylon to Tear or Break?
Understanding how damage happens can help you protect your gear in the future. Nylon is tough, but it has specific weaknesses.
Here are the most common causes of nylon damage:
- Sharp Snags: Walking past a thorny bush or catching your jacket on a sharp fence wire.
- Constant Friction: Straps rubbing against the same spot on a backpack repeatedly over time.
- UV Exposure: Leaving gear in the harsh sun breaks down the nylon fibers, making them brittle.
- High Heat: Sparks from a campfire or setting a bag too close to a heater can melt holes instantly.
- Age and Rot: Storing gear while it is damp can ruin the fabric coatings and weaken the seams.
Tools and Materials Needed to Repair Nylon
You need the right supplies before you start working. Gathering your materials first saves you from stopping halfway through the project.
Here is exactly what you need for a successful repair:
- Rubbing Alcohol: You need this to clean the area so patches stick properly.
- Microfiber Cloth: A clean, lint-free cloth for wiping down the fabric.
- Scissors: A small, sharp pair for cutting threads and rounding patch corners.
- Nylon Repair Tape: Also known as Tenacious Tape, this is perfect for quick, waterproof patches.
- Nylon Thread: Much stronger than standard cotton thread, making it ideal for sewing heavy gear.
- Sewing Needles: Choose a sharp, sturdy needle that can pierce thick fabrics.
- Seam Sealer or Fabric Glue: Great for waterproofing tiny pinholes or reinforcing stitched areas.
Step-by-Step Guide: How to Repair Nylon
There are a few different ways to approach this project. The method you choose depends on the type of damage.
We broke this down into three beginner-friendly methods. You can choose to patch, sew, or glue your gear.
Method 1: Applying an Adhesive Patch
This is the absolute best way to fix a nylon jacket, sleeping bag, or tent. It is fast, waterproof, and requires zero sewing skills.
Step 1: Clean the Area
Pour a small amount of rubbing alcohol onto your microfiber cloth. Gently wipe the area around the tear. This removes dirt and body oils. Let it dry completely.
Step 2: Trim the Frayed Edges
Take your scissors and carefully snip away any loose threads. You want the surface to be as flat and clean as possible.
Step 3: Cut the Patch to Size
Cut your repair tape so it extends at least one inch past the tear on all sides. Round the corners of the patch with your scissors. Round corners prevent the patch from peeling up.
Step 4: Apply the Patch
Lay the fabric completely flat on a hard surface. Peel the backing off the tape. Press the patch firmly over the tear, smoothing it out from the center to remove air bubbles.
Step 5: Let It Cure
Leave the item alone for at least 24 hours. The adhesive needs time to bond properly with the nylon fibers.
Method 2: Sewing a Tear in Heavy Nylon
If you are dealing with a heavy backpack strap or a high-tension area, tape might not hold. Sewing provides a much stronger structural fix.
Step 1: Prep the Needle and Thread
Thread your needle with heavy-duty nylon thread. Tie a secure knot at the end of the thread.
Step 2: Align the Fabric Edges
Pinch the edges of the tear together. Make sure they line up evenly so your seam stays straight.
Step 3: Stitch the Tear
Start your first stitch about a half-inch before the tear begins. Push the needle through the fabric. Use a simple whip stitch or a straight stitch to close the gap.
Step 4: Keep the Stitches Tight
Pull the thread snug after every stitch. You want the tension to be firm, but do not pull so hard that the fabric puckers.
Step 5: Tie Off the Thread
Once you stitch past the end of the tear, make a tight knot. Snip the excess thread with your scissors.
Method 3: Fixing Pinholes with Seam Sealer
Sometimes you do not have a tear, but rather tiny pinholes. This often happens near seams on tents.
Step 1: Clean the Fabric
Just like with the patch method, clean the area with rubbing alcohol. Wait for it to dry entirely.
Step 2: Apply the Sealer
Squeeze a tiny drop of seam sealer or specialized nylon fabric glue directly onto the pinhole.
Step 3: Spread It Thinly
Use a small brush or a toothpick to spread the glue into a thin, even layer. It should barely cover the hole.
Step 4: Wait for It to Dry
Check the glue instructions for drying times. Most require overnight drying before the gear is waterproof again.
Safety Warnings to Keep in Mind
DIY repairs are incredibly safe, but you should always take basic precautions. Protecting yourself and your home is the top priority.
First, work in a well-ventilated area if you use seam sealers or fabric glues. The fumes from these chemicals can cause headaches. Open a window or work outdoors.
Second, handle sewing needles with care. Pushing needles through thick nylon can be tough. Use a thimble to protect your fingers from painful pricks.
Finally, never use a hot clothing iron on nylon unless explicitly instructed by a patch manufacturer. Nylon melts very quickly under direct high heat.
When to Call a Professional
Knowing how to repair nylon yourself is a great skill. However, some jobs are simply too big for a home workbench.
If a main structural seam on a large family tent blows out entirely, call a pro. Fixing massive structural damage requires heavy-duty industrial sewing machines.
You should also seek help for complex zipper replacements. Taking out an old zipper and aligning a new one perfectly on a waterproof jacket is notoriously difficult.
If fixing the item improperly puts your safety at risk, hire an expert. This is especially true for climbing harnesses or heavy load-bearing straps.
Cost Estimate: DIY vs. Professional Repair
One of the best reasons to learn this skill is the money you will save. The difference in price is staggering.
A DIY repair kit with patches, thread, and alcohol costs around $10 to $20. You can use these supplies multiple times for future repairs, too.
Taking a jacket or tent to a professional repair shop usually starts around $40. For complex tears, that price can easily exceed $100.
By spending 15 minutes and $10 on supplies, you keep a ton of extra cash in your wallet.
Frequently Asked Questions About Nylon Repair
Can I use a regular clothing iron to fix nylon?
No, you should avoid irons. Standard nylon melts easily under high heat. If a special heat-activated patch requires it, use the lowest setting and place a towel between the iron and the fabric.

What is the best tape to use?
Tenacious Tape is widely considered the best option. It is flexible, highly water-resistant, and bonds perfectly to synthetic fabrics. Never use standard duct tape, as it leaves a sticky residue.
Is knowing how to repair nylon different from fixing polyester?
The processes are incredibly similar. Both are synthetic fabrics. The adhesive patches and heavy-duty threads we recommend work perfectly on polyester gear as well.
Can I fix a torn backpack without sewing?
Yes, if the tear is on a non-load-bearing area. You can use heavy-duty repair tape. However, if the tear is on a shoulder strap, sewing is required for safety and strength.
How long does a taped nylon patch last?
A properly applied patch can last for years. If you clean the fabric with alcohol and round the patch corners, it will easily survive heavy rain and multiple washing machine cycles.
Conclusion: Mastering How to Repair Nylon
Learning how to repair nylon empowers you to take better care of your favorite equipment. It is a highly practical skill that saves you time, frustration, and a significant amount of money.
Whether you snagged your puffy jacket on a hike or burned a tiny hole in your camping tent, you now know exactly what to do. You have the tools, the methods, and the knowledge to fix it right.
Do not let minor damage ruin your next outdoor adventure. Grab some repair tape, clean the fabric, and get that gear back in action.
Ready to tackle more home projects? Browse our other DIY fix guides to learn how to repair almost anything around your house!