

Do you have a glowing piece of art that suddenly went dark? A broken neon light can be a real disappointment. You might think fixing it requires a specialized technician. Fortunately, you can learn how to repair neon signs right at home.
Many common issues are simpler to solve than you might expect. By fixing the problem yourself, you save a ton of money on costly professional repair bills.

Techs often charge heavy fees just to diagnose a simple bad transformer. We can bypass that expense completely. In this guide, we will walk through exactly what you need to do. Grab your tool belt, and let’s get that classic glow shining bright once again!
What Causes This Problem?
Before we start fixing things, we need to know why your sign stopped working. Neon lights are beautiful, but they can be fragile.
Most failures come down to a few basic culprits. Here are the most common causes of a broken neon sign:
- A burnt-out transformer: This is the power supply that pushes electricity through the gas. When it dies, the whole sign goes dark.
- Cracked or broken glass tubes: Even a microscopic crack lets the neon or argon gas escape. Without the gas, the tube simply cannot light up.
- Loose or frayed wiring: The connections between the transformer and the glass tubes can wear out over time.
- Faulty electrodes: These sit at the ends of the glass tubes. If they burn out, the electrical current cannot travel through the gas.
- Failing block standoffs: The plastic clips holding the glass to the frame can snap. This puts pressure on the glass, leading to future breaks.
Tools & Materials Needed
You do not need a fancy workshop to pull this off. A few basic items will do the trick nicely.
Gather these tools and materials before you begin:
- A digital multimeter (crucial for safely checking voltage)
- A replacement neon sign transformer (also called a power supply)
- Insulated screwdrivers
- Electrical tape
- Wire strippers and cutters
- Silicone end caps
- High-voltage wire (specifically rated for neon signs)
- Safety goggles
- Heavy-duty rubber insulated gloves
Safety Warnings: Read This First!
We need to have a serious talk about safety before moving forward. Neon signs run on extremely high voltage.
A standard wall outlet pushes 120 volts. A neon transformer steps that up to anywhere from 2,000 to 15,000 volts! This level of electricity is incredibly dangerous if handled poorly. Always treat a plugged-in sign with the utmost respect.
Never touch the glass tubes, wires, or transformer while the sign is plugged in. Always unplug the unit completely from the wall. Even after unplugging, some transformers hold a residual electric charge. Wait at least ten minutes after unplugging before touching any internal parts.
Wear your thick rubber insulated gloves while working. Do not skip this step to save time. Keep your work area completely dry. Never work on electrical devices near water or damp surfaces.
If you feel nervous or unsure at any point, stop immediately. Your safety is worth far more than a glowing piece of wall art.
Step-by-Step Guide: How to Repair Neon Signs
Now that we have covered safety, it is time to roll up our sleeves. Figuring out how to repair neon signs is all about process of elimination. Follow these simple steps in order. We will track down the problem and get it fixed.
Step 1: Diagnose the Exact Problem
Start by observing the sign while it is turned on. Do this without touching it! Is the sign completely dark? Does it flicker constantly? Is only one section lighting up while the rest is dead?
If the whole sign is dead, you likely have a bad transformer. If it flickers or buzzes loudly, you might have a dying transformer or a loose wire. If one specific tube is dark but the rest are glowing, that single tube is the culprit. Take notes on exactly what you see.
Step 2: Unplug and Drain the Power
Once you have diagnosed the symptoms, pull the plug from the wall. Do not rely on a power strip switch. Physically remove the plug from the outlet.
Set a timer for ten minutes. This allows any built-up electricity in the capacitors to drain away safely. Once the time is up, put on your rubber insulated gloves. You are now safe to start handling the sign.
Step 3: Inspect for Cracked or Broken Tubes
Take a very close look at the glass tubes. You are looking for any hairline cracks, white hazy spots, or outright breaks. Sometimes, the glass gets bumped and sustains a tiny fracture. If the glass breaks, the neon gas escapes into the air.
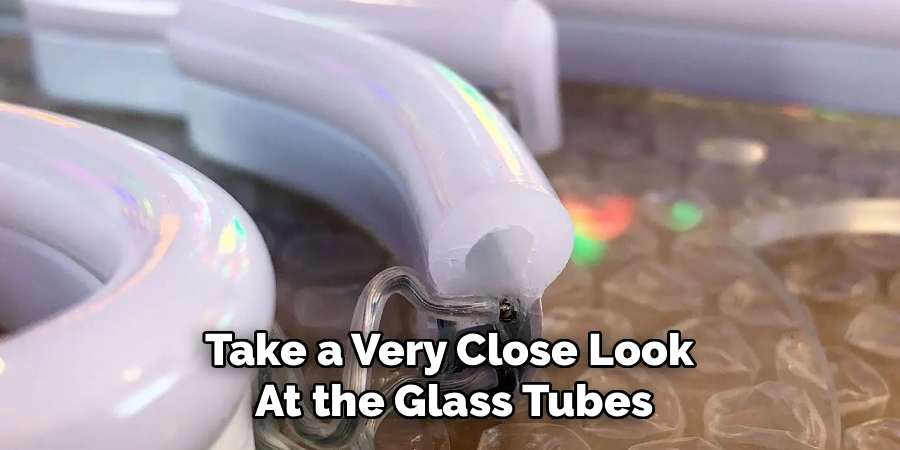
If you find a broken tube, DIY repair stops here for that specific piece of glass. You cannot refill gas or bend glass at home safely. You will need to remove that specific broken tube and order a replacement from a neon glass bender. However, you can still replace it yourself once the new tube arrives!
Step 4: Check the Wiring Connections
If the glass looks perfect, the issue might be a simple loose connection. Follow the high-voltage wires coming out of the transformer. They will connect to the glass tubes at the electrodes.
Look for any wires that are frayed, disconnected, or covered in dark soot. Soot indicates an electrical short circuit. If you find a loose wire, gently strip back a tiny bit of the insulation. Reattach it securely to the electrode and cover it with a silicone end cap.
Wrap the connection tightly with electrical tape to keep moisture out. This simple fix often brings a dead sign back to life!
Step 5: Test and Replace the Transformer
If the glass is intact and the wires are tight, your transformer is likely dead. This is the most common failure point. Look at the sticker on your current transformer. You need to write down the output voltage and milliamps (mA).
You must buy an exact match for these numbers. If you buy a weaker one, the sign will flicker. If you buy a stronger one, you will burn out the glass tubes quickly. Order the correct replacement part online.
Once it arrives, unscrew the old transformer from the mounting frame. Carefully detach the input and output wires. Screw the new transformer into place on the frame. Connect the power wires and the high-voltage electrode wires exactly as they were before.
Make sure all connections are tightly covered with silicone caps and electrical tape.
Step 6: Power Up and Test
Clear away all your tools from the work area. Take off your gloves and step back. Plug the sign directly into the wall outlet. Turn on the power switch.
If you did everything correctly, the sign should glow beautifully without any loud buzzing or flickering. If it still does not work, unplug it immediately and double-check your wire connections.
When to Call a Professional
DIY is fantastic, but we have to know our limits. There are times when calling a pro is the smartest move. If your glass tubes are smashed into pieces, a professional glass bender must remake them. Working with molten glass and neon gas requires a specialized studio.
If your sign is a rare, expensive vintage antique, do not risk breaking it. Leave historical restorations to the experts.
If you test the transformer and wiring, but the sign still trips your circuit breaker, stop. You might have a serious grounding issue that requires a licensed electrician. Never push your luck with high-voltage electricity. A good neighbor knows when to ask for a helping hand!
Cost Estimate: DIY vs. Professional Repair
Fixing a neon sign yourself keeps a lot of cash in your wallet. Let’s break down the rough numbers. If you need a new transformer, the part usually costs between $35 and $75. High-voltage wire and electrical tape will run you about $15.
So, a DIY transformer replacement costs around $50 to $90 total. If you hire a professional for the exact same job, prepare to pay much more. Most sign repair companies charge a service call fee of $100 to $150.
Add in their markup on parts and labor, and a pro repair usually costs $250 to $400. By doing the labor yourself, you easily save hundreds of dollars. That is money you can spend on your next fun project!
Frequently Asked Questions About Neon Sign Repair
You probably still have a few questions floating around. Let’s tackle the most common concerns right now.
Can you refill neon gas at home?
No, you cannot refill neon gas at home. Pumping gas into a vacuum-sealed tube requires specialized machinery and strict safety protocols. If a tube loses its gas, you must order a replacement glass section.
Why is my neon sign flickering?
Flickering is usually caused by a dying transformer struggling to push power. It can also be caused by a loose wire connection sparking against the glass. Check your connections first, then consider a transformer replacement.

How long do neon signs usually last?
With proper care, a well-built neon sign can last 10 to 15 years before needing major repairs. Transformers typically burn out around the 5-to-7-year mark, depending on daily usage.
Are LED neon signs easier to fix than glass neon?
Yes, LED signs are generally much easier to repair. They run on low voltage (usually 12V), making them much safer to handle. Fixing an LED sign usually just involves soldering a broken low-voltage wire.
Conclusion: Master How to Repair Neon Signs Like a Pro
Fixing a broken light does not have to be a stressful ordeal. By following this guide, you now know exactly how to repair neon signs safely and efficiently. We covered diagnosing the problem, respecting high-voltage safety, and replacing bad transformers. You have the knowledge to troubleshoot like a pro and save yourself hundreds of dollars.
Remember, the key to success is patience and safety. Never rush a high-voltage project, and always double-check your connections. If you found this guide helpful, don’t let your DIY journey stop here! Check out our other home repair guides to keep your house running smoothly and looking great.