

You flip the switch on your favorite tool or household appliance, and nothing happens. Maybe it hums aggressively, but the parts refuse to spin. A dead appliance can feel incredibly frustrating.
Replacing a broken machine is expensive. Taking it to a repair shop takes time and costs plenty in labor fees.
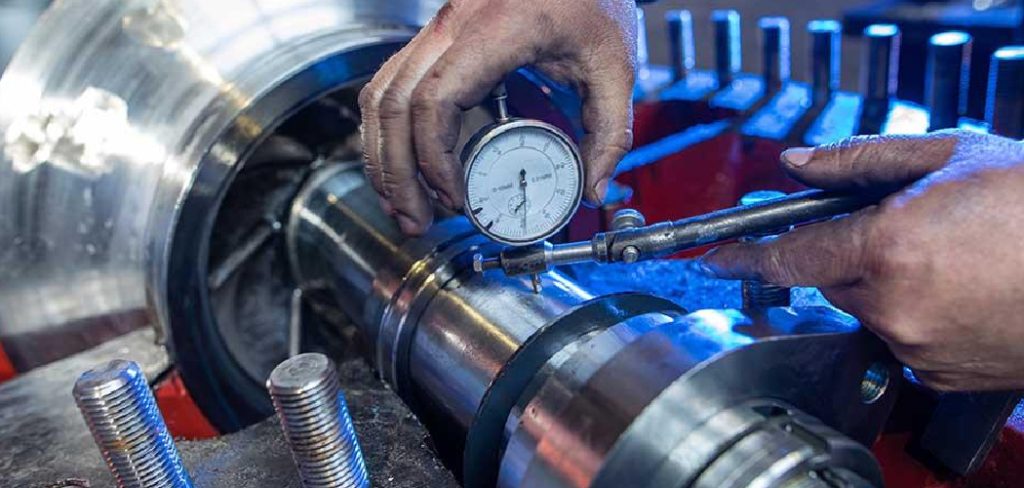
Learning how to repair motor issues yourself puts money right back into your pocket. You gain the confidence to fix things around the house without relying on expensive technicians. Most electric motors found in household fans, vacuums, and power tools operate on simple principles.
You do not need an engineering degree to fix them. With a little patience and the right tools, you can easily get your equipment running smoothly again.
What Causes This Problem?
Before you tear your appliance apart, you need to understand why it stopped working. Electric motors fail for a few common reasons.
- Worn carbon brushes: These small graphite blocks transmit electricity to the spinning part of the motor. They naturally wear down over time and lose contact.
- Blown start capacitor: Many motors use a capacitor to get an extra jolt of energy during startup. If this part fails, the motor will hum but will not spin.
- Dirt and debris buildup: Dust, pet hair, and grime can clog the internal components. This causes the motor to overheat or seize up completely.
- Burned-out windings: Overheating can melt the thin insulation around the copper coils inside the motor. This creates a short circuit.
- Bad bearings: Bearings help the central shaft spin smoothly. When they rust or dry out, the friction stops the motor from turning.
Tools & Materials Needed
Having your tools ready makes the repair process smooth and enjoyable. Gather these items before you unplug anything.
- Screwdriver set (Phillips and flathead)
- Digital multimeter (essential for testing electrical parts)
- Needle-nose pliers
- Socket wrench set
- Replacement carbon brushes (check your model number)
- Replacement capacitor (if your motor uses one)
- Electronic contact cleaner spray
- Safety glasses and work gloves
- Small containers or magnetic trays for loose screws
Step-by-Step Fix Guide for How to Repair Motor Issues
Do not let the internal wiring intimidate you. We will break this process down into simple, manageable steps.
Take pictures with your phone as you disassemble the machine. These photos will act as a map when it is time to put everything back together.
Step 1: Disconnect the Power Source
Safety always comes first. Never work on a device while it remains plugged in.
Unplug your appliance from the wall outlet completely. If the device runs on batteries, remove the battery pack.
Press the power button a few times after unplugging it. This discharges any leftover electricity hiding in the circuit board.
Step 2: Access the Motor Housing
You need to remove the outer casing of your appliance to reach the motor. Locate the screws holding the plastic or metal housing together.
Carefully unscrew them and place them in your magnetic tray. Some casings feature hidden plastic clips, so gently pry the casing apart with a flathead screwdriver.
Take your time during this step. Forcing the plastic can break the retaining clips.
Step 3: Inspect for Visible Damage
Look closely at the motor before you remove any internal wires. Notice any black soot or melted plastic near the copper coils.
Smell the motor to check for a strong, burnt odor. If the copper coils look charred and smell like a campfire, the motor is likely ruined.
If the coils look bright and clean, the motor is highly fixable. You can proceed to the next troubleshooting steps.

Step 4: Spin the Shaft by Hand
Grab the central metal shaft of the motor and give it a gentle twist. It should spin freely with very little resistance.
If the shaft feels stiff or makes a grinding noise, your bearings are failing. A seized bearing stops the motor from turning and can cause it to overheat quickly.
You can often fix a stiff bearing by applying a few drops of lightweight machine oil. If it remains stuck, you will need to pry the old bearing off and tap a new one into place.
Step 5: Test the Start Capacitor
Many larger motors feature a cylindrical part bolted to the side called a capacitor. This part stores energy to help the motor start spinning.
When a capacitor goes bad, the motor will hum loudly but refuse to move. You can visually inspect it for bulging or leaking fluid.
Use your digital multimeter to test it. Set your multimeter to the capacitance setting (usually marked by a symbol that looks like a split line).
Touch the multimeter probes to the capacitor terminals. If the reading drops to zero or shows no continuity, you must replace the capacitor.
Step 6: Check and Replace Carbon Brushes
Carbon brushes are the most common failure point in power tools and vacuum cleaners. Look for two small, spring-loaded plastic housings on opposite sides of the motor.
Unscrew the caps holding the brushes in place. Gently pull the small graphite blocks out of their slots.
If the brushes measure less than a quarter of an inch long, they cannot reach the internal spinning component (the commutator). This breaks the electrical connection.
Slide your new carbon brushes into the empty slots. Secure the springs and tighten the holding caps back into place.
Step 7: Clean the Commutator
The commutator is the segmented copper cylinder where the carbon brushes make contact. It must stay clean to conduct electricity properly.
Over time, carbon dust builds up and turns the bright copper black. Use a pencil eraser to gently rub away the dark carbon deposits.
Avoid using harsh sandpaper, as this can scratch the soft copper. Spray a little electronic contact cleaner onto a cotton swab to wipe away the remaining grime.
Step 8: Test the Motor Windings
If the brushes and capacitor look good, you need to check the internal wiring. Set your multimeter to the Ohms (resistance) setting.
Touch one probe to the power input terminal and the other to a metal part of the motor frame. Your multimeter should show infinite resistance.
If it shows a low number, electricity is leaking into the frame. This indicates a dangerous short circuit, meaning the motor requires complete replacement.
Step 9: Reassemble the Appliance
Once you have replaced the faulty parts and cleaned the internal components, it is time to put everything back together. Review the photos you took during disassembly.
Slide the motor back into its designated mounting bracket. Route the wires carefully so they do not get pinched by the plastic casing.
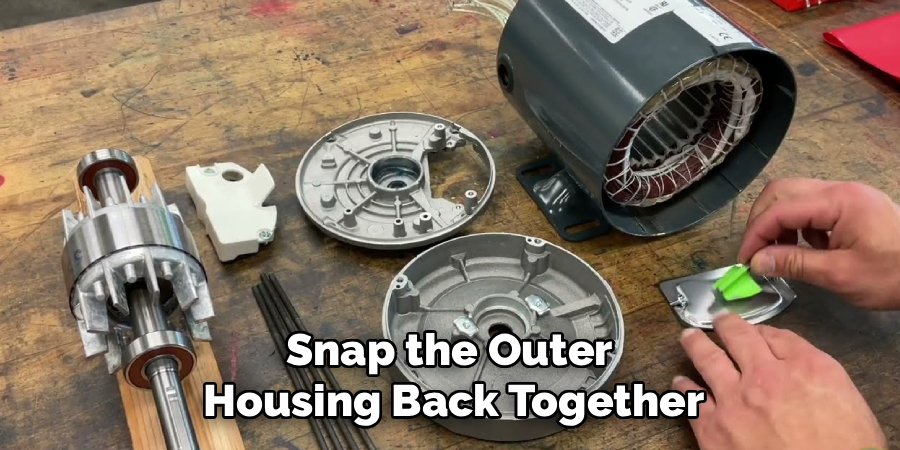
Snap the outer housing back together and tighten all the external screws. Give the appliance a gentle shake to ensure nothing rattles inside.
Step 10: Perform a Test Run
Plug the appliance into an outlet equipped with a circuit breaker. Put on your safety glasses just in case something goes wrong.
Flip the power switch to the “on” position. You should hear the familiar hum of the motor as it spins up to speed smoothly.
If it works, give yourself a pat on the back. You just successfully repaired your machine and saved a chunk of money.
Safety Warnings on How to Repair Motor Components
Working with electricity requires your full attention. Always treat appliances with respect to prevent injury.
Never attempt to test a motor while it remains plugged into an active wall socket. A stray wire can deliver a severe electrical shock.
Capacitors store electricity even after you unplug the appliance. Discharge the capacitor by touching an insulated screwdriver across its two metal terminals before you touch it.
Always wear safety glasses when testing motors. A loose part or debris can suddenly fly out when the central shaft starts spinning.
When to Call a Professional
DIY repairs are incredibly rewarding, but some jobs require professional help. You must know your limits to stay safe.
If your appliance falls under an active warranty, do not open it. Breaking the factory seal will void your warranty entirely. Let the manufacturer handle the repair for free.
If the internal copper windings look melted and charred, the repair requires a specialized machine to rewind the wire. This process is complex and often costs more than a new motor.
When dealing with massive motors in HVAC units or large industrial equipment, always call a certified technician. These units carry high voltage and require specialized licensing to repair legally.
Cost Estimate: DIY vs. Pro
Fixing things yourself keeps your budget happy. Let us look at the cost breakdown.
A set of replacement carbon brushes usually costs between five and fifteen dollars. A new start capacitor typically costs around ten to twenty dollars.
If you hire a professional appliance technician, expect to pay a diagnostic fee just for them to look at it. This fee usually starts at eighty dollars.
The technician will also charge labor rates ranging from fifty to one hundred dollars per hour. A simple brush replacement could easily cost you over a hundred and fifty dollars at a repair shop. Doing it yourself costs roughly the price of a fancy cup of coffee.
FAQs About How to Repair Motor Systems
We know tackling electrical repairs brings up plenty of questions. Here are clear answers to the most common concerns.
Can I fix a motor that got wet?
You can usually save a wet motor if you act fast. Unplug it immediately and do not turn it on. Disassemble the housing, blow it out with compressed air, and let it sit in a warm, dry spot for several days before testing it.
How do I know if my carbon brushes are bad?
Your device will often spark excessively near the air vents while running. The appliance might also sputter, lose power under a heavy load, or refuse to turn on completely unless you tap the casing.
Is a buzzing motor dangerous?
A buzzing sound usually means the motor is receiving electricity but cannot spin. Turn it off immediately. Leaving a jammed motor turned on will rapidly overheat the internal coils and start a fire.
Do I need a special tool to remove bearings?
Some bearings slip right off the central shaft. Stubborn bearings require an inexpensive tool called a gear puller to slide them off without bending the central shaft.
Why does my motor smell like burning plastic?
A burning smell indicates massive internal friction or a severe electrical short. Stop using the device immediately. You will likely need to clean out internal debris or replace the unit entirely.
Conclusion
Learning how to repair motor issues might seem daunting at first glance. However, most failures boil down to dirty components, worn-out brushes, or a faulty capacitor.
By following this step-by-step guide, you can confidently open up your broken appliances and diagnose the problem. You save money, keep electronics out of the landfill, and build valuable mechanical skills.
Always prioritize safety, take plenty of pictures during disassembly, and trust your multimeter to guide you. Next time your favorite tool stops spinning, grab your screwdriver and show it who is boss!